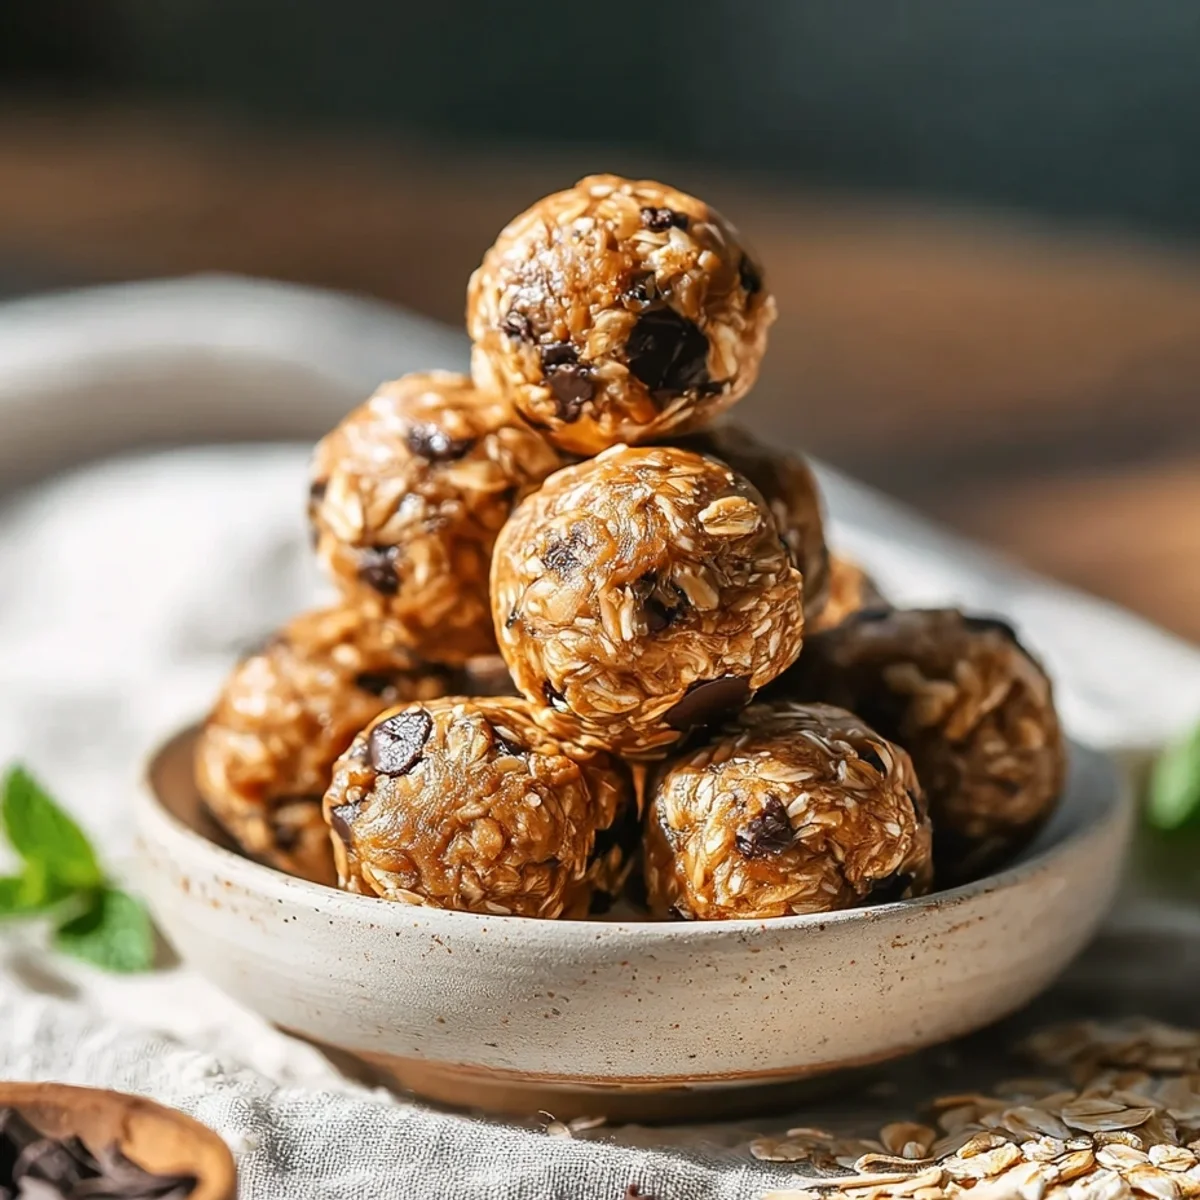


I remember the first time I stumbled upon the idea of Peanut Butter Energy Balls. It was a chaotic Tuesday, kids running wild, dinner nowhere in sight, and I was just starving. I needed something, anything, fast and filling. I saw a recipe pop up, and honestly, I was skeptical. Could something so simple really curb that hangry feeling? Turns out, yes. These little wonders have saved my sanity more times than I can count. They're quick, they're wholesome, and they just hit different when you need a little pick-me-up without the sugar crash.
Oh, the first time I made Peanut Butter Energy Balls, I totally underestimated the stickiness. I ended up with more dough on my hands than in the bowl! My kids thought it was hilarious, watching me try to scrape it off. I learned then that a little chill time and a good pair of gloves (or just embracing the mess!) goes a long way. Oops, but worth it!
Ingredients
Base Ingredients
- Creamy Peanut Butter: Honestly, this is the heart of your Peanut Butter Energy Balls. I always go for natural, unsweetened stuff the kind you have to stir. It gives a richer flavor and binds everything so much better. Don't even think about the overly processed, sugary kind, it just won't be the same.
- Rolled Oats: These are the backbone, giving structure and that satisfying chew. I've tried quick oats once, and it worked... kinda. The texture was a bit mushier, so stick to old-fashioned rolled oats for the best bite. Plus, fiber!
- Honey or Maple Syrup: This is your natural sweetener and a binder. I usually use honey because I love that warm, floral note, but pure maple syrup works beautifully too. I once accidentally used a flavored syrup, and let's just say my energy balls tasted like a pancake breakfast gone wrong.
Flavor Boosters
- Ground Flaxseed: A little nutritional powerhouse! It adds healthy fats and extra binding power. It's subtle, so you won't even taste it, but your body will thank you. I always keep a bag in the fridge, it's great for smoothies too.
- Vanilla Extract: Just a splash, but it makes a world of difference. It deepens the flavors and adds a hint of warmth. I swear by good quality vanilla, it’s one of those things you can taste the difference in.
- Mini Chocolate Chips (optional): Because sometimes, you just need chocolate, right? These make your Peanut Butter Energy Balls feel like a treat, not just a healthy snack. I've tried dark chocolate, milk chocolate, even white chocolate chips all good, honestly.
Optional Extras
- Chia Seeds: Another superfood addition! They absorb moisture and add more healthy fats and fiber. I threw them in on a whim one day, and they just disappeared into the mix, adding a nice texture without being overwhelming.
- Shredded Coconut: If you love coconut, this is a must! It adds a lovely chewiness and a hint of tropical flavor. I usually toast mine lightly first for an extra nutty aroma. My kitchen smells amazing when I do this.
Instructions
- Mix Your Peanut Butter Energy Balls Base:
- Alright, first things first, grab a big mixing bowl. I usually use one that's slightly too big, just to avoid any overflow drama later. Toss in your peanut butter, rolled oats, and your chosen sweetener honey or maple syrup. Get in there with a sturdy spoon, or honestly, your hands are the best tools here. Mix it until it looks mostly combined, a bit shaggy, but don't worry about perfection just yet. It's okay if it looks a little messy, mine always does!
- Add the Flavor & Nutrients:
- Now, let's boost those Peanut Butter Energy Balls! Stir in your ground flaxseed, vanilla extract, and any optional extras like chia seeds or shredded coconut. If you're using mini chocolate chips, this is the moment! Keep mixing until everything is evenly distributed. You'll start to see it come together into a more cohesive, albeit still sticky, dough. I always take a little sniff here, that peanut butter and vanilla combo is just divine.
- Chill the Peanut Butter Energy Balls Dough:
- This step is crucial, hon! Cover your bowl with plastic wrap and pop it into the fridge for at least 30 minutes. I once skipped this because I was impatient (big mistake!), and the dough was impossible to roll. It was a sticky, melty mess, and I just ended up eating it with a spoon, which, while delicious, wasn't the goal. Chilling helps the oats absorb moisture and firms everything up nicely.
- Roll Your Peanut Butter Energy Balls:
- Once the dough is nicely chilled, pull it out. Get a small plate or baking sheet ready, lined with parchment paper if you're feeling fancy. Scoop out about a tablespoon of the mixture I use a small cookie scoop for consistency, but a regular spoon works fine. Roll it between your palms to form a compact ball. If your hands get too sticky, just rinse them quickly under cold water and dry them off. It's a little messy, but so satisfying!
- Optional Toppings (Make Them Shine):
- If you want to get creative with your Peanut Butter Energy Balls, now's the time! I sometimes roll them in a little extra shredded coconut, some cocoa powder, or even finely chopped nuts. It adds a nice finish and a bit of extra texture. Just gently roll each ball to coat it evenly. It's a fun way to customize them and make them look extra special, especially if you're sharing.
- Store Your Peanut Butter Energy Balls Easily:
- Once all your Peanut Butter Energy Balls are rolled, arrange them on your prepared plate or baking sheet. Pop them back into the fridge for another 15-20 minutes to firm up completely. Then, transfer them to an airtight container. They're ready to grab whenever you need a quick, healthy snack. I just love opening the fridge and seeing these little guys waiting for me. They're such a lifesaver!
Making these Peanut Butter Energy Balls often turns into a family affair. My youngest loves helping roll them, usually ending up with a little mustache of peanut butter. It’s chaotic, sure, but those moments are what cooking is all about for me creating simple, wholesome things together, even if it means a bit more cleanup.
Storage Tips
These Peanut Butter Energy Balls are pretty resilient, thankfully! I usually store them in an airtight container in the fridge, and they keep beautifully for about a week to 10 days. I've tried freezing them before too, and they hold up surprisingly well for up to a month. Just pop them out about 15-20 minutes before you want to eat them to let them thaw slightly. One time, I left a batch out on the counter overnight (oops!), and they got a little too soft and sticky for my liking, so definitely keep them chilled for the best texture and freshness. They're a meal-prep dream, honestly.

Ingredient Substitutions
I've played around with a few swaps for these Peanut Butter Energy Balls. If you're not a peanut butter fan, almond butter or cashew butter work wonderfully, though the flavor will be a bit different, obviously. I tried sunflower seed butter once for a nut-free version, and it worked... kinda. The texture was a bit greasier, but still edible! For the sweetener, agave nectar can replace honey or maple syrup if that's what you have on hand. As for the oats, if you're gluten-free, just make sure to grab certified gluten-free rolled oats. I've even swapped out some of the oats for protein powder when I wanted an extra boost, just add a tiny bit more liquid if the mixture gets too dry.
Serving Suggestions
These Peanut Butter Energy Balls are fantastic on their own, especially with a cup of coffee for an afternoon slump-buster. But I've found they're also great crumbled over a bowl of Greek yogurt and berries for a more substantial breakfast. Sometimes, I'll even grab a couple after a workout with a big glass of water. For the kids, they're a perfect lunchbox addition. Honestly, they pair well with just about any moment you need a quick, satisfying bite that makes you feel good.
Cultural Backstory
While Peanut Butter Energy Balls don't have a deep, ancient cultural origin like some dishes, they really embody the modern need for quick, wholesome fuel. Think about it: we're all constantly on the go, juggling a million things, and often reaching for less-than-ideal snacks. These balls, to me, represent a small act of self-care in a busy world. They're born from a desire to nourish ourselves simply and efficiently, a little revolution against processed junk food. It's about taking simple, pantry staples and transforming them into something that supports our active lives, a global nod to smart snacking.
These Peanut Butter Energy Balls have become such a staple in my kitchen, a little symbol of easy wins on tough days. I love that they're wholesome but still feel like a treat, a testament to how simple ingredients can make something truly comforting. I hope they bring a bit of that same easy joy and sustained energy to your busy days. Give them a whirl, and tell me how your batch turns out!

Frequently Asked Questions
- → Can I make Peanut Butter Energy Balls without a food processor?
Absolutely! I never use one for these. A good sturdy spoon and some elbow grease are all you need to mix the ingredients. Your hands are your best tools for rolling, honestly, just embrace the stickiness a little!
- → What if my Peanut Butter Energy Balls mixture is too sticky or too dry?
If it's too sticky, try adding a tablespoon more oats or ground flaxseed. If it's too dry and crumbly, a little extra peanut butter or honey usually does the trick. I've had both happen, and a small adjustment often fixes it right up.
- → How long do Peanut Butter Energy Balls last in the fridge?
In an airtight container, they usually stay fresh and delicious for about a week to 10 days. I make a batch on Sunday, and they're perfect for quick snacks all through the week. They're a lifesaver for busy mornings!
- → Can I use any type of peanut butter for these Peanut Butter Energy Balls?
I really recommend natural, stir-style peanut butter for the best results. The processed, hydrogenated stuff tends to be too sweet and doesn't bind as well. I once used a crunchy peanut butter, and while tasty, the balls were a bit harder to form.
- → Are these Peanut Butter Energy Balls freezer-friendly?
Yes, they are! I've frozen them many times. Just place them in a single layer on a baking sheet until solid, then transfer them to a freezer-safe bag or container. They'll keep for up to a month, and you can just grab one as needed.