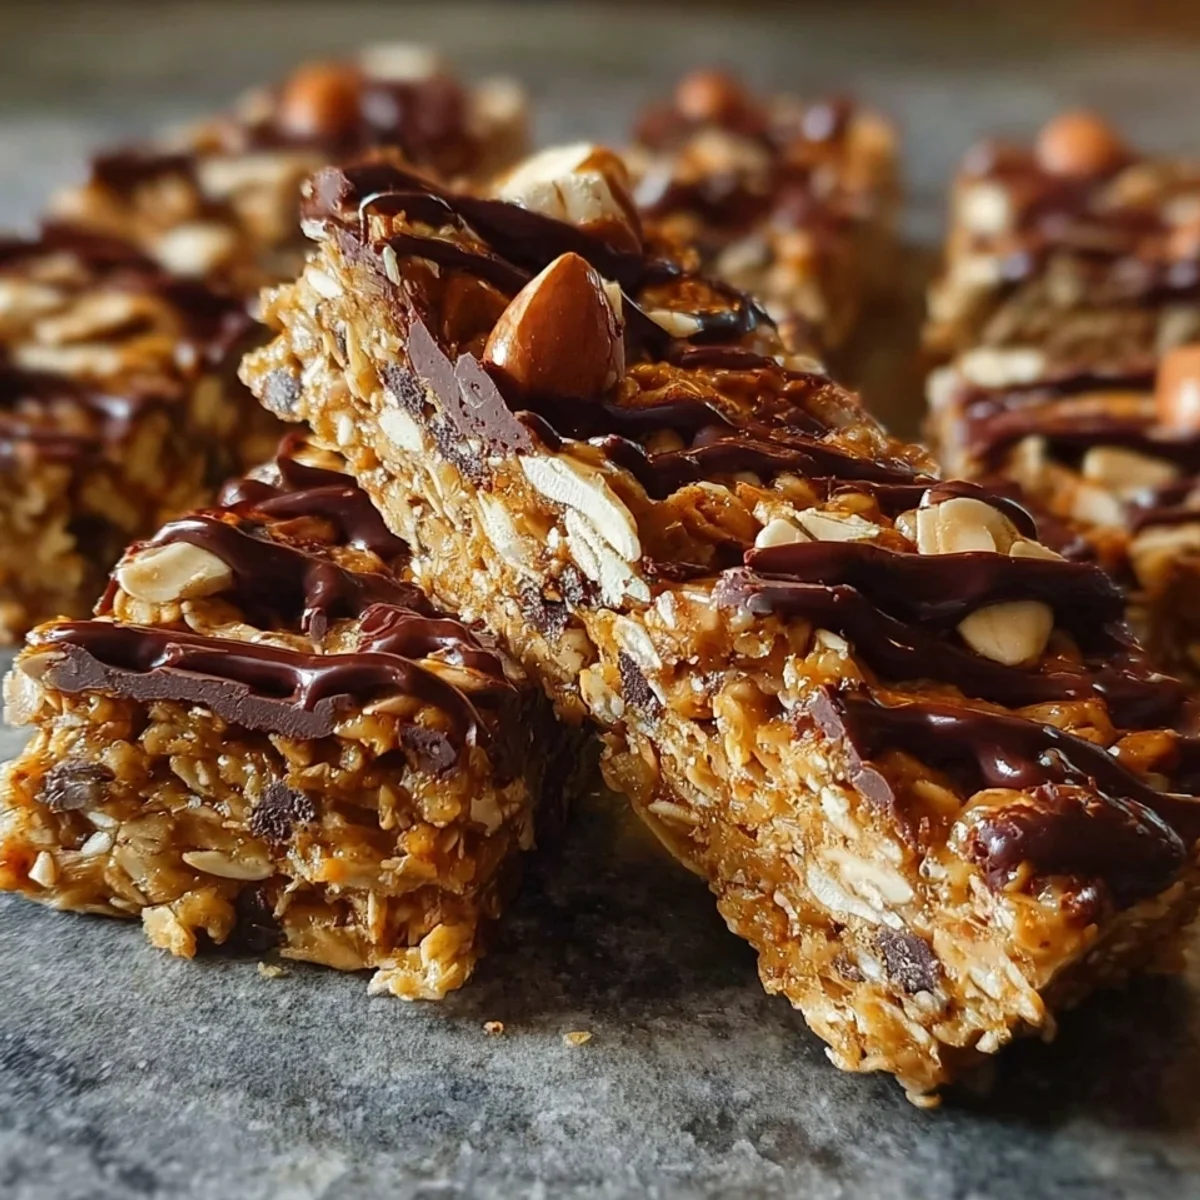


Okay, friend, let me tell you, life gets wild, right? Between work, chasing after my pup, and trying to squeeze in a workout, I was constantly reaching for something quick. But, honestly, those store-bought bars? Full of weird stuff! That's when I decided, "Enough is enough!" I needed a snack that was good for me, kept me full, and tasted amazing. After a few kitchen experiments (and a couple of sticky disasters, oops!), these Easy High Protein Bars were born. They've been a lifesaver!
Oh, the first time I tried to make these, I forgot to grease the parchment paper. Seriously, it was a sticky, crumbly mess! I was scraping bits of bar off the paper for what felt like an hour. My husband just laughed, calling it 'deconstructed protein crumble.' Live and learn, right? Now, greasing that paper is step one, no exceptions!
Gathering Goodness: What You'll Need for These High Protein Bars
- 1 cup vanilla or unflavored whey protein powder: This is the star of our show, the muscle-building hero! I usually go for vanilla because it gives these High Protein Bars a lovely baseline flavor, but unflavored is great if you want to be super creative with your spices or other additions. Just make sure it's a good quality powder you like the taste of, it makes all the difference, hon. No one wants a chalky bar, am I right?
- 1 1/2 cups rolled oats (gluten-free if preferred): Our trusty oats! They bring that perfect chewiness and a fantastic dose of fiber, which is super important for keeping you feeling satisfied. I always use old-fashioned rolled oats, not quick oats, because they hold their texture better. If you're gluten-sensitive like my sister, a certified gluten-free brand works beautifully here. They're the backbone of these amazing High Protein Bars, really.
- 1/2 cup natural almond butter: Ah, the glue that holds everything together! Natural almond butter, the kind with just almonds and maybe a touch of salt, is what you want. It adds healthy fats and a rich, nutty flavor. Make sure it's nice and drippy if it's too thick, gently warm it up a bit. I've made the mistake of using cold, stiff almond butter, and mixing was a total arm workout, not fun!
- 1/2 cup pure maple syrup: My favorite natural sweetener! Maple syrup gives these bars a lovely, subtle sweetness without being overpowering. Plus, it adds to the perfect sticky texture. Don't skimp and use pancake syrup, friend, it just won't be the same. Pure maple syrup is key for that balanced taste and helps these High Protein Bars hold their shape so beautifully.
- 2 tablespoons chia seeds: Tiny but mighty! Chia seeds are little powerhouses, packed with omega-3s and more fiber. They also help absorb moisture and contribute to the bar's overall structure, which is pretty cool for such small guys. I love knowing I'm getting an extra nutritional boost without even trying. They just disappear into the mix, doing their good work.
- 1/2 cup mini dark chocolate chips: Because, well, chocolate! A little bit of dark chocolate makes everything better, right? The mini chips are perfect here because they distribute evenly throughout each bar, so you get a little bit of chocolatey goodness in every bite. It feels like such a treat, but it's still good for you. Honestly, these make the High Protein Bars feel like a dessert!
Whipping Up Your Own High Protein Bars: A Step-by-Step Guide
- Step 1: Prepare Baking Dish:
- First things first, grab an 8x8 inch baking dish. This is super important for getting the right thickness for your High Protein Bars. Line it with parchment paper, leaving a little overhang on the sides trust me, those 'handles' will save your life later! Then, a little spritz of cooking spray on the parchment. I learned that the hard way, my first batch stuck like superglue. You want these bars to come out easily, looking perfect.
- Step 2: Combine Dry Ingredients:
- In a big mixing bowl, toss together your protein powder, rolled oats, chia seeds, ground flaxseed meal, and sea salt. Give it a good whisk until everything is evenly combined. You want to make sure there are no clumps of protein powder lurking, or you'll get a surprise powdery bite later, and no one wants that! This dry base is where all the good stuff for our High Protein Bars begins.
- Step 3: Mix Wet Ingredients:
- Now, in a separate, smaller bowl, pour in your almond butter, maple syrup, unsweetened applesauce, and vanilla extract. Whisk these wet ingredients together until they're smooth and fully blended. If your almond butter is a bit stiff, a quick 10-15 second zap in the microwave can help it flow better. This gooey mixture is what's going to bind our High Protein Bars together.
- Step 4: Combine All Ingredients:
- Time for the magic! Pour the wet mixture into the dry ingredients. Now, get ready for an arm workout! Use a sturdy spatula or a wooden spoon and mix, mix, mix. It'll look a bit crumbly at first, but keep going. Press and fold until it all comes together into a thick, sticky dough. This is crucial for uniform High Protein Bars, so don't rush it! Once it's mostly combined, fold in those mini dark chocolate chips.
- Step 5: Press and Chill:
- Transfer your glorious bar mixture into your prepared baking dish. This is where you really need to put some muscle into it! Use the back of your spatula, or even your hands (lightly greased, trust me!), to press the mixture down firmly and evenly into the dish. We're talking super compact, no air pockets. Once it's perfectly flat, pop it into the fridge for at least 2 hours. Chilling is non-negotiable for perfectly set High Protein Bars!
- Step 6: Cut Into Bars:
- After its beauty nap in the fridge, pull out your chilled slab using the parchment paper overhangs. Place it on a cutting board. Now, with a sharp knife, slice it into 12 even bars. I usually go for 3 cuts one way and 2 the other. Clean cuts are key for pretty bars! If your knife gets sticky, wipe it clean between cuts. These beautiful High Protein Bars are almost ready to enjoy!
Honestly, making these bars is one of my favorite kitchen rituals. There's something so satisfying about transforming simple ingredients into a healthy, delicious snack. The smell of vanilla and chocolate wafting through the kitchen, the feeling of pressing that mixture down, knowing you're creating something nourishing for yourself and your loved ones it's just pure joy. It's a little bit of kitchen therapy, if you ask me!
Keeping Your Homemade High Protein Bars Fresh and Tasty
Okay, so you've made a batch of these glorious High Protein Bars, now how do you keep them perfect? I store mine in an airtight container in the fridge. They'll stay fresh and chewy for up to a week. I once left a batch out on the counter overnight (oops!), and while they weren't 'bad,' they got a little softer and lost that firm bite. For longer storage, you can totally freeze them! Just wrap individual bars in plastic wrap, then pop them into a freezer-safe bag or container. They'll last for up to 3 months. Just pull one out to thaw for about 15-20 minutes before you want to snack on it. Easy peasy!

Playing Around: Ingredient Swaps for Your High Protein Bars
I've played around with these High Protein Bars so much! If you're not a fan of almond butter, peanut butter or cashew butter work beautifully just make sure they're natural and unsweetened. For a vegan option, swap the whey protein for a plant-based protein powder (like pea or brown rice protein). You might need a tiny splash more applesauce or maple syrup to get the right consistency, as plant proteins can be drier. Agave nectar or honey can stand in for maple syrup, too. And for mix-ins? Get wild! Dried cranberries, chopped nuts, shredded coconut I've tried them all. Just keep the total amount of mix-ins to about 1/2 to 3/4 cup so the bars still hold together well.
Beyond the Snack: Creative Ways to Enjoy Your High Protein Bars
These High Protein Bars are my ultimate grab-and-go snack, but they're so versatile! I love one with my morning coffee when I'm rushing out the door. They're also fantastic pre- or post-workout fuel that protein hits just right. My niece even loves them in her lunchbox! You can crumble one over a bowl of Greek yogurt with some fresh berries for a quick, hearty breakfast, or even warm it slightly and serve it with a scoop of vanilla ice cream for a healthier dessert. Honestly, they're good any time you need a little satisfying boost!
The Evolution of Energy: A Peek into High Protein Bars' Origins
You know, the idea of a 'bar' for energy or sustenance isn't new at all. Think about pemmican for indigenous peoples or hardtack for sailors portable, calorie-dense foods designed to keep you going. Modern energy and High Protein Bars really started gaining traction in the 60s and 70s with the rise of health foods and active lifestyles. People wanted convenient nutrition. I think what's cool about making your own, like these, is that you're taking that concept of convenient, nourishing food and bringing it back to basics, ditching all the mystery ingredients. It's a little nod to history, with a healthy, homemade twist!
And there you have it, my friend! Your very own batch of easy, delicious High Protein Bars. I swear, once you make these, you'll never go back to store-bought. They're just so satisfying, knowing exactly what's in every bite. I hope you love them as much as I do! Don't forget to tag me on social media or drop a comment below with your favorite customizations. Happy snacking!

Burning Questions About High Protein Bars? I've Got Answers!
- → Can I make these High Protein Bars vegan?
Absolutely! Just swap the whey protein powder for your favorite plant-based protein (like pea or brown rice protein). You might need to add a tiny bit more applesauce or maple syrup to get the right sticky consistency, as plant proteins can be a little drier. Easy peasy!
- → How long do these High Protein Bars last?
Stored in an airtight container in the fridge, these bars will stay fresh and delicious for up to a week. If you want them to last longer, they freeze beautifully for up to 3 months. Just remember to thaw them out a bit before enjoying!
- → Can I use a different type of nut butter?
Yep! Peanut butter or cashew butter work wonderfully in these High Protein Bars. Just make sure you're using a natural, drippy variety with minimal added sugar or oils. The consistency is key for holding everything together. I've tried sunflower seed butter too, for a nut-free option, and it was great!
- → Why are my High Protein Bars crumbly?
Ah, that's usually because the mixture wasn't pressed down firmly enough into the dish, or it didn't chill long enough. Really put some muscle into pressing it down! And don't skimp on that fridge time it's crucial for them to set properly and become nice and cohesive.
- → Are these High Protein Bars gluten-free?
They can be! As long as you use certified gluten-free rolled oats, then yes, these bars are naturally gluten-free. Always double-check your protein powder and other ingredients for any hidden gluten, but usually, they're good to go. Enjoy your worry-free snacking!