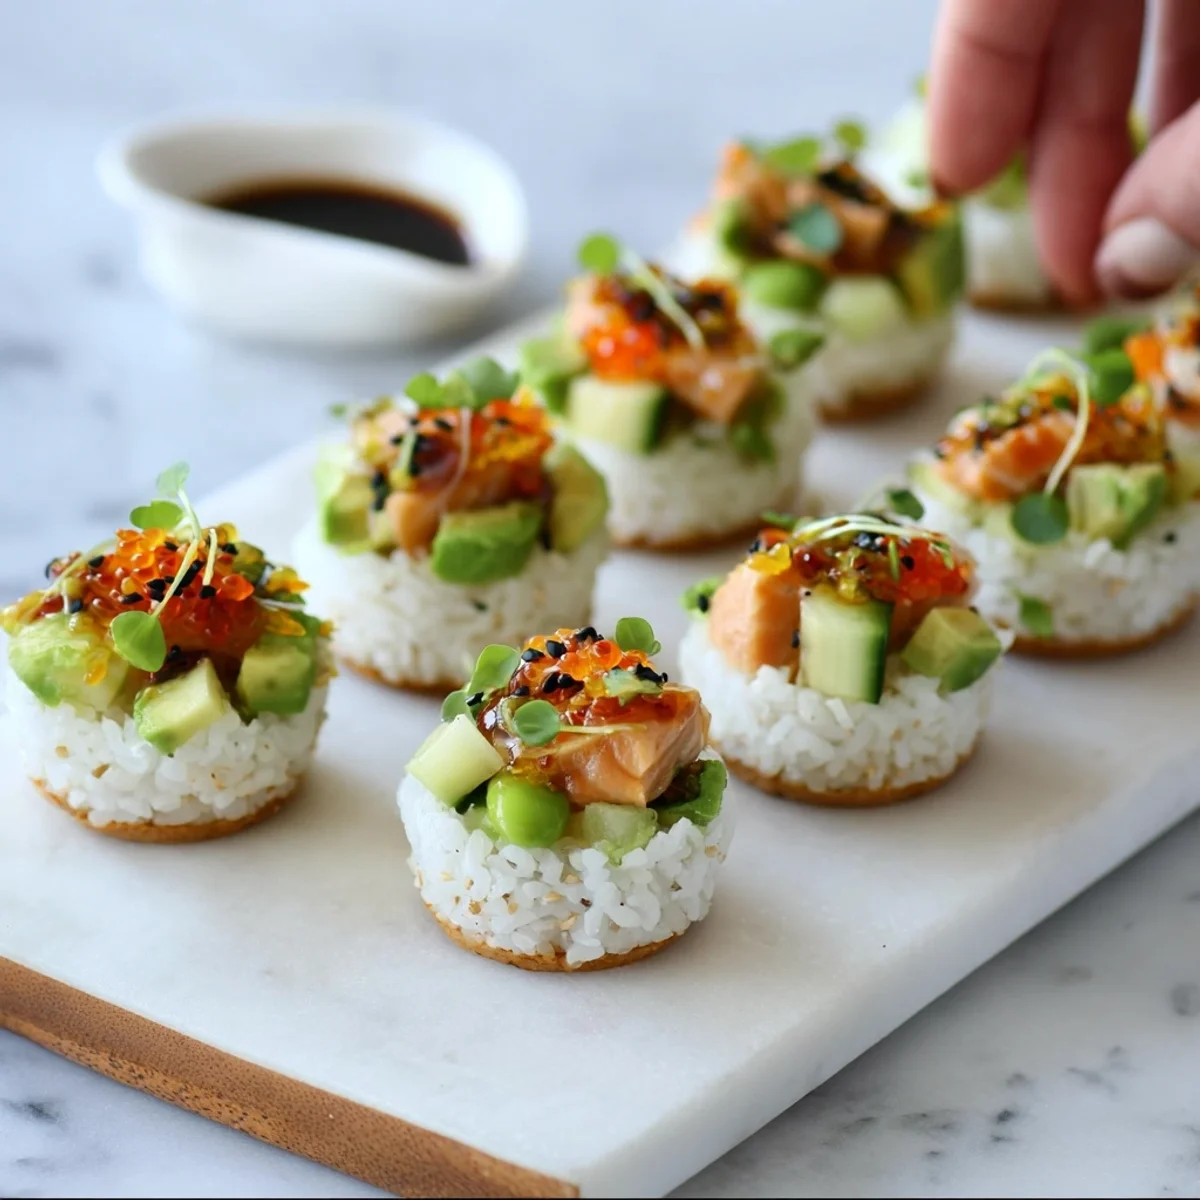


I remember the first time I tried to make actual sushi rolls at home. It was a disaster, honestly! Rice sticking everywhere, seaweed tearing, fillings escaping… I ended up with something that looked more like a deconstructed sushi burrito than a neat roll. My kitchen was a war zone, but the flavors were there, you know? That's when I had an "aha!" moment. What if I could get all those familiar, comforting sushi flavors without the rolling stress? Enter these Easy Sushi Cups. They're my little secret for satisfying that sushi craving without the mess, and they bring such a happy, light vibe to any gathering.
One time, I was rushing to make these for a potluck, and in my haste, I grabbed the wrong rice. Brown rice instead of sushi rice! Oops. The texture was… interesting, to say the least. It still tasted good, but it didn't have that classic sticky chew. My friend, bless her heart, asked if it was a "rustic sushi cup." We laughed, but it taught me a lesson: the right rice makes all the difference!
Ingredients
- Sushi Rice: Okay, this is non-negotiable for that classic texture. Don't use long-grain, just don't. I usually rinse it like a hundred times until the water runs clear, it makes it less starchy and totally worth the effort.
- Nori Sheets: Essential for that sea-kissed flavor. I cut mine into little squares that fit perfectly in the muffin tin. Sometimes, I toast them lightly over an open flame for a second or two before cutting for extra crispness gives it a deeper, almost nutty aroma.
- Cooked Salmon or Canned Tuna: I love using leftover baked salmon, honestly. It flakes beautifully. If I'm feeling lazy, a good quality canned tuna (in oil, drained) mixed with a bit of mayo works wonders. It's about what you have, and what makes you happy!
- Cucumber: Adds that crucial fresh crunch. I always deseed mine, it keeps the cups from getting watery later. A little bit of green just makes everything feel brighter, doesn't it?
- Avocado: Creamy, dreamy, and a must for me. I swear by using perfectly ripe avocados, not too hard, not too mushy. I've had avocado disasters where it was either rock hard or brown inside, a real bummer!
- Spicy Mayo: This is where the magic happens, people! Store-bought is fine, but I whip up my own with Kewpie mayo, Sriracha, and a tiny splash of lime. It's a game-changer, trust me.
- Soy Sauce: A little drizzle for that umami depth. I keep a low-sodium one on hand, but use what you love. I sometimes add a tiny bit of mirin to it for a touch of sweetness.
- Sesame Seeds: For a pretty finish and a subtle nutty flavor. Toasted black and white sesame seeds look so elegant, honestly. It's the little things that make it special.
- Green Onions (scallions): A pop of color and a mild oniony bite. I always keep a bunch in the fridge, they're so versatile. I snip them right over the cups with kitchen shears.
Instructions
- Prep the Rice:
- First up, get that sushi rice ready. Rinse it under cold water until it runs clear this step is key for perfect, non-gummy rice, honestly. Then, cook it according to package directions. Once it's done, gently mix in the rice vinegar, a pinch of sugar, and a tiny bit of salt. Let it cool a bit, warm rice is much easier to handle. I sometimes fan it with a piece of cardboard, like a pro, to speed up the cooling!
- Cut the Nori:
- While the rice cools, grab your nori sheets. Using kitchen shears, cut them into squares that will fit snugly into the bottom and up the sides of your mini muffin tin. This is where I sometimes get a little messy, with nori bits flying, but it's all part of the fun. You want them to form little edible cups for your Easy Sushi Cups.
- Assemble the Base:
- Lightly spray your mini muffin tin with a little non-stick spray. Press a nori square into each cup, then add a small spoonful of your cooled sushi rice. Gently press it down with dampened fingers or the back of a spoon to form a firm base. Don't pack it too tight, though, or it'll be a brick, and no one wants that in their Easy Sushi Cups!
- Layer the Fillings:
- Now for the fun part! Flake your cooked salmon or mix your canned tuna with a touch of mayo. Add a small layer over the rice in each cup. Next, add a few diced cucumber pieces and some creamy avocado cubes. This is where you can get creative, honestly, sometimes I add a little mango for a sweet twist, it's pretty good!
- Drizzle and Garnish:
- Time for the flavor boosters! Drizzle a generous amount of spicy mayo over the fillings in each cup. Then, add a light splash of soy sauce. Sprinkle with toasted sesame seeds and finely chopped green onions. I always add extra sesame seeds, I just love that little crunch.
- Chill and Serve:
- These Easy Sushi Cups are best served slightly chilled. Pop the muffin tin into the fridge for about 15-20 minutes to let everything set a little. Carefully remove them from the tin a small offset spatula helps here! Arrange them on a platter and watch them disappear. They're so satisfying and so much less fuss than actual rolls, trust me.
There was this one time I made a huge batch of these Easy Sushi Cups for a backyard movie night. I thought I had made too many, but honestly, they vanished faster than the popcorn! My sister's kids, who are notoriously picky, kept sneaking them off the platter. It felt so good to see everyone enjoying something that felt a little fancy but was so simple to pull together.
Easy Sushi Cups Storage Tips
Okay, so storing these Easy Sushi Cups is a bit of a balancing act, to be real. If you have any leftovers (which is rare in my house, just saying!), the best way to keep them is to store the components separately if you can. The rice and nori base can get a little soft if left assembled with the wet toppings for too long. If they're already assembled, pop them into an airtight container and refrigerate for up to 24 hours. I microwaved one once, and the nori turned rubbery so don't do that, lol. The flavors are still good, but the texture changes. It's better to eat them cold or at room temp.

Easy Sushi Cups Ingredient Substitutions
I've experimented a lot with these Easy Sushi Cups, honestly, and there are so many ways to switch things up! For the protein, shrimp is fantastic, or even shredded chicken if you're not a fish person. I tried using smoked tofu once, and it worked... kinda. It wasn't quite the same, but still edible! If you're vegetarian, grated carrots, thinly sliced bell peppers, or even some edamame would be lovely. No cucumber? Try jicama for a similar crunch. And for the spicy mayo, if you don't like spice, a simple lemon-dill mayo is a great alternative. Don't be afraid to use what's in your fridge!
Serving Your Easy Sushi Cups
These Easy Sushi Cups are just begging to be served on a pretty platter, honestly. They're perfect for a casual get-together, a fancy-ish brunch, or even just a fun weeknight appetizer. I love serving them with a side of extra soy sauce for dipping, maybe some pickled ginger, and a little dollop of wasabi paste for those who like a kick. Pair them with a crisp, cold sake or a light white wine for the adults, or a sparkling lemonade for everyone. This dish and a good book on the patio? Yes please. They make any moment feel a little more special.
Cultural Backstory
While these Easy Sushi Cups aren't traditional Japanese sushi, they draw heavily from the flavors and concepts of maki rolls. My connection to sushi started years ago, trying it for the first time in a tiny, bustling restaurant in a new city. It felt so exotic and exciting! This recipe is my homage to that experience, a way to bring those vibrant flavors and fresh ingredients into my own kitchen in a way that feels approachable and fun. It's about taking inspiration and making it your own, creating something new that still carries a piece of that original magic.
Honestly, these Easy Sushi Cups have become a staple in my kitchen, a little ray of sunshine on busy days or when I just want something fresh and fun. They’re proof that sometimes the simplest ideas are the most satisfying. I hope you give them a try and make them your own. Don't forget to tell me what fun fillings you come up with in the comments!

Frequently Asked Questions
- → Personal question about the Easy Sushi Cups?
Honestly, my biggest struggle was getting the rice just right at first. Too sticky, too dry! But after a few tries, I got the hang of it. It's all about that rinse and not overcooking.
- → Question about ingredients or substitutions for these Easy Sushi Cups?
I've tried so many things! Smoked salmon instead of cooked, or even crab sticks. For veggies, bell peppers or shredded carrots work. Just make sure whatever you add isn't too watery, or it'll make the nori soggy.
- → Question about technique or cooking method for Easy Sushi Cups?
The key is not to pack the rice too hard, or it becomes dense. And don't overfill the cups! A light hand makes for a more delicate bite. I definitely learned that the hard way with some overflowing disasters.
- → Question about storage or leftovers?
They're best fresh, but if you have leftovers, keep them in an airtight container in the fridge for a day. The nori might soften a bit, but the flavors are still there. Just avoid heating them up!
- → Question about variations or customization?
Oh, absolutely! Try adding a sprinkle of furikake, or a dot of sriracha for more heat. Sometimes I add a tiny dollop of cream cheese with the salmon, like a Philadelphia roll. Just play around and see what you love!