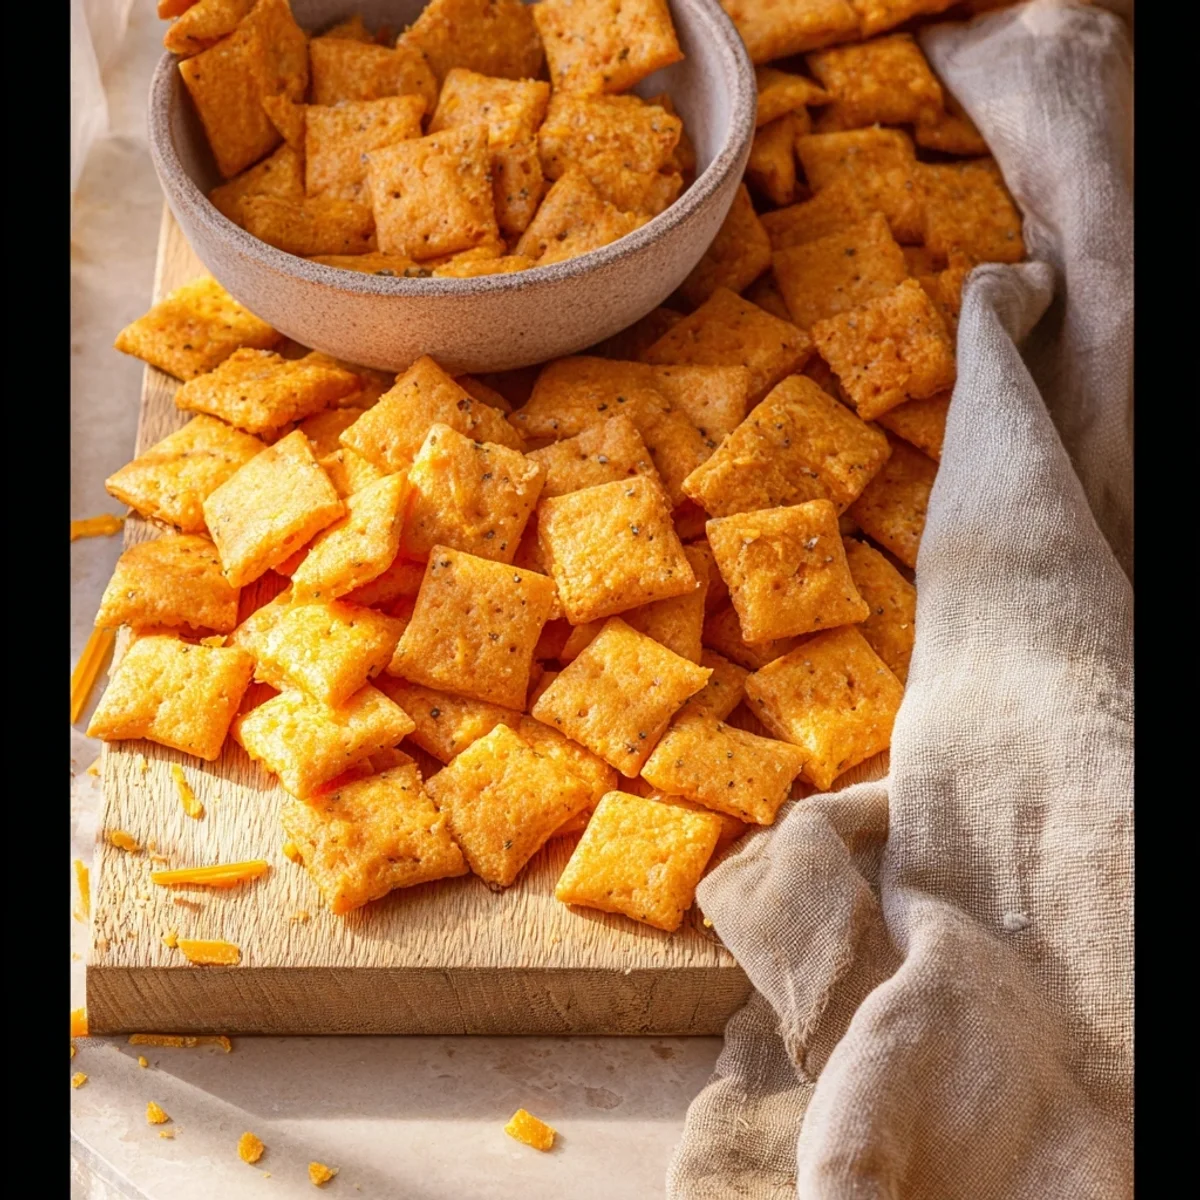


I remember the first time I tried to make homemade Cheez Its. It was a rainy Saturday, and honestly, I was just bored. My pantry was a wasteland, but I had a block of cheddar staring me down. I figured, "Why not?" The kitchen ended up looking like a flour explosion, but the smell, oh, the smell! That first batch wasn't pretty, but the cheesy crunch was pure magic. It felt like I’d unlocked a secret snack level. This recipe brings me back to simpler times, a little messy, a lot delicious.
My biggest "oops" moment with these crackers was definitely the time I forgot to poke holes. They puffed up like little cheesy balloons in the oven! I mean, they were still tasty, but definitely not the flat, crispy crackers I was aiming for. It was a good laugh, and a reminder that even small steps matter when making Homemade Cheez Its.
Homemade Cheez Its Ingredients
- Sharp Cheddar Cheese: Honestly, this is the star of your Homemade Cheez Its. Don't skimp here, that bright, tangy flavor is what makes these crackers sing. I've tried mild cheddar, and it just doesn't hit the same. Grate it yourself, please! The pre-shredded stuff has anti-caking agents that mess with the texture. Trust me, I learned that the hard way.
- All-Purpose Flour: The backbone of our cracker. It's just simple, straightforward structure. I've experimented with a mix of whole wheat, but the texture wasn't quite right for that classic snap. Stick with good old AP flour for this recipe.
- Unsalted Butter: Cold butter is key here, like making pie crust. It creates those little pockets of steam that make our crackers flaky and tender. I once used melted butter because I was in a rush, and it was just a dense, sad cracker. Never again, friend, never again.
- Salt: A little goes a long way, but it's crucial for balancing the richness of the cheese. I always add a pinch more than the recipe calls for because I like that salty kick. It really enhances the cheesy flavor.
- garlic Powder: This is my secret weapon for these homemade crackers. It adds an extra layer of savory goodness without being overpowering. I didn't expect it to make such a difference, but it just elevates the whole experience.
- Onion Powder: Similar to garlic powder, it adds depth. You won't know it's there, but you'll notice if it's missing. It’s part of that addictive, umami flavor.
- Water (ice cold): Just a tiny bit to bring the dough together. It has to be ice cold to keep that butter from melting too soon. I've used lukewarm water before, and the dough was a greasy mess. Learn from my mistakes!
How to Make Homemade Cheez Its
- Prep Your Cheesy Base:
- First things first, grab your sharp cheddar and grate it finely. Honestly, this is where the magic starts. Toss it into a food processor with the flour, salt, garlic powder, and onion powder. Pulse a few times until everything looks like coarse crumbs. You want to make sure that cheese is really integrated with the dry ingredients, I've had batches where the cheese clumps, and it’s just not the same.
- Cut in the Butter:
- Now, add your cold, cubed unsalted butter to the food processor. Pulse again, in short bursts, until the mixture resembles coarse sand, with some pea-sized pieces of butter still visible. This is where the flakiness comes from, so don't overmix! I always worry about overworking the dough here, because that leads to tough crackers. It's a delicate balance, but you'll feel it.
- Bring the Dough Together:
- Slowly drizzle in the ice-cold water, one tablespoon at a time, pulsing until the dough just starts to come together. You might not need all of it, or you might need a tiny bit more. It should form a shaggy ball that holds together when you pinch it. I used to add too much water and ended up with sticky dough oops! Just add enough so it's not crumbly.
- Chill Your Homemade Cheez Its Dough:
- Turn the dough out onto a lightly floured surface and gently form it into a flat disc. Don't knead it too much, we want to keep that tender texture. Wrap it tightly in plastic wrap and pop it into the fridge for at least 30 minutes. This chilling step is crucial for easy rolling and preventing shrinkage. I've skipped this, and the dough was a nightmare to work with, honestly.
- Roll and Cut Your Crackers:
- Preheat your oven to 350°F (175°C) and line a baking sheet with parchment paper. On a lightly floured surface, roll out the chilled dough to about 1/16-inch thick. This is thinner than you think, but it's key for that crispy texture. Use a fluted pastry wheel or a sharp knife to cut the dough into 1-inch squares. Don't forget to poke a tiny hole in the center of each square, this prevents them from puffing up too much.
- Bake Your Homemade Cheez Its:
- Carefully transfer the squares to your prepared baking sheet. You can place them quite close together, as they won't spread much. Bake for 12-15 minutes, or until golden brown and crispy. Keep a close eye on them, because they can go from perfectly golden to burnt in a flash! The smell that fills your kitchen at this point is just incredible pure cheesy heaven.
There’s something so satisfying about pulling a tray of these Homemade Cheez Its out of the oven. They’re never perfectly uniform, some a little darker, some a little wonky, but that’s their charm. One time, my cat, Mittens, even tried to swipe one right off the cooling rack. The smell is just irresistible, even for furry friends! It always feels like a small victory.
Homemade Cheez Its Storage Tips
So, you've made a batch of these crackers, and if you're anything like me, they disappear fast. But if you actually manage to have leftovers (a rare occurrence in my house, honestly!), store them in an airtight container at room temperature. They'll stay wonderfully crispy for about 3-4 days. I once tried to store them in a Ziploc bag that wasn't sealed properly, and they went stale overnight what a bummer! You can also freeze the unbaked dough wrapped tightly for up to a month, just thaw in the fridge before rolling and baking.

Homemade Cheez Its Ingredient Substitutions
I've played around with a few things while making these crackers, and here's the honest truth. For the cheese, a mix of sharp cheddar and a little Parmesan works surprisingly well for extra umami, but stick to real block cheese. I tried using a cheddar blend once, and it just didn't melt right. If you're out of all-purpose flour, a 1:1 gluten-free baking blend can work, but the texture might be a little more crumbly I've had "kinda" success there. As for the butter, I've used plant-based butter in a pinch, and while the flavor isn't quite the same, it still yielded a decent cracker.
Serving Homemade Cheez Its
These crackers are amazing on their own, straight from the oven, still warm. But honestly, they're fantastic with a simple bowl of tomato soup on a chilly evening that classic combo just hits different. I also love them alongside a quick charcuterie board with some olives and a glass of crisp white wine. Or, to be real, sometimes I just eat a handful while watching a cheesy rom-com. They're also a total win for school lunches or an afternoon pick-me-up.
The Story Behind Homemade Cheez Its
The idea of making crackers from scratch isn't new, but the commercial Cheez-It cracker has such a nostalgic hold on so many of us. For me, making Homemade Cheez Its is about taking that beloved, familiar flavor and elevating it with real ingredients, without all the preservatives. It’s a bit of a throwback to when snacks were simpler, made in home kitchens. It connects me to a feeling of creating something comforting and delicious from scratch, a little act of kitchen rebellion against the store-bought aisle.
And there you have it, your very own batch of Homemade Cheez Its! They might not look exactly like the ones from the box, but they're packed with so much more flavor and, honestly, a lot more love. Watching them bake and smelling that cheesy aroma fill my kitchen always brings a smile to my face. I hope you give these a try and share your own cheesy creations with me!

Frequently Asked Questions About Homemade Cheez Its
- → Can I use pre-shredded cheese for Homemade Cheez Its?
Honestly, I really don't recommend it. Pre-shredded cheese often has additives that can make the dough greasy and prevent that perfect melt and crisp. Grating your own block of sharp cheddar makes all the difference for these crackers!
- → What if my dough is too sticky or too crumbly?
If it's too sticky, try adding a tiny bit more flour, a teaspoon at a time. If it's too crumbly, add a splash more ice water, half a teaspoon at a time, until it just comes together. It's a feel thing, you'll get it!
- → How do I get my crackers perfectly crispy?
The key is rolling the dough very thin, about 1/16-inch. Also, don't overcrowd the baking sheet, and keep a close eye on them towards the end of baking until they're golden brown. A slightly longer bake makes them extra crunchy!
- → Can I make these crackers ahead of time?
Absolutely! You can prepare the dough, form it into a disc, and chill it in the fridge for up to 2 days. You can also freeze the unbaked, cut squares on a baking sheet, then transfer to a bag for up to a month.
- → Any fun variations for Homemade Cheez Its?
Oh, for sure! Try adding a pinch of smoked paprika or a dash of hot sauce powder to the dough. You could also sprinkle some everything bagel seasoning on top before baking. Get creative, that's what I do!