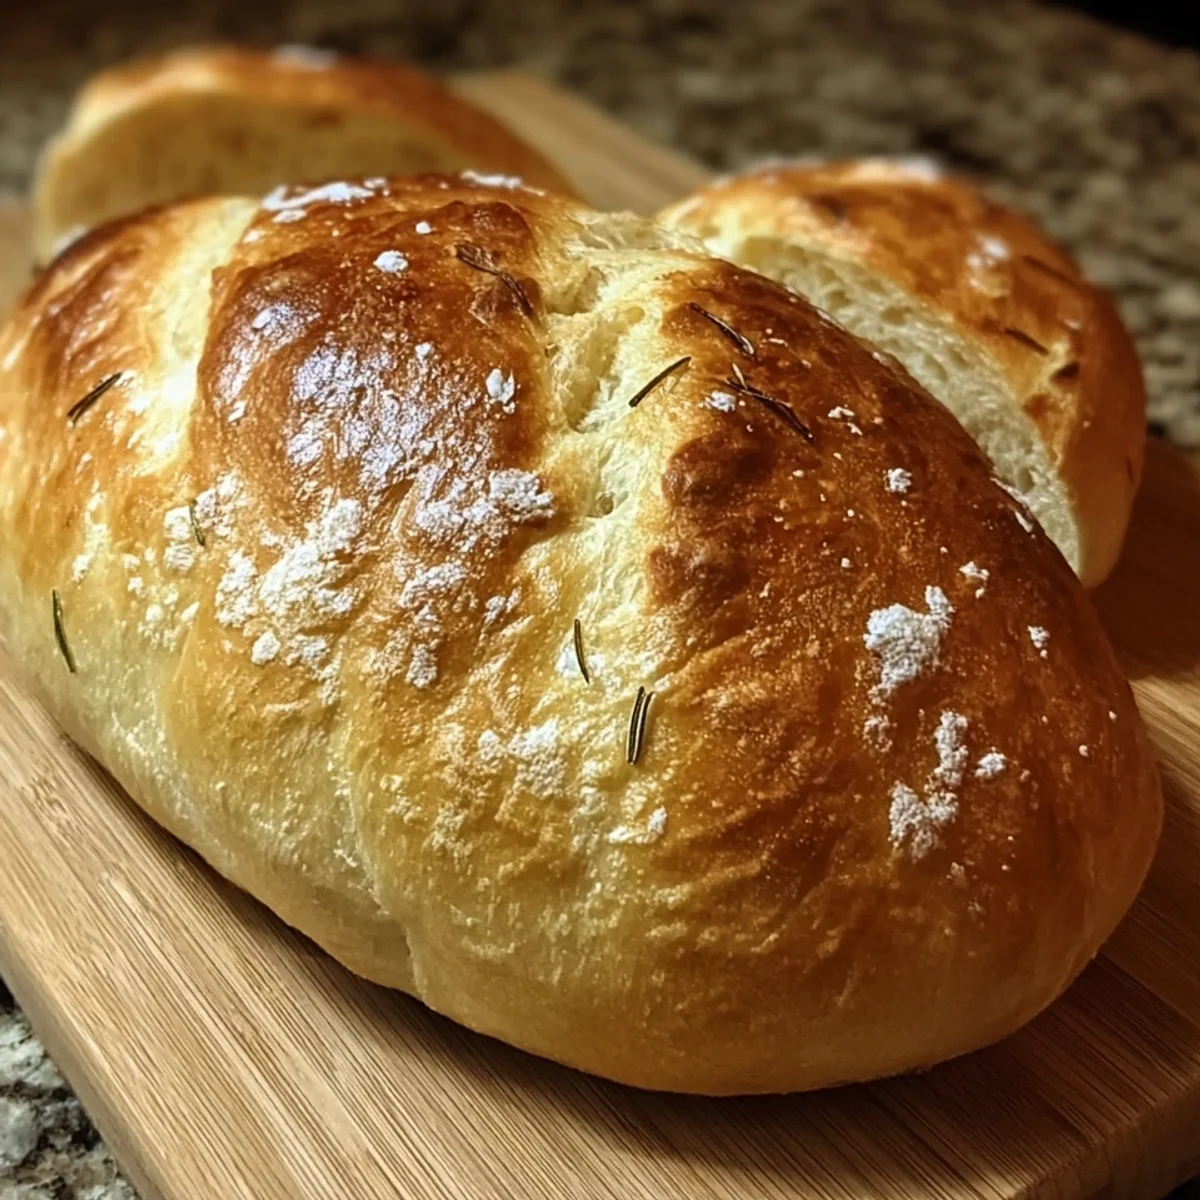


Oh my goodness, you guys! I remember the first time I tasted truly authentic, warm, homemade bread. It was at a tiny trattoria in Rome, and I swear, it changed my life. I came back home obsessed, determined to recreate that magic. After many attempts and a few, shall we say, dense loaves, I finally cracked the code for this incredible Crusty Italian Bread. It’s been a staple in my kitchen ever since!
Okay, so one time, early in my bread-making journey, I forgot to add the salt. Oops! I pulled it out of the oven, so proud of its golden crust, then took a bite. It was... bland. Like, shockingly bland. My husband was like, 'Honey, it's pretty, but it tastes like a cloud that forgot its purpose.' Lesson learned: salt is NOT optional, friends!
Your Pantry for Perfect Crusty Italian Bread
- 4 cups unbleached all-purpose flour: This is our main player, the backbone of our loaf! Unbleached is key here, I find it gives a slightly chewier texture and a richer flavor than bleached. Don't skimp on quality, a good flour makes all the difference in the world for that perfect crumb. It's like building a house, you gotta start with a solid foundation, right?
- 1/2 cup fine semolina flour: Oh, semolina! This is my secret weapon for that authentic Italian texture and a beautiful golden hue. It adds a subtle chewiness and helps create that glorious, crispy crust we're aiming for. Honestly, don't skip it, it elevates the bread from good to magnifico! It's worth seeking out, trust me.
- 1 3/4 cups warm water (105-115°F): This is crucial, my friends! Too hot and you'll kill the yeast, too cold and it won't activate properly. Think of it as a cozy bath for your yeast just right. I always use a thermometer, because eyeballing it often led to flat, sad loaves in my early days. Precision pays off here!
- 2 1/4 teaspoons instant dry yeast (1 packet): Our little magic worker! This is what makes our bread light and airy. Instant yeast is super convenient because you can mix it directly with the dry ingredients, but I still like to give it a little sugar bath first to make sure it's alive and kicking. A happy yeast means happy bread!
- 1 1/2 teaspoons fine sea salt: Remember my bland bread disaster? This is why! Salt isn't just for flavor, it also controls the yeast activity and strengthens the gluten structure. Fine sea salt dissolves beautifully and distributes evenly. It's the unsung hero that brings everything together, giving depth to every bite.
- 1 teaspoon granulated sugar: Just a tiny bit, and not for sweetness! This is food for our hungry yeast. It helps kickstart their activity, giving our dough a good initial boost for rising. Think of it as a little energy drink for our microscopic friends. It helps them do their job wonderfully.
Crafting Your Own Crusty Italian Bread: The Steps
- Step 1: Activate Yeast & Sugar:
- Grab your warm water and sprinkle in that sugar and yeast. Give it a gentle stir and let it hang out for about 5-10 minutes. You're looking for a foamy, bubbly party on top. If it's not bubbling, your yeast might be expired or your water wasn't quite right. Don't despair, just grab new yeast and try again! This step is critical for a lively dough.
- Step 2: Combine Dry Ingredients:
- In a big bowl, whisk together your flours, salt, oregano, basil, and garlic powder. See those little flecks of green and white? That's flavor waiting to happen! Make sure everything is super well combined. This ensures every bite of your future Crusty Italian Bread will be seasoned perfectly. No boring spots here!
- Step 3: Mix Dough & Knead:
- Pour your foamy yeast mixture and olive oil into the dry ingredients. Stir with a wooden spoon until it forms a shaggy dough. Then, get your hands in there! Knead on a lightly floured surface for 8-10 minutes until it's smooth and elastic. It's a workout, but oh-so-satisfying. You'll feel the dough transform under your hands.
- Step 4: First Rise (Bulk):
- Lightly oil a clean bowl, place your dough in, and turn it to coat. Cover it with plastic wrap or a damp towel and let it rise in a warm spot for 1-1.5 hours, or until it's doubled in size. This is where the magic happens, the dough puffing up, getting ready to become that glorious bread. Patience is a virtue, my friend!
- Step 5: Shape & Second Rise:
- Gently punch down the dough, then turn it out onto a lightly floured surface. Shape it into your desired loaf a round boule or an oval batard. Place it on a parchment-lined baking sheet, cover loosely, and let it rise again for 30-45 minutes. This second rise is important for the final airy texture of your homemade bread.
- Step 6: Preheat & Prepare Oven:
- About 30 minutes before baking, preheat your oven to a blazing 450°F (232°C). Place an empty, oven-safe pan (like a cast iron skillet) on the bottom rack. This is for our steam, which is absolutely vital for that incredible, crackly Crusty Italian Bread crust. Don't skip this step, it's a game-changer!
Honestly, there's nothing quite like the smell of fresh bread baking. It's pure comfort. Getting my hands in the dough, feeling it transform from sticky mess to smooth elasticity it's therapeutic. And the moment that golden loaf comes out of the oven, singing its little crackly song? Pure bliss. It’s a simple joy, but one that fills your home and your heart.
Keeping Your Crusty Italian Bread Fresh and Fantastic
So, you've baked this magnificent loaf of Crusty Italian Bread, and now what? Ideally, you'd eat it all warm, but sometimes there's a little leftover! My biggest mistake early on was putting it in a plastic bag right away hello, soggy crust! Nope, don't do that. Let it cool completely first. Store it at room temperature, cut-side down on a cutting board, covered loosely with a clean kitchen towel. It’ll stay lovely for a day or two. For longer, slice it up and freeze it in an airtight bag. Just pop a slice in the toaster when you're ready for a quick bread fix. It thaws beautifully!

Swaps and Surprises for Your Crusty Italian Bread
I've played around with substitutions a bit, you know, for science! If you don't have semolina flour, you can totally use all unbleached all-purpose flour for this recipe, but you might miss a little of that unique chewiness and golden color. For the herbs, feel free to swap oregano and basil for dried rosemary or even a mix of Italian herbs. Garlic powder is optional too, but I love that subtle savory kick. As for olive oil, any good quality extra virgin will do. Just remember, the core ingredients are flour, water, yeast, and salt everything else is just delicious embellishment!
Serving Up Your Homemade Crusty Italian Bread
Oh, the possibilities with this bread! It's begging to be dipped into a rich, garlicky olive oil with a sprinkle of red pepper flakes. Or slathered with butter, still warm from the oven. My favorite? A thick slice alongside a hearty pasta dish, like my Nonna's Sunday gravy, or mopping up every last drop of a delicious minestrone soup. It also makes the best bruschetta, topped with fresh tomatoes and basil, or even just some good cheese and cured meats for an antipasto spread. Seriously, this bread is a canvas for so many amazing flavors!
The Heartwarming Story Behind Crusty Italian Bread
The history of Italian bread is as rich and varied as Italy itself! Every region, sometimes even every town, has its own unique bread. This recipe, with its simple ingredients and focus on a robust crust and airy interior, really harks back to the rustic, traditional loaves baked in homes and bakeries across Italy for centuries. It's bread meant for sharing, for tearing, for savoring with simple, fresh ingredients. Making your own Crusty Italian Bread isn't just baking, it's connecting with generations of culinary tradition, bringing a piece of that warmth and heritage right into your kitchen.
There you have it, friends! My go-to recipe for the most amazing Crusty Italian Bread. It's a labor of love, yes, but one that rewards you with incredible flavor and that unbeatable homemade aroma. I hope you give it a try and fall in love with bread baking just like I did. If you make it, please share your photos and tell me all about your experience in the comments below! Happy baking!

All Your Questions About Crusty Italian Bread, Answered!
- → Can I use active dry yeast instead of instant?
Yes, you can! Just make sure to activate it first. Dissolve it in the warm water with the sugar, let it sit for 10 minutes until foamy, then proceed with the recipe. It works just as well, you just add one extra waiting step.
- → Why is my bread not getting crusty?
A few reasons! Your oven might not be hot enough, or you might not be creating enough steam. Make sure your oven is fully preheated to 450°F and that you're using an empty pan on the bottom rack with hot water added for steam.
- → Can I make this dough ahead of time?
Absolutely! After the first rise, you can punch down the dough, cover it tightly, and refrigerate it for up to 24 hours. Just let it come to room temperature for about 30-60 minutes before shaping and the second rise.
- → What if I don't have semolina flour?
No worries! You can substitute the 1/2 cup of fine semolina flour with an equal amount of unbleached all-purpose flour. The texture might be slightly different, but you'll still get a delicious loaf.
- → My bread is too dense, what went wrong?
This usually means either your yeast wasn't active, your water temperature was off, or you didn't knead enough. Make sure your yeast foams up in step one, and give that dough a good, vigorous knead to develop the gluten.