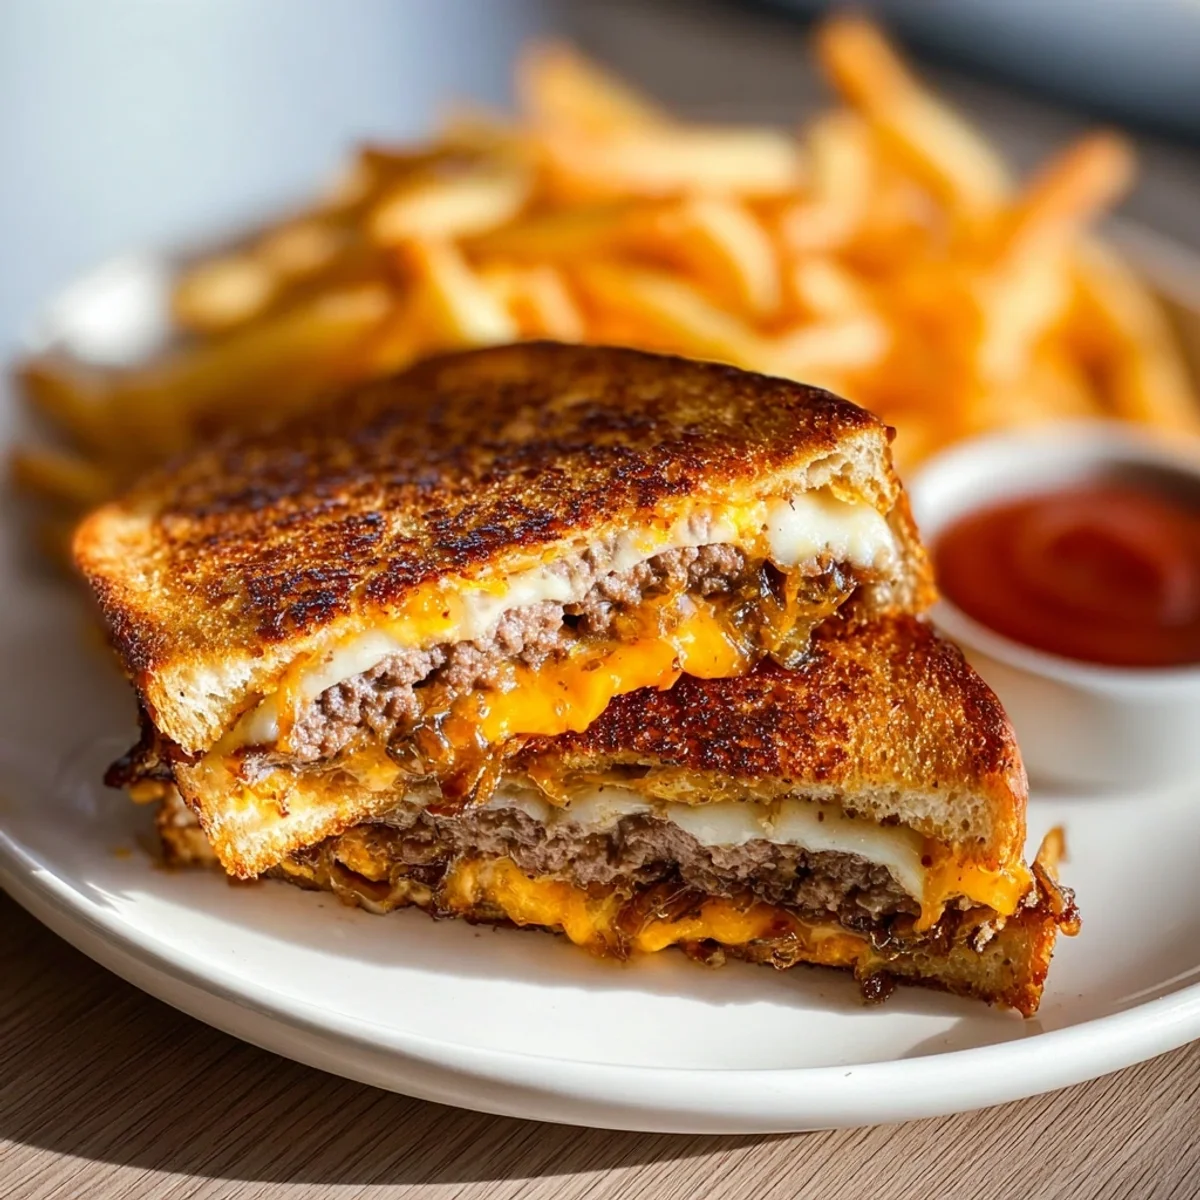


Honestly, the first time I ever had a Classic Patty Melt Sandwich, I was about twelve, sitting on a wobbly stool at a greasy spoon diner with my grandpa. The air smelled of coffee and sizzling onions, and when that plate landed in front of me, all golden-brown bread, gooey cheese, and those sweet, tender onions, I was hooked. It wasn't fancy, but it felt like pure comfort. That memory stuck with me, and making this at home always brings back those easy, happy vibes. It’s got that special something, you know?
I remember one time, I was so excited to make this Classic Patty Melt Sandwich that I completely forgot to preheat my pan for the onions. They just sat there, steaming instead of caramelizing! Oops. Had to start over, but hey, that’s how you learn, right? Now, I always make sure that pan is smoking slightly before those onions even think about hitting the heat. It’s all part of the process, and honestly, the little mishaps make the successes even sweeter.
Classic Patty Melt Sandwich Ingredients
- Ground Beef (80/20 Chuck): This is your patty! The fat content is key here, hon. 80/20 gives you that juicy, flavorful burger without drying out. I’ve tried leaner, and it just doesn’t have the same oomph. Don't skimp on the fat, trust me.
- Yellow Onions: The heart and soul of a Classic Patty Melt Sandwich. Caramelizing them slowly brings out their incredible sweetness. I tried using red onions once, and it worked... kinda, but it didn't have that classic diner flavor. Yellow is the way to go.
- Rye Bread: This isn't just any bread, it's the foundation! Marbled rye is my absolute favorite for its slightly tangy flavor and sturdy texture. Don't even think about using thin white bread, it'll just fall apart. Thick-cut is essential, and a good quality one makes all the difference.
- Swiss Cheese: The melt factor! Swiss is traditional for a reason it gets super gooey and has that slightly nutty, savory thing going on. I've experimented with cheddar, and it's fine, but Swiss really is the star here.
- butter: For frying the bread and caramelizing the onions. Unsalted is usually what I grab so I can control the saltiness myself. There was one time I used too much, and the bread was practically swimming! A good pat for each side of the bread is plenty.
- Mayonnaise: Some folks use butter, but I swear by a thin layer of mayo on the outside of the bread for an extra crispy, golden crust. It's a little trick I picked up, and it works wonders. You won't taste the mayo, just pure crunch!
- Salt & Black Pepper: Simple seasonings, but they're crucial. Season your patties and onions generously. I always eyeball it, but don't be shy, it brings out all those lovely flavors.
Classic Patty Melt Sandwich: Step-by-Step
- Caramelize Those Onions:
- Grab a large skillet, something heavy-bottomed if you have it. Melt a good knob of butter over medium-low heat. Slice your yellow onions thinly this is important for even caramelization. Toss them in the butter, season with a pinch of salt. Now, here’s the secret: low and slow. Stir them every so often, letting them soften and turn golden, then deep amber. This can take 20-30 minutes, sometimes more. Don't rush it! I always forget to stir them enough, and then one side gets a bit too dark. But honestly, the smell filling your kitchen is half the reward.
- Form Your Patties:
- While the onions are doing their thing, gently form your ground beef into four oval-shaped patties, about 1/2-inch thick. You want them to be roughly the same size and shape as your rye bread slices. Don't overwork the meat, that makes them tough. Season both sides generously with salt and black pepper. I once made them too thick, and they took forever to cook through, leaving the bread burnt. Lesson learned: keep 'em relatively thin for even cooking.
- Cook the Patties:
- In a separate skillet (or wipe out your onion pan if they're done and set aside), heat a little oil over medium-high heat. Once hot, carefully place your patties in the pan. Cook for about 3-4 minutes per side for a medium-well burger. You’re looking for a nice sear and a juicy center. This is where I sometimes get impatient and flip too early, losing that beautiful crust. Wait for it! You'll hear that satisfying sizzle, and the kitchen will start smelling amazing.
- Prep Your Bread and Cheese:
- While the patties are cooking, get your rye bread ready. Spread a thin layer of mayonnaise on one side of each slice of bread. This is my little trick for the crispiest, golden-brown crust! Lay a slice of Swiss cheese on the un-mayo'd side of two bread slices. Once the patties are cooked, place one patty on each of those cheese-topped slices. Then, top each patty with a generous spoonful of those wonderfully caramelized onions.
- Assemble and Grill:
- Now for the magic! Place the remaining two bread slices (mayo-side up) on top of the onions. So, you've got mayo-bread, cheese, patty, onions, cheese, mayo-bread. Get it? Gently press down. In a clean skillet (or wiped-out patty pan), melt a bit more butter over medium heat. Place your assembled sandwiches, mayo-side down, in the pan. I usually do two at a time because my skillet isn't huge, and trying to cram all four is just asking for kitchen chaos.
- The Big Flip and Finish:
- Cook for 3-4 minutes per side, or until the bread is beautifully golden brown and crispy, and the cheese is gloriously melted and oozing. You might need to gently press down with your spatula to help that cheese melt. This is the moment I always anticipate the smell, the sizzle, the promise of gooey goodness. Once both sides are perfect, carefully remove them from the pan. Slice them diagonally, because, honestly, it just looks better that way. Serve immediately and enjoy that perfect Classic Patty Melt Sandwich!
Making this Classic Patty Melt Sandwich always feels like a little celebration, even if it's just for a regular Tuesday lunch. There's something so comforting about the whole process, from the sweet smell of onions slowly caramelizing to the sizzle of the patties. One time, I was so proud of my perfectly golden patty melt, I practically danced around the kitchen. It’s those small, delicious victories that make home cooking so much fun.
Classic Patty Melt Sandwich Storage Tips
Okay, so storing a Classic Patty Melt Sandwich is a bit of a tricky beast, to be real. This dish is definitely at its best fresh off the skillet, when the bread is crispy and the cheese is gooey. Leftovers? They're okay, but they won't have that fresh-made magic. If you do have some, wrap them individually in foil or plastic wrap once they’ve cooled completely. They’ll keep in the fridge for up to 2 days. I microwaved it once, and the bread got super soggy, and the sauce separated so don't do that lol. Your best bet for reheating is a dry skillet over medium-low heat, flipping occasionally, until warmed through and the bread crisps up a bit again. It won't be quite the same, but it'll still be tasty enough!

Classic Patty Melt Sandwich Ingredient Substitutions
I’ve definitely played around with ingredient swaps for my Classic Patty Melt Sandwich, mostly out of necessity when I was missing something. For the cheese, cheddar or provolone can work if you’re out of Swiss, I tried provolone once, and it gave a milder, creamier melt, which was... kinda nice, actually. If you're not a fan of rye, a good sourdough can stand in, offering a tangy contrast, though it won't be quite the classic flavor profile. For the onions, sweet onions like Vidalia work beautifully, caramelizing even sweeter. As for the beef, ground turkey could be used for a lighter option, but honestly, you'll lose some of that rich, beefy flavor. I'd recommend adding a bit more seasoning if you go that route.
Classic Patty Melt Sandwich Serving Suggestions
Oh, the Classic Patty Melt Sandwich is practically begging for some good company! For sides, I love serving it with a big bowl of crispy, salty French fries hello, diner vibes! Or, if I’m feeling a little less indulgent, a simple green salad with a bright vinaigrette cuts through the richness beautifully. On the drink front, a cold root beer or even a classic milkshake just feels right. And for a dessert? A slice of apple pie with a scoop of vanilla ice cream would be the ultimate end to this comfort meal. Honestly, this dish and a good old rom-com on the couch? Yes please. It's perfect for those relaxed, cozy evenings.
Classic Patty Melt Sandwich Cultural Backstory
The Classic Patty Melt Sandwich has roots deep in American diner culture, emerging sometime in the 1940s or 50s. It’s essentially a hybrid, a genius cross between a grilled cheese and a hamburger. It’s said to have been invented by Tiny Naylor, the owner of a popular chain of restaurants in Los Angeles, who wanted something hearty and satisfying for his late-night diners. It quickly became a staple, beloved for its comforting combination of grilled bread, gooey cheese, savory patty, and those signature sweet caramelized onions. For me, it embodies that nostalgic feeling of roadside diners and classic American comfort food, a simple dish that has brought so much joy to so many, including my grandpa and me on those special diner visits.
There’s just something so satisfying about pulling apart a warm Classic Patty Melt Sandwich, seeing that stringy cheese, and biting into the juicy patty and sweet onions. It’s a dish that never disappoints, a little piece of diner magic you can make right in your own kitchen. I hope you love making and eating this as much as I do! Don't forget to share your own kitchen adventures and maybe even your favorite twist on this classic. Happy cooking, friends!

Frequently Asked Questions About the Classic Patty Melt Sandwich
- → Can I make the caramelized onions ahead of time?
Oh, absolutely! I do this all the time. Caramelized onions for your Classic Patty Melt Sandwich can be made a day or two in advance and stored in an airtight container in the fridge. It’s a huge time-saver and means less fuss when you’re ready to assemble your patty melts!
- → What if I don't like Swiss cheese for my Classic Patty Melt Sandwich?
No worries! While Swiss is traditional, I've had success with other cheeses. Provolone gives a mild, creamy melt, and even a sharp cheddar can work for a bolder flavor. Just pick a good melting cheese you enjoy, it’s your Classic Patty Melt Sandwich, after all!
- → My bread keeps getting soggy before the cheese melts. What am I doing wrong?
Ah, a common kitchen dilemma! For a perfect Classic Patty Melt Sandwich, make sure your skillet isn't too hot, use medium heat. Also, ensure your patties and onions are hot when you assemble the sandwich, as this helps melt the cheese faster without over-toasting the bread. Patience is key!
- → How long can I keep leftover Classic Patty Melt Sandwiches?
You can store them wrapped tightly in the fridge for up to 2 days. Honestly, they’re best fresh, but for reheating, a dry skillet works better than a microwave to get some crispness back. I wouldn't push it past 2 days myself, they just don't hold up well.
- → Can I use different types of bread for my Classic Patty Melt Sandwich?
Yep, you totally can! While rye is classic for a Classic Patty Melt Sandwich, I’ve tried sourdough and even a good sturdy white sandwich bread. Just make sure it's a thick-cut, robust bread that can handle the fillings without getting too flimsy. Experiment and see what you like!