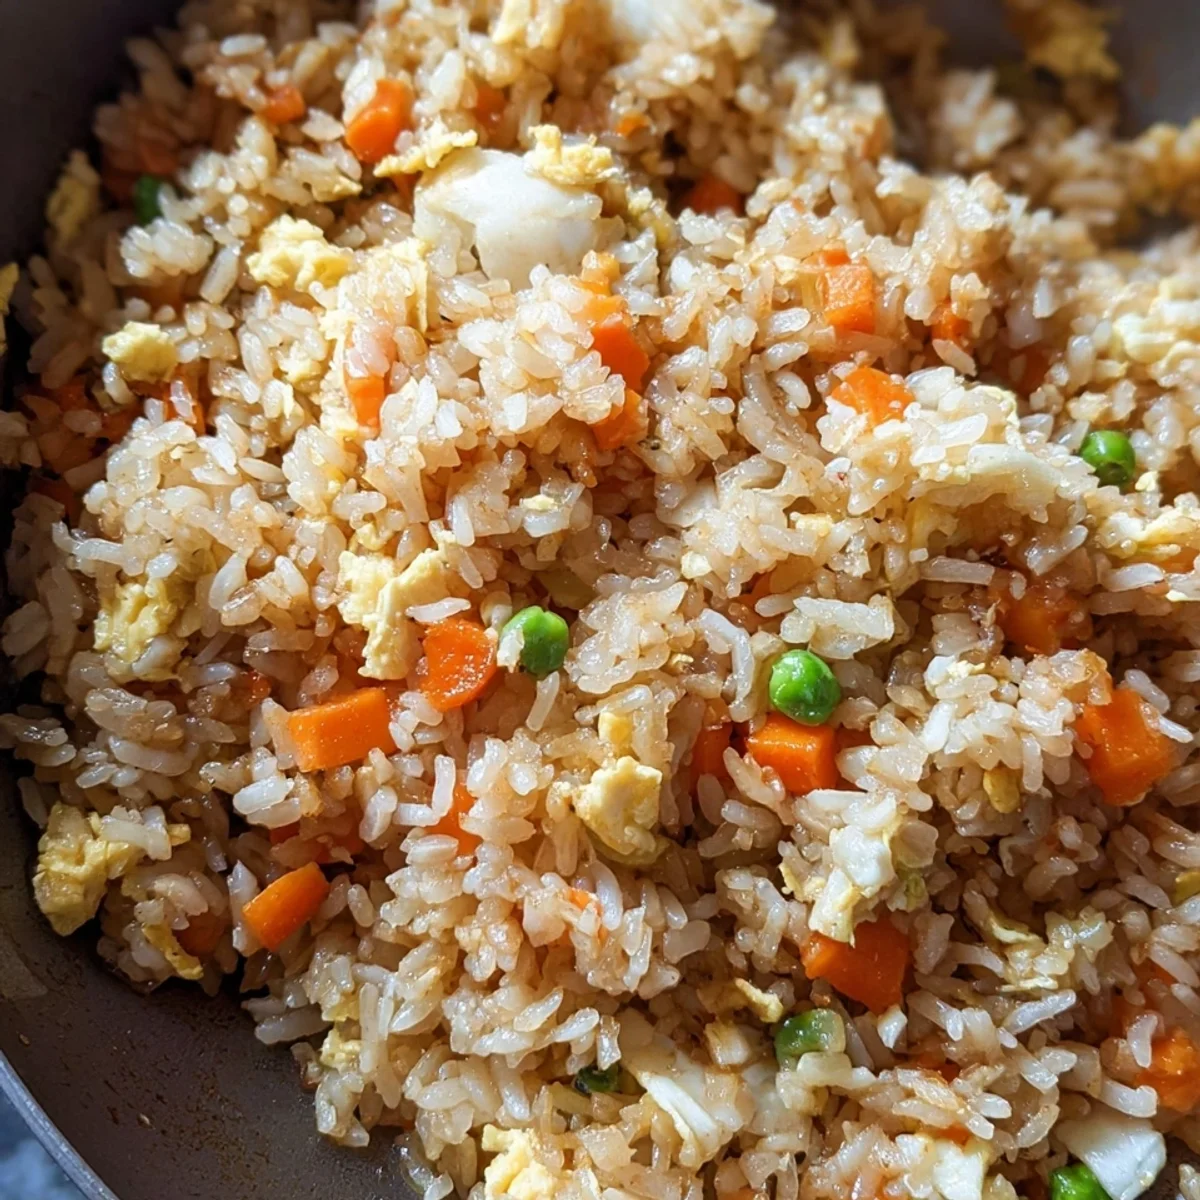


Okay, so picture this: Friday night, exhausted from the week, and all I could think about was that sizzling hibachi grill smell. You know, the one that just pulls you in? My family and I used to hit up our local Japanese steakhouse for that experience, but honestly, my wallet started protesting. One night, after a particularly chaotic week, I decided, "Nope, I'm making Easy Hibachi Style Fried Rice at home." I didn't expect it to be so good, but oh my goodness, the aroma filling my kitchen was pure comfort. This dish isn't just food, it's a memory, a little piece of that restaurant magic right in your own kitchen.
I remember the first time I really tried to nail this Easy Hibachi Style Fried Rice. I got a little too enthusiastic with the soy sauce and ended up with rice that was, let's just say, a tad on the salty side. My husband, bless his heart, still ate it, but I learned my lesson. Now, I always add a splash at a time, tasting as I go. It's those little kitchen oops moments that make a recipe truly yours, right?
Ingredients for Easy Hibachi Style Fried Rice
Base Ingredients
- Day-old cooked rice: This is non-negotiable, hon! Freshly cooked rice gets mushy, day-old has lost moisture and fries up beautifully. Honestly, I always cook extra rice the night before just for this.
- Eggs: Scrambled eggs are a classic in this fried rice. They add a lovely richness and texture. Sometimes I even whisk in a tiny splash of milk for extra fluffiness, but don't tell anyone!
- Vegetable oil: For that perfect sizzle. Any neutral oil works, but I usually grab canola or grapeseed. Don't skimp here, it helps get that lovely fried texture.
Flavor Boosters
- butter: Oh, butter. It's what gives that signature hibachi richness and a gorgeous sheen. Don't use margarine, it just doesn't hit the same, trust me.
- Garlic, minced: Fresh is always, always better. I mean, can you ever have too much garlic? I usually throw in an extra clove or two because the aroma is just... everything.
- Onion, diced: Adds a sweet, savory base. White or yellow onion works great. I like to dice mine pretty fine so they blend into the rice.
- Frozen mixed vegetables: Peas, carrots, corn the classic trio! Super convenient and adds color and a bit of sweetness. I've tried fresh, but honestly, frozen is just as good here and saves so much time.
Sauce & Seasoning
- Soy sauce: The backbone of this fried rice. I prefer a low-sodium version so I can control the saltiness. Tamari is a great gluten-free alternative if you need it, I've used it in a pinch and it worked perfectly.
- Sesame oil: A little goes a long way with this one! It adds that unmistakable nutty, aromatic finish. Don't add it too early or the flavor can cook off.
- Salt and black pepper: Basic seasonings, but essential. Taste as you go, you can always add more, but you can't take it away!
Optional Extras
- Cooked protein (chicken, shrimp, steak): If you want to make it a meal, add your favorite protein! I often use leftover grilled chicken or quickly sautéed shrimp. It makes the dish extra satisfying.
- Green onions, sliced: For garnish and a fresh, mild oniony bite. It just makes the dish look so much prettier, doesn't it?
How to Make Easy Hibachi Style Fried Rice
- Prep Your Rice and Eggs:
- First things first, get that day-old rice ready. Break up any clumps with your hands honestly, it's easier than trying to do it in the hot pan later. Then, scramble your eggs in a small bowl with a pinch of salt and pepper. Set them aside for a moment. This is where I sometimes get impatient and try to cook the rice too soon, but trust me, a little prep makes all the difference for your fried rice.
- Sauté Aromatics and Veggies:
- Heat your vegetable oil in a large skillet or wok over medium-high heat. Once it's shimmering, toss in the minced garlic and diced onion. Sauté for about 2-3 minutes until they're fragrant and softened. Oh, the smell at this stage is just heavenly! Then, add your frozen mixed vegetables and cook for another 3-4 minutes, stirring occasionally, until they're tender-crisp. Don't let them get mushy, we want a little bite!
- Bring in the Rice:
- Now for the star! Push the veggies and aromatics to one side of the pan. Add the day-old rice to the empty side, along with the butter. Let the butter melt and coat the rice, then start stirring everything together. You want to spread the rice out and let it get a little crispy on the bottom. This is crucial for that authentic hibachi texture. Keep stirring and scraping for about 5-7 minutes. It's a bit of an arm workout, but so worth it!
- Add Eggs and Protein:
- Make a well in the center of the rice mixture. Pour in your scrambled eggs. Let them set for about 30 seconds, then gently scramble them right in the pan. Once cooked, mix them into the rice. If you're adding cooked chicken, shrimp, or steak, this is the time to toss it in. Make sure everything is well combined and heated through. I always make sure my protein is already cooked because trying to cook raw meat in the pan with the rice can be a disaster, I've learned that the hard way!
- Season and Finish:
- Pour in the soy sauce and a dash of sesame oil. Stir, stir, stir! Make sure every grain of rice gets coated in that delicious, savory sauce. Taste it here does it need more salt? A little more pepper? Adjust to your liking. This is where the magic really happens, giving your fried rice its signature flavor. I usually sneak a spoonful to "test" it, oops!
- Serve It Up:
- Once everything is perfectly seasoned and heated through, remove your Easy Hibachi Style Fried Rice from the heat. Garnish with those fresh sliced green onions if you're using them. Serve it immediately! It's best hot and fresh, right out of the pan. The aroma, the texture, the flavor it's just spot on. Enjoy your homemade hibachi feast!
There was this one time I was so proud of my Easy Hibachi Style Fried Rice, I accidentally left it on the stove for an extra five minutes while distracted by a phone call. The bottom got a little too crispy, almost burnt, but you know what? A few bits of that slightly charred rice actually added a smoky depth that was surprisingly good! Sometimes, kitchen chaos leads to happy accidents, right?
Easy Hibachi Style Fried Rice Storage Tips
Leftovers of this Easy Hibachi Style Fried Rice are, honestly, one of life's simple pleasures! Just let it cool completely before transferring it to an airtight container. It'll keep beautifully in the fridge for up to 3-4 days. Now, I've tried freezing fried rice before, and while it's technically possible, the texture can get a bit softer and less appealing after thawing. So, I generally recommend sticking to refrigeration. When reheating, my go-to is actually a skillet over medium heat with a tiny bit of oil, it helps bring back some of that lovely crispy texture. Microwaving works, of course, but it can make it a little steamy, so be warned! I once nuked it too long and the rice got super dry lesson learned, lol.

Easy Hibachi Style Fried Rice: Ingredient Substitutions
Okay, let's talk swaps for your Easy Hibachi Style Fried Rice! If you're out of day-old rice, you can cook fresh rice and then spread it thinly on a baking sheet to cool and dry out for about 30 minutes in the fridge before using. It's not quite the same, but it works in a pinch! For protein, feel free to use tofu for a vegetarian twist, or even just extra veggies if you're feeling it. I've tried adding diced bell peppers or mushrooms, and they were delicious. If you don't have soy sauce, tamari is a fantastic gluten-free alternative, as I mentioned, but a little coconut aminos could also work, though it'll be a slightly different flavor profile. Just be mindful of the salt content when swapping! I once ran out of sesame oil and used a tiny drop of chili oil instead for a kick it was an unexpected but tasty twist, kinda!
Serving Your Easy Hibachi Style Fried Rice
This Easy Hibachi Style Fried Rice is absolutely fantastic on its own a complete meal, honestly. But if you're feeling fancy or want to round out the experience, it pairs beautifully with so many things! A simple side of steamed edamame or a crisp cucumber salad adds a fresh counterpoint. For drinks, a cold green tea or even a light lager would be perfect. And for dessert? Maybe some mochi ice cream or even just a bowl of fresh fruit. This dish and a cozy movie night? Yes please! It’s the kind of meal that just makes you feel happy and content, whether it’s a solo dinner or shared with loved ones.
The Backstory of Easy Hibachi Style Fried Rice
While my Easy Hibachi Style Fried Rice is a home cook's adaptation, the concept of fried rice has deep roots in Chinese cuisine, dating back centuries. It evolved as a clever way to use leftover rice and ingredients, preventing waste something I totally appreciate in my own kitchen! The "hibachi style" part specifically refers to the Japanese steakhouses where chefs cook fresh ingredients on a large, flat griddle (the hibachi or teppanyaki grill) right in front of diners. My discovery of this dish at a local spot felt like a mini-vacation every time. Bringing that vibrant, interactive cooking style and flavor profile home has made it incredibly special to me, transforming a simple ingredient like day-old rice into something truly exciting.
So there you have it, my take on Easy Hibachi Style Fried Rice. It's truly become a staple in my kitchen, a dish that brings smiles and that wonderful restaurant aroma without the fuss. It reminds me that even on the busiest days, a little homemade magic is always within reach. I really hope you give this a try and make it your own. Let me know how your kitchen adventures with this Easy Hibachi Style Fried Rice turn out!

Frequently Asked Questions About Easy Hibachi Style Fried Rice
- → Why is day-old rice so important for Easy Hibachi Style Fried Rice?
Honestly, it's a game-changer! Freshly cooked rice has too much moisture, which makes your fried rice mushy. Day-old rice is drier, so it fries up beautifully and gets that lovely, slightly crispy texture. I learned this the hard way with a very sad, clumpy batch once!
- → Can I make this Easy Hibachi Style Fried Rice vegetarian?
Absolutely! Just skip the meat protein and maybe add some extra veggies like mushrooms or bell peppers, or even some pan-fried tofu. I've done it many times, and it's still incredibly flavorful and satisfying. Don't forget to use a vegetarian soy sauce if that's a concern!
- → What's the secret to getting that authentic hibachi flavor?
I think it's a combination of a super hot pan, good quality butter, and fresh garlic. And honestly, a dash of sesame oil at the end really ties it all together. It's about building those layers of flavor, letting things sizzle, not steam. It took me a few tries to get that balance right!
- → How long does Easy Hibachi Style Fried Rice last as leftovers?
It holds up really well! You can store it in an airtight container in the fridge for up to 3-4 days. I love having it for lunch the next day. Just reheat it gently in a skillet or microwave, but be careful not to overcook it, or it can get a bit dry.
- → Can I add different vegetables to my Easy Hibachi Style Fried Rice?
Oh, for sure! That's the beauty of fried rice. I've thrown in everything from broccoli florets to shredded cabbage. Just make sure to cut them into similar-sized pieces so they cook evenly. Experiment and see what you love, that's half the fun of cooking!