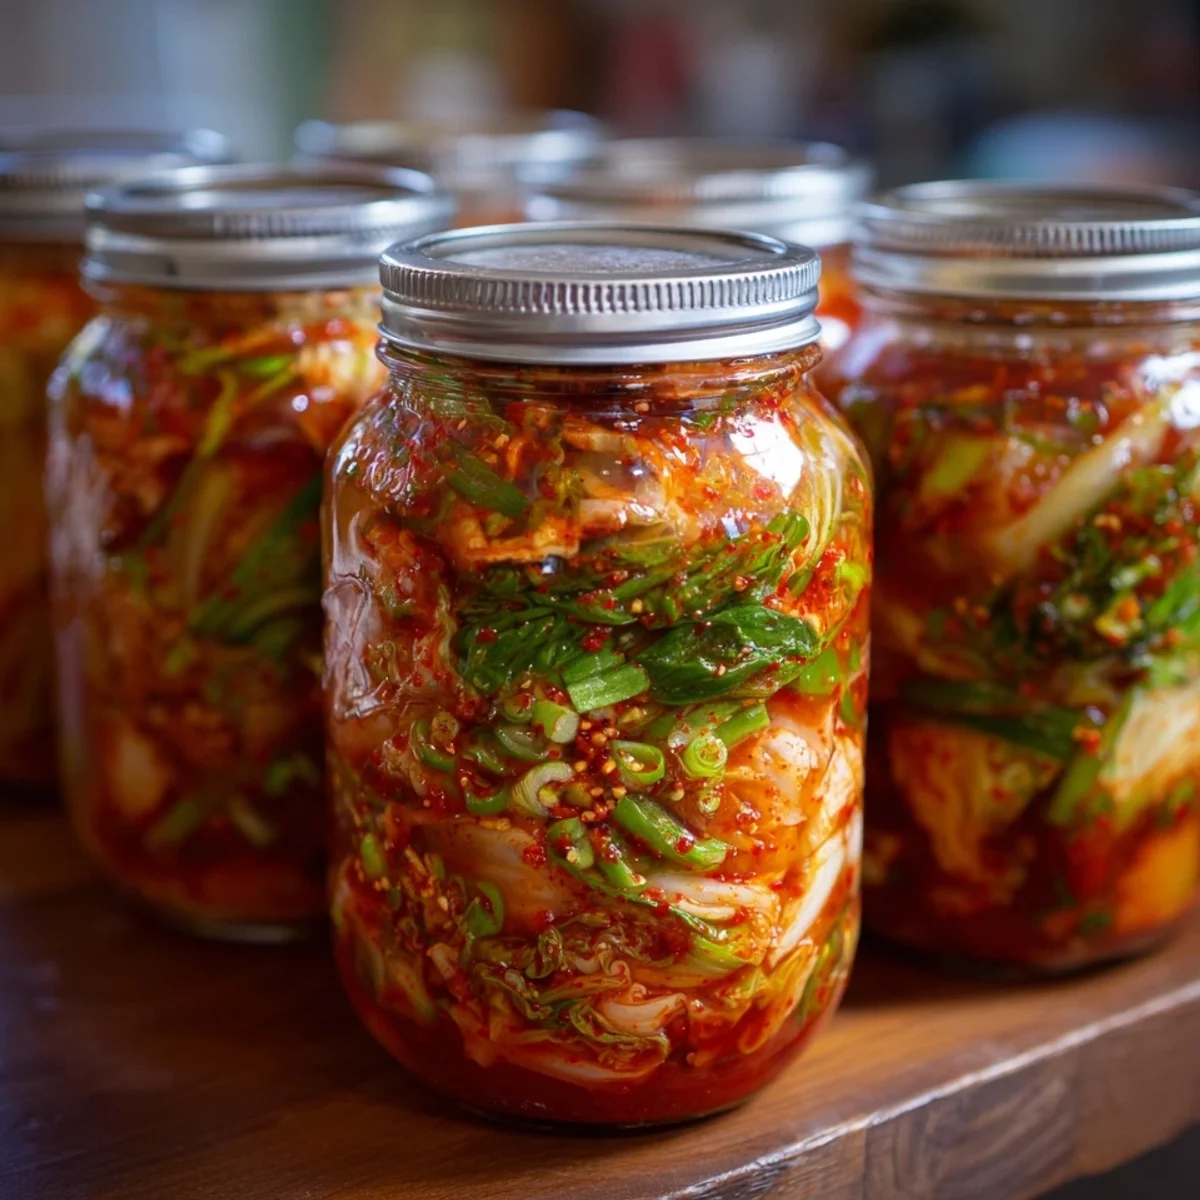


Oh, hey there, friend! Pull up a chair, grab a cup of tea, because today we're diving deep into something truly special: making your very own korean Cabbage Kimchi. I remember the first time I tried making it, I was so intimidated by the idea of fermenting food at home. But let me tell you, once you taste that vibrant, spicy, tangy crunch that you made with your own hands, there's just no going back. It’s a labor of love, a delicious science experiment, and honestly, one of the most rewarding kitchen projects ever!
My very first batch of kimchi had a little incident. I was so excited, mixing everything in a huge bowl, when I got a little too enthusiastic with the gochugaru. A cloud of red chili dust erupted, coating my kitchen, my hair, and even the cat (oops, she was fine, just looked like a tiny, angry, red lion!). Lesson learned: mix gently, and maybe wear a mask if you're sensitive!
Gathering Your Essentials for Homemade Korean Cabbage Kimchi
- 5 lbs napa cabbage, quartered lengthwise and cut into 2-inch pieces: This is the heart and soul of our Korean Cabbage Kimchi, hon! Napa cabbage is perfect for this because its leaves are sturdy enough to stand up to the brining process but still tender enough to soak up all those amazing flavors. You want a fresh, crisp head, no wilting allowed! Cutting it into 2-inch pieces might seem small, but trust me, it's the ideal bite-sized piece for fermenting and eating. It's like building the perfect spicy, crunchy foundation.
- 1/2 cup coarse sea salt: Okay, this isn't just any salt, it's the magical ingredient that kickstarts the whole kimchi process. Coarse sea salt draws out excess water from the cabbage, which is crucial for achieving that perfect crunch and preventing spoilage. It also helps preserve the cabbage and creates the ideal environment for fermentation. Don't skimp, but don't overdo it either. This is where the science really begins, making sure our cabbage is ready for its spicy transformation!
- 1/2 cup Korean chili flakes (Gochugaru): Gochugaru is non-negotiable for authentic Korean Cabbage Kimchi. It's not just about the heat, it brings a beautiful, smoky, slightly sweet, and vibrant red color that makes kimchi so iconic. Regular chili flakes just won't cut it, trust me, I tried once in a pinch and it was a flavor disaster! Get the good stuff, the finer grind if you can, for that smooth, rich paste. It’s the spicy soul of the dish.
- 1/4 cup fresh garlic, minced (about 1 head): Garlic, glorious garlic! This isn't the time for pre-minced stuff from a jar, my friend. We're talking fresh, pungent, aromatic garlic, minced with love. It provides a foundational punch of flavor that is essential for kimchi. It’s a powerhouse ingredient that not only tastes amazing but also contributes to the fermentation process. Don't be shy, a whole head might seem like a lot, but it mellows beautifully as it ferments.
- 2 tbsp fresh ginger, grated: Ah, ginger! The warming, zesty counterpoint to the garlic and chili. Freshly grated ginger adds a wonderful layer of complexity and a subtle spicy kick that really brightens up the entire kimchi paste. It's a key player in that signature fresh, zingy flavor profile. Plus, it's just so good for you! I always grate it right before adding to capture all that potent aroma and flavor.
- 1 cup daikon radish, julienned (about 1/2 lb): Daikon radish is a fantastic addition, adding a refreshing, slightly peppery crunch that contrasts beautifully with the cabbage. It also contributes to the overall texture and makes each bite more interesting. Julienne it thinly so it blends well with the cabbage. It's not just a filler, it's a textural and flavor enhancer that makes your homemade Korean Cabbage Kimchi even more dynamic and delicious. Don't skip this one!
Crafting Your Own Korean Cabbage Kimchi: A Step-by-Step Guide
- Step 1: Brine the Cabbage:
- Okay, first things first: the brine! Grab your 5 lbs of napa cabbage, already quartered and cut into those perfect 2-inch pieces. Toss it into a really big bowl I mean, a HUGE one. Sprinkle that 1/2 cup of coarse sea salt all over it, making sure every piece gets some love. Now, massage it gently, like you're giving it a spa treatment. This draws out the water, making the cabbage pliable and ready to soak up all the amazing flavors for our Korean Cabbage Kimchi. Let it sit for 2-3 hours, tossing every 30 minutes. You'll see it wilt down, which is exactly what we want!
- Step 2: Rinse and Drain:
- After its briny bath, your cabbage is going to look a bit sad and floppy don't worry, that's good! Now, this step is CRUCIAL for delicious Korean Cabbage Kimchi. Rinse the cabbage under cold running water multiple times. You need to get rid of all that excess salt, or your kimchi will be way too salty, trust me, I learned that the hard way once! Rinse, rinse, rinse! Then, squeeze out as much water as you can. I usually use a colander and press down with my hands. You want it damp, not soggy. Set it aside to drain for at least 30 minutes, or even an hour.
- Step 3: Make Rice Flour Paste:
- Time for the magic binder! In a small saucepan, whisk together 2 tbsp glutinous rice flour and 1/2 cup water until smooth. Cook this over medium heat, stirring constantly, until it thickens into a glossy, translucent paste. This paste is so important for Korean Cabbage Kimchi, it acts as a glue for the chili paste and also feeds the good bacteria, helping with fermentation. Once it's thick and bubbly, remove it from the heat and stir in 1 tbsp granulated sugar. Let it cool completely. This cooling step is vital don't rush it!
- Step 4: Prepare Kimchi Paste:
- Alright, this is where the flavor explosion happens! In another large bowl, combine your cooled rice flour paste with 1/2 cup Korean chili flakes (gochugaru), 1/4 cup minced fresh garlic, and 2 tbsp grated fresh ginger. Mix it all up until you have a thick, vibrant red paste. Wear gloves for this, seriously! I skipped them once, and my hands were stained red and tingling for hours. This paste is the heart and soul of your homemade Korean Cabbage Kimchi, so make sure it's well combined and smelling incredible. That fiery red hue is just gorgeous!
- Step 5: Add Fresh Vegetables:
- Now for some fresh crunch! To your gloriously red kimchi paste, add the 1 bunch of green onions, cut into 2-inch pieces, and the 1 cup of julienned daikon radish. These fresh additions bring texture, a little bite, and extra layers of flavor that will develop beautifully during fermentation. Give everything a good stir to evenly coat the green onions and daikon with that amazing spicy paste. It's starting to look like the real deal, isn't it? The colors are just popping!
- Step 6: Combine and Mix:
- Here comes the fun part, and it's messy! Grab your large bowl of drained cabbage and add your vibrant kimchi paste mixture. Now, put on those gloves again (you remembered them this time, right?). Get in there with both hands and thoroughly mix everything. You want every single piece of cabbage to be coated in that beautiful, spicy, aromatic paste. Squeeze, massage, and toss until it’s all evenly distributed. This is truly where your homemade Korean Cabbage Kimchi comes alive, smelling incredible and looking ready for its fermenting journey. Don't be afraid to get your hands dirty!
Making kimchi is such a sensory experience. The smell of the salty cabbage, the pungent garlic and ginger, the vibrant red of the gochugaru it's all so alive. There's a real joy in getting your hands in there, feeling the textures, and knowing you're creating something truly special. It's a connection to tradition, a delicious experiment, and a little piece of my heart in a jar.
Keeping Your Fermented Goodness Fresh: Storage Tips
Once your kimchi is packed, store it in airtight jars or containers. I usually leave it out at room temperature for 1-3 days to kickstart the fermentation. You'll know it's working when you see little bubbles and it starts to smell tangy. After that, move it to the fridge. It'll continue to ferment slowly there, developing deeper flavors over weeks, even months! I once left a jar on the counter too long in summer and came back to a very fizzy, slightly overflowing situation oops! So, keep an eye on it. Properly stored in the fridge, it can last for several months, getting more sour and complex with age.

Playing Around: Ingredient Swaps for Your Kimchi
I've played around with substitutions quite a bit, mostly out of necessity! If you can't find daikon radish, a jicama or even a crisp apple (a tart one!) julienned can add a nice crunch, though the flavor profile will be different. For the gochugaru, honestly, there's no perfect substitute for that specific Korean flavor, but a mix of smoked paprika and a little cayenne could give you color and heat if you're in a real bind. I've also tried using regular rice flour instead of glutinous, and it still worked, just wasn't quite as thick and glossy. Don't be afraid to experiment a little, but stick to the core ingredients for your first batch!
Delicious Ways to Enjoy Your Homemade Korean Cabbage Kimchi
Oh, where do I even begin with serving homemade Korean Cabbage Kimchi? It's amazing as a side dish with almost any Korean meal, like bulgogi or bibimbap. But don't stop there! I love tossing it into fried rice for an extra kick, or chopping it up and mixing it into scrambled eggs. It's fantastic on hot dogs, in grilled cheese sandwiches, or even just straight out of the jar as a snack (don't judge!). My favorite might be adding a generous dollop to a bowl of hot ramen or instant noodles it just elevates everything. Get creative, my friend, the possibilities are endless!
The Heartwarming Story Behind This Fermented Delight
Kimchi isn't just a food, it's a way of life in Korea, deeply woven into the fabric of their culture for centuries. It originated as a way to preserve vegetables during harsh winters, long before refrigeration. Families would gather for 'kimjang,' a communal kimchi-making event, preparing huge batches to last through the cold months. It's a symbol of Korean identity, a source of national pride, and a staple at every meal. For me, making it at home connects me to that rich history and tradition, a little taste of Korea right in my own kitchen.
And there you have it, my friends! A journey into making your very own batch of this incredible fermented goodness. It might seem like a lot of steps, but it's a process that's so worth it, a true labor of love. The flavors, the textures, the pride of making something so delicious from scratch it’s just the best. Give it a try, I promise you won't regret it! And when you do, please share your kimchi triumphs (and maybe even your little kitchen mishaps!) with me in the comments below. Happy fermenting!

Your Burning Questions About Kimchi, Answered!
- → How do I know when my kimchi is ready?
It's all about taste, friend! After 1-3 days at room temp, it should smell tangy and have a slight fizz. Try a piece, if it's pleasantly sour and crunchy, it's good to go in the fridge. It'll continue to ferment and get more sour over time, so taste often to find your sweet spot!
- → Why is my kimchi not fermenting?
Hmm, a few things could be happening. Was your kitchen too cold? Fermentation slows down in cooler temps. Did you rinse too much salt off? Salt is crucial for the process. Or maybe your jar isn't airtight enough. Give it a bit more time in a warmer spot, and make sure it's packed tightly.
- → Can I make kimchi less spicy?
Totally! The spice level is completely adjustable. Just reduce the amount of gochugaru you add to the paste. You could start with half the amount and add a little more if you like, or even skip some if you're very sensitive. It'll still have amazing flavor without all the heat.
- → What if my kimchi gets moldy?
Oh no, that's a bummer! Mold usually happens if the cabbage isn't fully submerged in liquid or if there's too much air exposure. Unfortunately, if you see fuzzy mold, you should discard the batch. To prevent it next time, make sure to pack it down really well and use an airlock if you're fancy!
- → How long does homemade kimchi last?
If stored properly in the fridge in an airtight container, your homemade kimchi can last for several months! The flavor will continue to deepen and become more sour over time, which many people love. Just make sure to always use a clean utensil when scooping it out to avoid introducing bad bacteria.