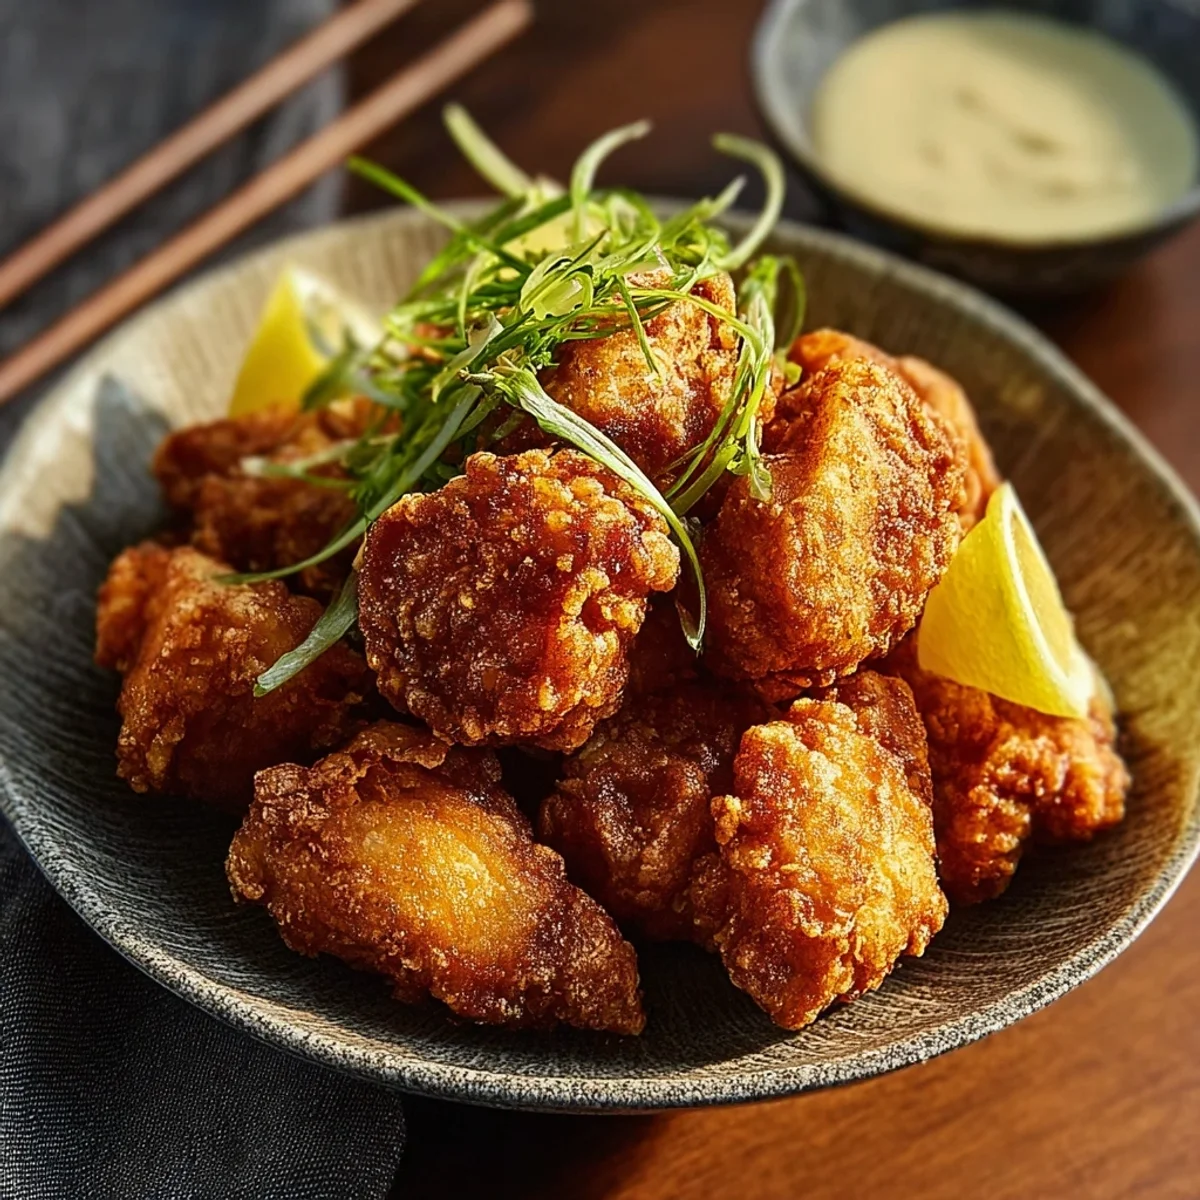


Honestly, Japanese Fried chicken Karaage has a special place in my heart. I first tried it years ago at a tiny, bustling izakaya during a trip to Tokyo, and I swear, it was love at first bite. The chicken was so impossibly juicy, with a crisp, light coating that just shattered. I remember trying to recreate it in my tiny apartment kitchen back home, complete with flour explosions and oil splatters everywhere oops! It took a few tries, and a couple of near-disasters (don't ask about the time I used too much mirin and made sweet chicken nuggets, lol), but this recipe right here? This is the one that finally nailed that authentic, comforting flavor and satisfying crunch. It just brings me back to those vibrant Tokyo nights.
I have this vivid memory of attempting Karaage chicken for a potluck once, and in my rush, I completely forgot to pat the chicken dry before marinating. The potato starch just clumped off in the oil, and I ended up with oddly-shaped, less-than-crispy chicken. It was a chaotic mess, but we all had a good laugh, and the flavor was still there, just not the texture I was hoping for! Lesson learned: patience and a dry chicken are key for the best Karaage chicken.
Japanese Fried Chicken Karaage Ingredients
- Boneless, skin-on chicken thighs: I know, I know, boneless skin-on chicken can be a pain to find sometimes, but honestly, the skin gets so crispy and protects the meat from drying out. If you can only find boneless, skinless, it'll still work, just keep an eye on it so it doesn't get dry. Thighs are key for juicy chicken, breast just doesn't get the same vibe.
- Potato starch (katakuriko): This is the secret to that ethereal, shatteringly crisp coating! Cornstarch works in a pinch, but potato starch gives it that authentic, light crunch. Don't skip it, trust me. I tried flour once, and it just wasn't the same. Too heavy!
- Soy sauce: Go for a good quality Japanese soy sauce if you can, it makes a difference. Kikkoman is my go-to. This is the salty, umami backbone of the marinade. Don't overdo it, or your chicken will be too salty learned that the hard way, oops!
- Sake (cooking sake is fine): Adds a subtle sweetness and helps tenderize the chicken. Plus, it just feels right for Japanese cooking, right? If you don't have it, a dry sherry or even a splash of white wine could work, but it won't be quite the same.
- Mirin: That sweet, tangy balance! It's crucial for the authentic Karaage chicken flavor. Don't mistake it for sake, it's much sweeter. This is where a lot of the magic happens, giving the chicken a gorgeous caramelized crust.
- Fresh ginger: Grate it fresh, hon! The pre-minced stuff just doesn't have the same zing. This adds that warm, spicy aromatic kick that makes Karaage chicken so irresistible. I always add a little extra because I just love ginger.
- Fresh garlic: Same as ginger, fresh is best! Minced finely, it infuses the chicken with a savory depth. I'm a garlic fiend, so sometimes I add an extra clove or two. My kitchen smells amazing after, even if my breath doesn't, lol.
- Neutral oil for frying (canola, vegetable, peanut): You need a high smoke point oil for this. Don't use olive oil, it'll burn and make your kitchen smell funky. I usually use canola because it's economical and does the job perfectly for that golden, crispy finish.
- Lemon wedges: A little squeeze of fresh lemon at the end just brightens everything up! It cuts through the richness of the fried chicken and adds a lovely fresh note. Honestly, it's a game-changer for serving.
- Mayonnaise (Japanese Kewpie, if possible): Okay, so this isn't in the chicken, but it's my favorite dipping sauce! Japanese mayo is richer and tangier than regular mayo, and it's fantastic with Karaage chicken. If you can find it, grab it. If not, regular mayo with a tiny squeeze of lemon and a dash of sugar will do.
Making Crispy Karaage Chicken: Instructions
- Prep the Chicken:
- First up, let's get that chicken ready! I usually grab boneless, skin-on chicken thighs because they stay so juicy. Cut them into bite-sized pieces, maybe 1.5 to 2 inches. You want them chunky enough to stay tender but small enough to cook through quickly. Pat them super dry with paper towels this is crucial for that crispy skin later, trust me. I once skipped this, and the marinade just slid right off, a total mess!
- Marinate for Flavor:
- Now for the good stuff! In a bowl, whisk together the soy sauce, sake, mirin, grated fresh ginger, and minced garlic. Seriously, grating ginger yourself makes all the difference, it's so vibrant. Toss the chicken pieces in this glorious mixture, making sure every piece is coated. Cover the bowl and let it hang out in the fridge for at least 30 minutes, or even a few hours if you've got the time. I've left it overnight before, and the flavor was just incredible. Don't rush this step, it's where the magic happens for your Karaage chicken!
- Coat for Crispiness:
- Okay, time to get messy! Take the chicken out of the marinade don't drain it, you want that juicy goodness. In a separate shallow dish, pour your potato starch. One piece at a time, dredge the chicken, pressing lightly to ensure a good, even coating. You want a thin, uniform layer, not a thick pasty one. Shake off any excess starch. I usually do this in batches so the starch doesn't get too clumpy. This is the secret to that light, airy crunch, so take your time here for the best Karaage chicken!
- Heat the Oil:
- Grab a heavy-bottomed pot or a deep skillet cast iron works wonderfully here. Pour in enough neutral oil (canola, vegetable, peanut) to come about 2-3 inches up the sides. Heat it over medium-high heat until it reaches around 340-350°F (170-175°C). If you don't have a thermometer, drop a tiny pinch of potato starch in, if it sizzles gently and floats up, you're good to go. Don't let it get too hot, or the outside will burn before the inside cooks, which is a major bummer.
- First Fry:
- Carefully, and I mean carefully, lower the Karaage chicken pieces into the hot oil, working in small batches. Don't overcrowd the pan, or the oil temperature will drop, and your chicken will be greasy, not crispy. Fry for about 2-3 minutes per side, until they're lightly golden and cooked through. They won't be super dark yet, just a lovely pale golden. Use tongs to flip them gently. Transfer these beauties to a wire rack set over a baking sheet to drain. This is the first fry, and it's all about getting that initial cook and some color.
- Second Fry for Extra Crisp:
- This is my favorite part for truly epic crispiness! Once all the chicken has had its first fry and rested for a few minutes, crank up the heat slightly on your oil to about 360-375°F (180-190°C). Carefully return the Karaage chicken to the hotter oil, again in small batches. Fry for another 1-2 minutes, or until they're a deep, gorgeous golden brown and shatteringly crisp. This second fry is where the magic happens for that incredible texture. Drain them again on a clean wire rack. Listen to that crunch seriously, it's the best sound!
There was this one time I was making Karaage chicken for a small dinner party, and my oil temperature kept dropping because I was trying to fry too many pieces at once. My kitchen was a steamy, slightly greasy mess, and the chicken wasn't getting that perfect golden hue. I had to take a deep breath, regroup, and fry in smaller batches. It took longer, but the final result was worth the extra effort and the momentary chaos.
Karaage Chicken Storage Tips
Okay, so leftover Karaage chicken? It's a thing of beauty, but you gotta store it right to keep it as good as possible. Once cooled completely, pop it into an airtight container and stash it in the fridge. It'll stay good for about 3-4 days. Now, reheating is where it gets tricky. I microwaved it once, and honestly, it turned into sad, chewy chicken so don't do that, lol. For the best crispiness, I always recommend reheating Karaage chicken in an air fryer at 350°F (175°C) for 5-7 minutes, or in an oven at 375°F (190°C) for 10-15 minutes, until it's warmed through and the coating crisps up again. It won't be quite as good as fresh, but it's still pretty darn delicious for a second round.

Karaage Chicken Ingredient Substitutions
Life happens, and sometimes you just don't have everything on hand, right? For the potato starch, cornstarch is your next best bet. It gives a similar crisp, though perhaps a tiny bit heavier. I tried all-purpose flour once, and it worked, kinda, but the coating was much denser and not that signature light Karaage chicken crisp. If you're out of sake, a dry white wine or even a splash of apple juice with a little rice vinegar can stand in, but the flavor profile will shift slightly. Mirin is a bit harder to substitute, but a pinch of sugar dissolved in water with a tiny bit of rice vinegar could approximate the sweetness and tang. Just trust your taste buds here! For the chicken, boneless skinless thighs work, but you'll lose some of that amazing crispy skin. Just adjust your cooking time so they don't dry out.
Serving Your Karaage Chicken
Oh, the possibilities! My absolute favorite way to serve Karaage chicken is with a generous squeeze of fresh lemon and a dollop of Kewpie mayonnaise for dipping. The bright citrus and creamy, tangy mayo are just a match made in heaven. For a full meal, I love pairing it with a simple bowl of steamed white rice and a fresh, crisp cabbage salad with a sesame dressing. Sometimes, I'll even make a quick cucumber sunomono (Japanese cucumber salad) on the side to cut through the richness. And a cold beer or a crisp sparkling sake? Yes please! It's perfect for a casual dinner, a fun appetizer spread, or even packed in a bento box for lunch the next day. This Karaage chicken is incredibly versatile.
The Story of Karaage Chicken
Karaage chicken, at its heart, is a beloved Japanese fried chicken dish, and it's got a pretty interesting history! While fried chicken has roots in many cultures, Karaage as we know it today really took off in Japan after World War II, when chicken became more widely available. It’s distinct from other fried chickens because of its light, crisp coating (often potato starch!) and its incredibly flavorful marinade, usually featuring soy sauce, sake, mirin, ginger, and garlic. It's not just a dish, it's a comfort food staple, a go-to for izakayas, bento boxes, and home cooking across Japan. For me, discovering Karaage chicken was like uncovering a whole new world of flavor and texture, and it quickly became one of those dishes I just had to master in my own kitchen. It embodies that perfect balance of savory, sweet, and umami that Japanese cuisine does so well.
Making Karaage chicken always fills my kitchen with such incredible smells, it's like a little trip to Japan without leaving home. After all the frying and draining, seeing those perfectly golden, crispy pieces just makes me so happy. It’s a labor of love, but one that’s so rewarding. I hope this recipe brings you as much joy and deliciousness as it does for me. Give it a try, and don't forget to share your Karaage chicken adventures with me!

Frequently Asked Questions About Karaage Chicken
- → Can I use chicken breast for Karaage chicken?
You can, but I honestly don't recommend it as much! Chicken breast tends to dry out more quickly than thighs during frying. If you do use it, cut the pieces a little smaller and be extra careful not to overcook them to keep them juicy. Thighs just have that natural tenderness.
- → What if I don't have potato starch for the Karaage chicken coating?
No worries! Cornstarch is a pretty good substitute. It gives a similar light crispiness, though sometimes it can be a tiny bit chewier. I've used it in a pinch, and it still makes for delicious Karaage chicken, just don't expect the exact same feather-light crunch.
- → My Karaage chicken isn't getting crispy, what am I doing wrong?
Ah, I've been there! Usually, it's one of two things: either your oil isn't hot enough, or you're overcrowding the pan. Make sure to use a thermometer to keep the oil at the right temperature, and fry in small batches. Also, the double-fry technique is a game-changer for ultimate crispiness!
- → How long can I marinate the Karaage chicken?
I usually go for at least 30 minutes, but honestly, the longer the better for flavor! You can marinate it for up to 24 hours in the fridge. I've left it overnight before, and the chicken just soaks up all that amazing ginger-garlic goodness, making it extra delicious.
- → Can I bake or air fry Karaage chicken instead of deep frying?
You can, but the texture won't be quite the same as traditional deep-fried Karaage chicken. For air frying, preheat to 375°F (190°C) and cook for 15-20 minutes, flipping halfway. For baking, spray with oil and bake at 400°F (200°C) for 20-25 minutes. It'll be good, but that deep-fried crunch is hard to beat!