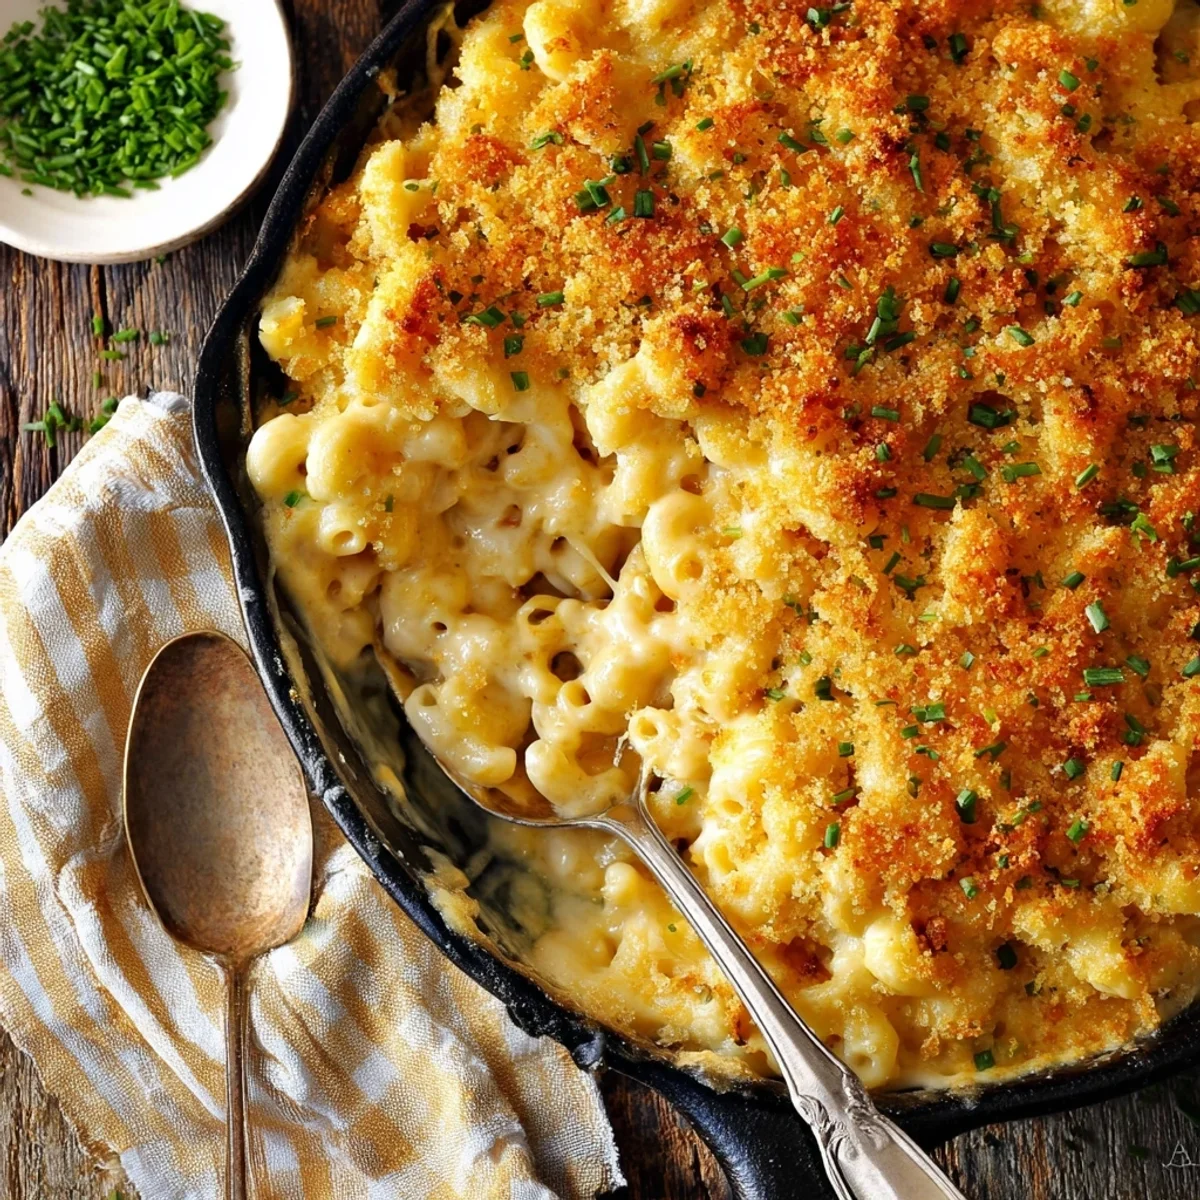


You know, some dishes just feel like home, right? For me, that’s always been a good, hearty Baked Mac and Cheese. I can still vividly remember being a kid, my grandma pulling a bubbling casserole dish from her oven, the whole house filling with that rich, cheesy aroma. Honestly, it was pure magic. I’d try to sneak a spoonful before it cooled, and she’d always playfully swat my hand away. That smell, that warmth, it’s etched in my memory. This isn't some fancy, complicated recipe, it’s the kind of comforting hug you need after a long day, simple and utterly satisfying. It's my tribute to those kitchen moments.
The first time I tried to make this Rich Baked Mac and Cheese myself, I was convinced I’d mess it up. I almost scorched the milk for the béchamel oops! There was a moment of panic, a lot of frantic whisking, and a little prayer. But hey, it still turned out! A bit lumpier than grandma's, maybe, but still delicious. That’s the beauty of this dish: it’s forgiving, and those little imperfections just add to its charm, honestly.
Ingredients for Rich Baked Mac and Cheese
- Elbow Macaroni: This is your base, the vehicle for all that cheesy goodness. I've tried other shapes, but honestly, elbows just hold onto the sauce the best. Don't skimp on salting the water, please!
- Unsalted Butter: Essential for the roux, which is the heart of our creamy sauce. Using unsalted means we control the salt later. I once used salted and, well, let's just say it was a very salty experience.
- All-Purpose Flour: Works with the butter to thicken our sauce. Don't worry if it looks like a paste at first, that's exactly what we want. Just stir constantly so it doesn't burn!
- Whole Milk: For that rich, creamy texture. Don't use skim milk, just don't. I tried once, thinking I was being "healthy," and the sauce was just... watery and sad. Learn from my mistake!
- Sharp Cheddar Cheese: The quintessential flavor for Baked Mac and Cheese! Grate your own, seriously. Pre-shredded has weird anti-caking stuff that makes it melt less smoothly.
- Gruyere Cheese: Adds a nutty, complex depth that takes this from good to wow. It melts beautifully and just makes the whole dish feel a bit more grown-up, without being snooty.
- Dijon Mustard: A secret weapon! You won't taste "mustard," but it really brightens the cheese flavor. Just a little bit makes a huge difference, I swear.
- Nutmeg: Another secret weapon! A tiny pinch warms up the whole dish and complements the cheese so perfectly. Freshly grated is always better, if you have it.
- Panko Breadcrumbs: For that glorious, crispy topping. Panko is superior here, it gets so much crunchier than regular breadcrumbs. A must for textural contrast.
- Extra Butter (for topping): Melted and mixed with the panko, this ensures a golden, irresistible crust. It's the crowning glory, honestly.
Crafting Your Creamy Baked Mac and Cheese
- Prep Your pasta:
- First things first, get your pasta cooking! Boil a big pot of water, add a generous pinch of salt I always forget this part and then kick myself later. Cook the elbow macaroni just shy of al dente, maybe a minute or two less than the package says. It's going to finish cooking in the oven, so we don't want mushy pasta. Drain it well and set it aside, don't rinse it, we want that starch to help the sauce cling!
- Make the Roux:
- Now for the magic. In a large saucepan or Dutch oven, melt the unsalted butter over medium heat. Once it's bubbly, whisk in the all-purpose flour. Keep whisking for about two minutes until it forms a pale, golden paste and smells a little nutty. This is your roux, the base for your creamy sauce. Honestly, this step feels like science, but it's super satisfying when you get it right. Don't let it brown too much!
- Build the Béchamel:
- Gradually, and I mean gradually, whisk in the whole milk. Add a little, whisk until it's smooth, then add more. This prevents lumps, which I've learned the hard way are no fun to deal with. Keep whisking until the sauce thickens and coats the back of a spoon. It should be smooth and velvety, smelling so comforting already. This is where the sauce really comes alive, feeling warm and luxurious.
- Melt the Cheese:
- Take the pan off the heat. This is important! Stir in your sharp cheddar and Gruyere cheeses a handful at a time, whisking until each batch melts completely before adding more. This keeps the sauce smooth and prevents it from seizing. Stir in the Dijon mustard, nutmeg, a good pinch of salt, and some freshly ground black pepper. Taste it! Adjust seasonings if you need to, this is your moment to shine.
- Combine and Assemble:
- Gently fold the cooked pasta into your glorious cheese sauce. Make sure every single elbow is coated in that creamy goodness. Transfer half of the pasta mixture into a lightly buttered 9x13 inch baking dish. This is where I sometimes get a little messy, cheese sauce everywhere, but it's all part of the fun, right? Spread it evenly, getting ready for the next layer.
- Top and Bake Your Baked Mac and Cheese:
- Sprinkle about half of the panko breadcrumbs over the first layer, then add the remaining pasta mixture. Top with the rest of the panko mixed with that extra melted butter. Bake in a preheated oven at 375°F (190°C) for 25-30 minutes, or until bubbling and golden brown and crispy on top. The smell is absolutely divine when it comes out! Let it rest for a few minutes before serving, if you can resist.
There's something so satisfying about pulling a hot dish of this Rich Baked Mac and Cheese from the oven. The top is golden and crackly, the cheese inside is bubbly and gooey it’s just perfection. I remember one time, my little niece saw it and exclaimed, "A cheese mountain!" That's the kind of joy this dish brings, honestly. It’s a messy, cheesy, wonderful experience every single time.
Storing Your Baked Mac and Cheese Goodness
Okay, so storing this Baked Mac and Cheese is pretty straightforward, but I’ve learned a few things the hard way. Once it’s completely cooled, transfer any leftovers to an airtight container. It’ll keep beautifully in the fridge for about 3-4 days. I microwaved it once without adding a splash of milk, and the sauce got a bit stiff and sad so don't do that lol. When reheating, I like to add a tablespoon or two of milk to the portion and gently warm it on the stovetop or in the microwave, it helps bring back that creamy texture. The breadcrumb topping might lose some of its crispness, but the flavor is still absolutely there, maybe even better the next day, honestly.

Baked Mac and Cheese Ingredient Substitutions
I’ve definitely played around with ingredient swaps for this Baked Mac and Cheese recipe, and here’s what I’ve found. For the pasta, penne or cavatappi work well if you don't have elbows, I tried rotini once and it worked... kinda, but not as well. As for the cheese, you can absolutely mix it up! A sharp white cheddar instead of yellow is lovely, or even some smoked gouda for a different vibe. I’ve swapped Gruyere for Fontina or even a bit of Parmesan, and while the flavor profile changes, it’s still delicious. Just avoid anything too soft or crumbly. For a gluten-free version, use gluten-free pasta and a GF all-purpose flour blend for the roux I've done it, and it works surprisingly well!
Serving Your Baked Mac and Cheese
This Rich Baked Mac and Cheese is a superstar on its own, but it also plays well with others. For a simple weeknight, I love serving it with a crisp green salad tossed in a vinaigrette, the tang cuts through the richness beautifully. If I'm feeling fancy, some roasted broccoli or asparagus makes a great side. And for drinks? A simple glass of iced tea, or for the adults, a crisp white wine like a Sauvignon Blanc or even a light-bodied red. This dish and a rom-com? Yes please. It’s the ultimate comfort meal for any mood, honestly.
Cultural Backstory of Baked Mac and Cheese
Baked Mac and Cheese, as we know it, has a fascinating history, evolving from European cheese and pasta dishes into the beloved American classic. Thomas Jefferson is often credited with introducing macaroni and cheese to the US after encountering pasta dishes in France. He even had a recipe! For me, it's always been tied to family gatherings and celebrations, a dish that symbolizes warmth and togetherness. It's more than just food, it's a tradition, a memory-maker. This particular version, with its simple ingredients and robust flavors, really connects me to those homestyle roots, feeling like a little piece of culinary history on my plate.
So there you have it, my go-to Rich Baked Mac and Cheese. It's not just a recipe, it's a piece of my kitchen, full of little mishaps and triumphs, and a whole lot of love. Every time I make it, I think of those happy kitchen moments, and I hope it brings a little bit of that same joy to your table too. Honestly, there's nothing quite like a bubbling dish of cheesy pasta. Give it a try, and let me know how your version turns out!

Frequently Asked Questions About Baked Mac and Cheese
- → Can I make this Baked Mac and Cheese ahead of time?
You absolutely can! I often assemble it a day before, cover it tightly, and pop it in the fridge. Just add about 10-15 minutes to the baking time to ensure it heats through. It's a total lifesaver for busy days, honestly!
- → What if my cheese sauce is lumpy?
Oh, I've been there! Usually, it means you added the milk too quickly or the cheese wasn't fully melted before adding more. You can try whisking vigorously over low heat or even using an immersion blender for a super smooth sauce. Don't stress, it'll still taste great!
- → Why does my Baked Mac and Cheese get dry?
This often happens if the pasta is overcooked before baking, or if it bakes for too long. My trick is to undercook the pasta slightly and keep an eye on it in the oven. Also, make sure your sauce is quite creamy before adding the pasta, it'll absorb some liquid during baking.
- → How do I reheat Baked Mac and Cheese leftovers?
For the best results, add a splash of milk or even a little cream to your portion before reheating. Microwave on medium power, stirring occasionally, or warm gently in a covered saucepan on the stove. It helps restore that lovely creamy texture that can get lost in the fridge.
- → Can I add meat or vegetables to this Baked Mac and Cheese?
Totally! I’ve added cooked bacon bits, shredded chicken, or even some sautéed spinach. Just stir them into the pasta and sauce mixture before baking. It’s a fantastic way to make it a more complete meal, and honestly, a great way to use up leftovers!