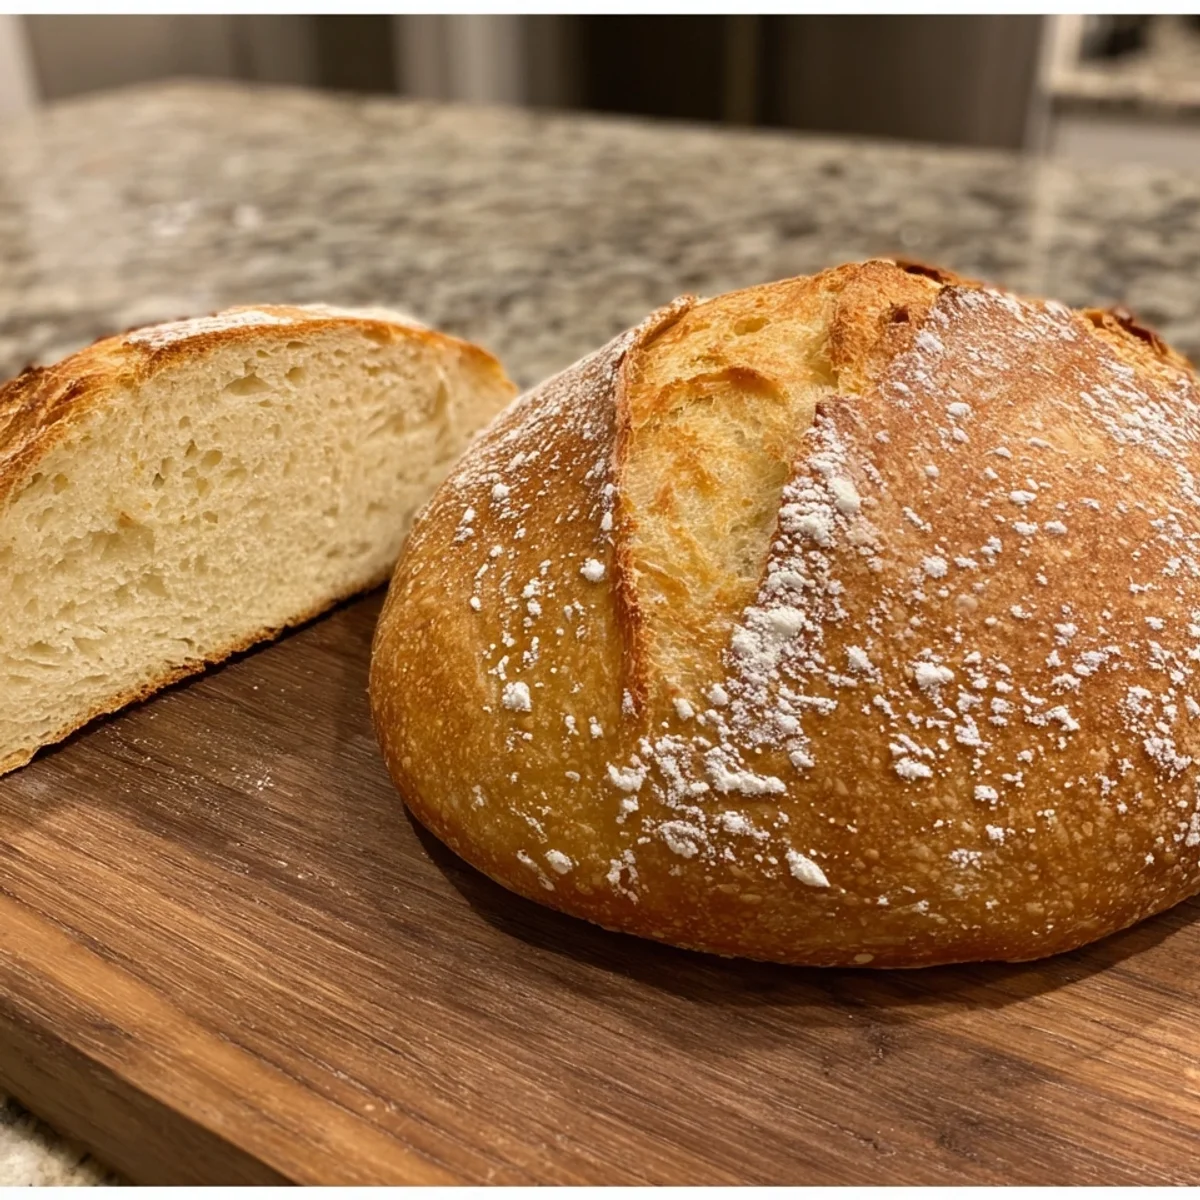


Oh, hey there, friend! Remember those days when baking bread felt like a mythical quest, full of kneading and waiting? Yeah, me too. I used to stare longingly at bakery loaves, thinking I could never achieve that crusty, airy perfection at home. Then, a few years back, I stumbled upon the magic that is No Knead Bread. It was a total game-changer, honestly. My kitchen hasn't been the same since, and yours won't be either once you try this!
My very first attempt at No Knead Bread was almost a disaster. I was so excited, but I forgot to flour my hands properly when shaping. That dough was like super glue, sticking to everything! I ended up with a rather… rustic-looking loaf, more like a giant, delicious blob. But hey, it tasted amazing, and I learned my lesson: always, always flour those hands!
Ingredients for Your Perfect No Knead Bread
- 3 cups Unbleached All-Purpose Flour: This is your bread's backbone, hon! Unbleached all-purpose flour gives our No Knead Bread that lovely chew and structure. I used to just grab whatever was cheapest, but trust me, spending a tiny bit more on unbleached makes a noticeable difference in flavor and texture. It just feels a bit more wholesome, you know? It’s the canvas for our masterpiece, allowing for that beautiful open crumb we all adore.
- 1 cup Whole Wheat Flour: Adding whole wheat flour? Oh, it’s a game-changer for this No Knead Bread! It brings a gorgeous, subtle nuttiness and a bit more depth to the flavor profile, plus a little extra fiber bonus! Don't worry, it won't make your bread heavy, it just adds a wonderful complexity. I love how it makes the crust even more rustic and inviting, giving it that artisanal feel you crave.
- 1 1/2 cups Warm Water (105-115°F): Water temperature is crucial here, my friend! Too cold, and your yeast will be sluggish, too hot, and you'll kill it oops! I once used water that was a bit too warm, and my dough barely rose. You want it like a warm bath, comforting to the touch. This warm water is what wakes up our active dry yeast, setting the stage for that glorious rise that defines a good No Knead Bread.
- 1 1/2 tsp Active Dry Yeast: Ah, the tiny but mighty hero! Active dry yeast is what gives our bread its lift, creating all those lovely air pockets. Don't skip the activation step it's like giving your yeast a little pep talk before it gets to work. I always make sure mine's fresh, old yeast is a recipe for a flat loaf, and nobody wants that! It's the magic behind the beautiful rise of this easy No Knead Bread.
- 1 1/2 tsp Fine Sea Salt: Salt isn't just for flavor, though it definitely makes our bread taste amazing! It also helps control the yeast's activity and strengthens the gluten structure. Fine sea salt dissolves beautifully and spreads evenly, giving you that consistent taste throughout. I remember forgetting salt once the bread was edible, but it tasted so bland, like something was missing, you know?
- 1 tbsp Extra Virgin Olive Oil: This little splash of olive oil does wonders! It adds a touch of richness to the dough, contributing to a softer crumb and a slightly golden crust. Plus, it makes the dough a bit more pliable, which is always nice when you're working with a sticky No Knead Bread dough. It’s like a secret ingredient that elevates the overall texture and subtle flavor of your homemade loaf.
Baking No Knead Bread: Step-by-Step Guide
- Step 1: Activate Yeast:
- First things first, let's wake up our yeast! In a big bowl, pour in your warm water (remember, bathwater temperature is key!) and sprinkle in the active dry yeast and sugar. Give it a gentle stir and let it sit for 5-10 minutes. You're looking for a foamy, bubbly top that means your yeast is happy and ready to make some amazing No Knead Bread! If it doesn't foam, your yeast might be dead, or your water was too hot/cold, so start over, sweetie.
- Step 2: Combine Dry Ingredients:
- While your yeast is doing its thing, grab another bowl and whisk together your unbleached all-purpose flour, whole wheat flour, and fine sea salt. This step might seem simple, but it ensures everything is evenly distributed, so you don't get a super salty bite here and a bland bite there. Trust me, uniform mixing makes for a much better No Knead Bread experience, giving you that perfect texture throughout.
- Step 3: Mix Dough:
- Now for the fun part! Pour your activated yeast mixture and the extra virgin olive oil into your bowl of dry ingredients. Grab a sturdy spoon or a Danish dough whisk (my personal favorite!) and mix until just combined. You're not kneading here, just bringing it all together. It'll be a shaggy, sticky mess, and that's exactly what we want for our No Knead Bread dough! Don't overmix, just get all the flour incorporated.
- Step 4: First Rise:
- Time for the magic! Drizzle that extra teaspoon of olive oil into a clean bowl, swirl it around, and plop your sticky dough in. Turn it once to coat, then cover the bowl tightly with plastic wrap or a damp towel. Let it rise at room temperature for about 1.5 to 2 hours. You want it to roughly double in size. This long, slow rise is what develops all that incredible flavor in your No Knead Bread, giving it that signature airy texture.
- Step 5: Shape Loaf & Preheat:
- Okay, this step is crucial for that perfect crust! About 30 minutes before the rise is done, place your Dutch oven (lid on!) into your cold oven and preheat to a scorching 450°F (232°C). While it's heating, gently turn your risen No Knead Bread dough onto a lightly floured surface. Fold the edges into the center a few times to create a roundish shape. Sprinkle your cornmeal into the hot Dutch oven it prevents sticking and adds crunch!
- Step 6: Bake Bread:
- Carefully, oh so carefully, transfer your shaped No Knead Bread dough into the screaming hot Dutch oven. Pop the lid back on and bake for 30 minutes. The steam trapped inside creates that amazing, crispy crust. Then, take the lid off and bake for another 15-20 minutes, or until it's deeply golden brown and sounds hollow when tapped. That deep color means flavor, trust me, it's worth it for this No Knead Bread!
Honestly, there's nothing quite like the smell of this No Knead Bread baking. It fills the whole house with such a comforting, homey aroma. Pulling that golden-brown loaf out of the Dutch oven, hearing that crackle, feeling its warmth it's pure joy. Every time, I get a little thrill, knowing I made something so beautiful and delicious with my own two hands. It's a simple pleasure, but it's a big one.
Keeping Your No Knead Bread Fresh
Once your beautiful No Knead Bread has cooled completely (seriously, wait!), you'll want to store it properly to keep it fresh. I usually keep mine at room temperature, wrapped tightly in a clean kitchen towel, then popped into a paper bag. It’ll stay lovely for 2-3 days that way. I've made the mistake of putting it in an airtight plastic bag when it was still a bit warm hello, soggy crust! If you want to keep it longer, slice it up and freeze individual slices in freezer bags. They toast up perfectly from frozen, like fresh bread all over again!

Playing Around with Your No Knead Bread Recipe
I've played around with this No Knead Bread recipe so many times! If you don't have whole wheat flour, you can totally use all unbleached all-purpose, just know it might be a bit lighter in texture. Want to get fancy? Try adding a 1/4 cup of rye flour for a darker, more complex flavor. For flavor variations, I sometimes toss in dried herbs like Italian seasoning or even some grated Parmesan cheese with the dry ingredients. You can also swap out the olive oil for another neutral oil if that's what you have on hand. It's super forgiving, so experiment away!
Delicious Ways to Enjoy Your No Knead Bread
Oh, the possibilities are endless for enjoying your freshly baked No Knead Bread! My favorite way? Sliced thick, slathered with good butter and a sprinkle of flaky sea salt simple perfection. It's also incredible alongside a hearty bowl of soup or stew, perfect for soaking up all those delicious juices. Think creamy tomato soup or a rich beef stew! And for breakfast? Toasted with some homemade jam or a fried egg on top? Pure bliss. Don't forget it makes amazing sandwiches, too. Seriously, you can't go wrong!
The Story Behind No Knead Bread
You know, the story of No Knead Bread is pretty cool. It really gained widespread popularity thanks to Jim Lahey of Sullivan Street Bakery in New York City. He introduced this revolutionary method back in the early 2000s, and it just blew up! Before that, people thought you needed hours of intense kneading to get a good loaf. His genius was showing us that time, hydration, and a hot Dutch oven could do all the heavy lifting. I mean, who knew baking could be so hands-off and still produce such incredible results? It changed home baking for so many of us, myself included!
Alright, my friend, that's it! You're armed with everything you need to bake the most incredible, easy No Knead Bread right in your own kitchen. There's truly nothing quite like the pride of pulling a perfect loaf from your oven. I hope you love this recipe as much as I do. Give it a try, snap a picture, and let me know how it goes in the comments below! Happy baking, you got this!

Common Questions About No Knead Bread
- Can I use cold water instead of warm water?
You can, but I don't recommend it for this active dry yeast recipe! Warm water (around 105-115°F) is crucial for activating the yeast quickly and getting a good rise. Cold water will make your yeast sluggish, and your dough might not rise properly, leading to a denser loaf. Trust me, a little warmth goes a long way here!
- Do I really need a Dutch oven for No Knead Bread?
Honestly, a Dutch oven is the secret weapon for this No Knead Bread! It creates a steamy environment that mimics a professional bakery oven, giving you that amazing, crispy crust and soft interior. You can try a heavy-bottomed pot with a tight-fitting lid, but the results might not be quite as spectacular. If you bake bread often, it's worth the investment!
- My dough isn't rising, what went wrong?
Oh no, that's a bummer! Usually, this means your yeast wasn't active. It could be old yeast (check the expiration date!), or your water was either too hot (killing the yeast) or too cold (not activating it). Make sure your water is just warm to the touch, like a baby's bath. Also, ensure your kitchen isn't super chilly during the rise time. Give it another shot!
- Can I add seeds or nuts to this recipe?
Absolutely, go for it! I love adding things to my No Knead Bread. You can mix in about 1/2 cup of seeds like sunflower, pumpkin, or flax seeds, or even some chopped walnuts or pecans, when you're combining the dry ingredients. Just remember that adding too much can affect the rise, so don't go overboard on your first try. Happy experimenting!
- How do I get an extra crispy crust?
To get an extra crispy crust on your No Knead Bread, make sure your Dutch oven is screaming hot before you put the dough in that 450°F is key! Also, don't remove the lid too early during baking. The steam trapped inside is what creates that initial crust. For even more crispness, you can bake the bread without the lid for an extra 5-10 minutes, keeping a close eye on it so it doesn't burn.