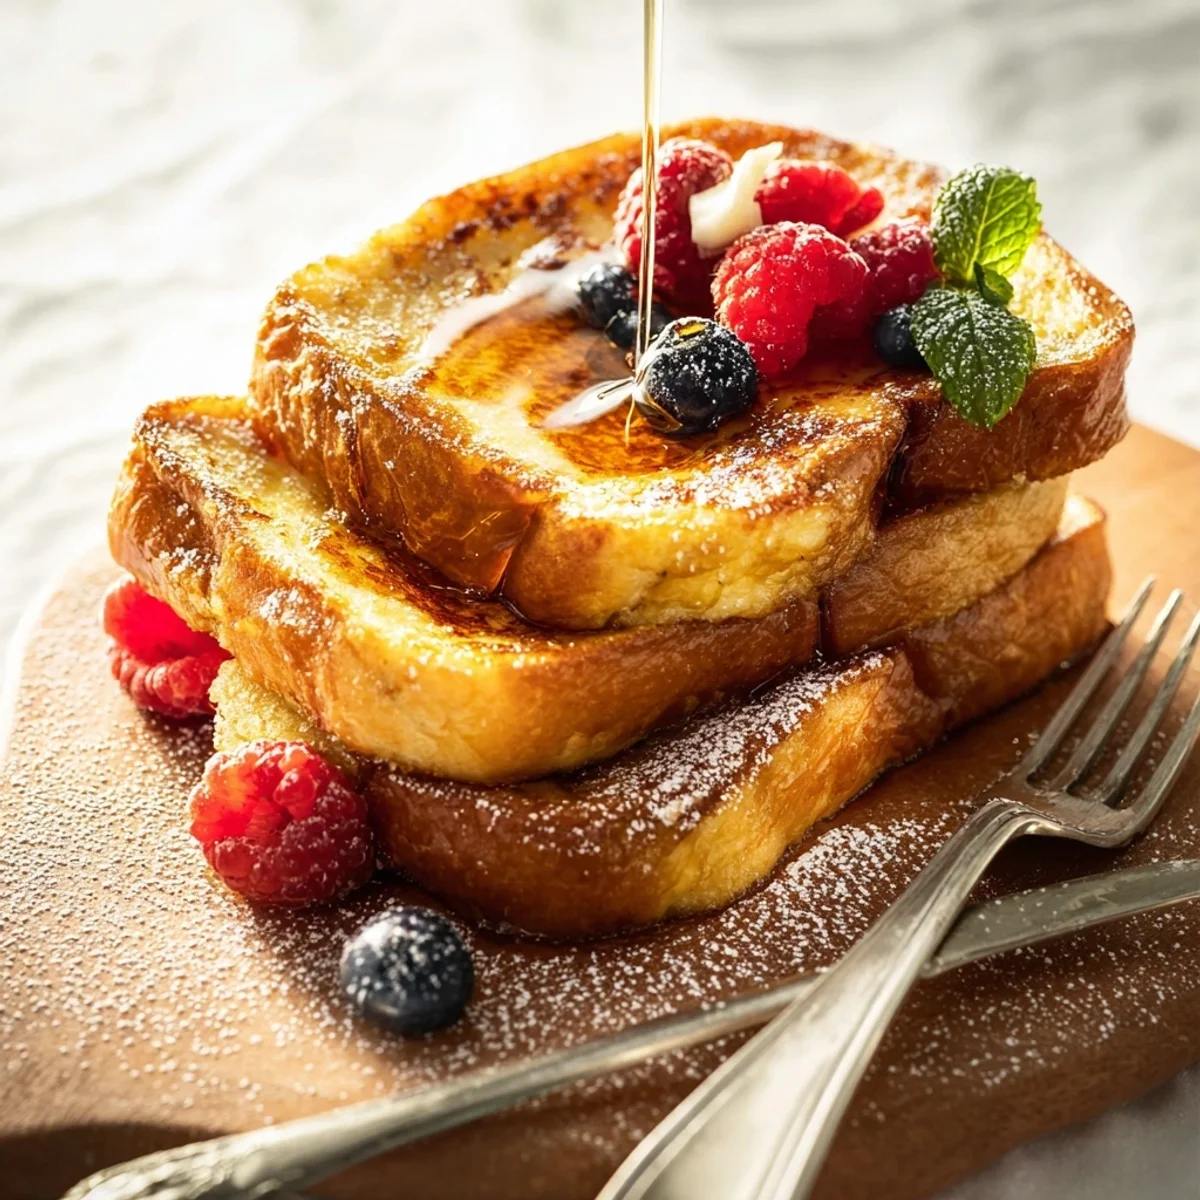


Honestly, some of my fondest childhood memories involve the scent of vanilla and cinnamon wafting through our kitchen on a Saturday morning. That's when Mom would whip up her rendition of Classic French Toast. It wasn't fancy, no chef hats or anything, just thick slices of bread, soaking up all that eggy goodness. I remember trying to help, usually just making a huge mess with the batter, but she’d just laugh. That simple smell, that feeling of warmth and comfort, stuck with me. This dish, this simple Classic French Toast, isn't just food, it's a hug, a memory, a start to a perfect slow day. It's special because it tastes like home, like ease, like pure morning joy.
Oh, the chaos! Just last month, I was making a big batch of Classic French Toast for a brunch gathering. I got distracted chatting, and totally forgot to preheat the griddle. So, I dipped all the bread, laid it out, and then... nothing. Just cold, soggy bread sitting on a cold pan. Oops! Had to scrape it all off, clean the pan, and start again. My friends had a good laugh, and I learned my lesson: focus on the task, even when you're having fun. But hey, the second batch? Flawless.
Homestyle Classic French Toast Ingredients
- Thick-Cut Bread (Brioche or Challah): This is your canvas, hon! Don't skimp here. Brioche or challah gives you that dreamy, custardy interior without falling apart. I once tried regular sandwich bread, and it turned into a sad, soggy mess. Just don't.
- Large Eggs: The binder, the magic! These are what make your Classic French Toast rich and golden. I’ve tried using fewer eggs to be 'healthier,' but the texture suffered. Stick with the large ones for the best results.
- Whole Milk (or Half-and-Half): Fat equals flavor, my friend. Whole milk gives that luxurious richness. Skim milk? Honestly, it’s just not the same. If you're feeling extra fancy, half-and-half makes it unbelievably decadent.
- Vanilla Extract: A non-negotiable! This is where so much of that comforting aroma comes from. Use good quality stuff, it really makes a difference. I once ran out and used imitation never again, the taste was just off.
- Ground Cinnamon: That warm, spicy hug! A generous dash is essential for that classic taste. I sometimes add a bit more than the recipe calls for because I just love that cozy smell.
- Pinch of Nutmeg: This little secret ingredient just elevates the whole thing. It adds a subtle depth that makes people wonder what your secret is. Don’t tell them it’s just a tiny bit of nutmeg!
- Unsalted butter: For cooking! Real butter is key for that golden, slightly crispy crust. It also adds a lovely flavor that oil just can't replicate.
- Maple Syrup, Fresh Berries, Powdered Sugar: The finishing touches! Pure maple syrup, always. Fresh berries add a pop of brightness, and a dusting of powdered sugar just makes it look so pretty.
Crafting Your Classic French Toast: Instructions
- Whisk the Custard:
- Grab a wide, shallow dish one big enough to dunk your bread slices comfortably. Into this, crack your eggs, pour in the whole milk, vanilla extract, ground cinnamon, and that tiny pinch of nutmeg. Whisk it all together until it’s smooth and well combined. You want to see those little flecks of cinnamon swirling around. Don't over-whisk, but make sure there are no stringy bits of egg yolk left. This is the base for your perfect Classic French Toast, so take your time here!
- Soak the Bread:
- Now for the fun part! Take your thick-cut bread slices and gently place them into the custard mixture, one at a time. Let each side soak for about 15-20 seconds. This is where I sometimes get impatient and pull it out too soon, resulting in a less custardy interior. You want the bread to absorb a good amount of the liquid, but not become completely waterlogged. It should feel heavy but still hold its shape. This soak time is crucial for truly delicious Classic French Toast.
- Heat the Pan:
- Place a large non-stick skillet or griddle over medium heat. Once it’s warm, add a pat of unsalted butter and let it melt, swirling to coat the pan. You want it shimmering, but not smoking. If it starts to smoke, your heat is too high, and you'll burn the butter and your Classic French Toast! The kitchen should start to smell amazing right about now that butter melting, oh yes!
- Cook to Golden Perfection:
- Carefully transfer your soaked bread slices to the hot, buttered pan. Don't overcrowd the pan, give each slice some space to breathe and cook evenly. Let them cook for about 2-4 minutes per side, until they're beautifully golden brown and slightly crispy. What you're aiming for is that lovely caramelization. I once tried to rush this step and ended up with pale, undercooked French Toast not ideal!
- Flip and Finish:
- Using a spatula, gently flip each slice of Classic French Toast to the other side. Cook for another 2-4 minutes, or until that side is also golden brown and cooked through. You'll see the edges firming up, and the center looking puffy. The kitchen will be filled with the most incredible smells of cinnamon, vanilla, and butter it’s just the best! You’ll know they’re done when they have that satisfying spring when you press them gently.
- Serve Warm & Garnish:
- As each batch of Classic French Toast finishes cooking, transfer it to a plate. If you’re making a larger quantity, you can keep them warm in a low oven (around 200°F) while you finish the rest. Serve immediately with a generous drizzle of pure maple syrup, a sprinkle of fresh berries, and a dusting of powdered sugar. This is where you make it truly yours! Enjoy your delicious Classic French Toast!
Making Classic French Toast always feels like a little victory in my kitchen. There was one time, I was trying to get fancy with a sourdough loaf, and it just didn't absorb the batter right. Total mess! But even then, the bits that did work were still pretty good. It’s all about learning, right? This recipe, though, this is the one that brings me back to those easy, happy mornings. It’s comforting in a way few other breakfasts are.
Storing Classic French Toast Leftovers
Okay, so you made a big batch of Classic French Toast and have some leftovers? Lucky you! Once completely cooled, you can pop them into an airtight container. I usually layer them with parchment paper to prevent sticking, which I learned the hard way after pulling apart a sad, sticky stack once. They'll keep in the fridge for about 2-3 days. Reheating is best done in a toaster, toaster oven, or even a dry skillet to get that lovely crispy exterior back. I microwaved it once, and the texture was just... soft and a bit rubbery. So don't do that, lol. It loses a bit of its fresh-off-the-pan charm, but it's still a pretty delicious breakfast on the go, especially for busy mornings!

Classic French Toast: Ingredient Swaps I've Tried
I've definitely experimented with this Classic French Toast recipe over the years, sometimes out of necessity, sometimes just for fun! For bread, while brioche or challah are my absolute favorites, a good quality Texas toast or even day-old artisan sourdough can work. I tried regular sliced white bread once, and it just didn't hold up, so skip that. If you're out of whole milk, almond milk or oat milk can be decent substitutes, though they'll give a slightly less rich flavor I've found oat milk works best for creaminess. No vanilla? A splash of rum extract or even a tiny bit of orange zest can add a different, but still lovely, flavor profile. I once used pumpkin pie spice instead of just cinnamon for a fall twist, and it was surprisingly good! You can totally make this Classic French Toast your own.
Serving Your Classic French Toast Creation
Honestly, the serving possibilities for Classic French Toast are endless! My absolute favorite way is with pure maple syrup, a generous pile of fresh berries (strawberries, blueberries, raspberries mix 'em up!), and a light dusting of powdered sugar. For a more decadent treat, a dollop of whipped cream or even a scoop of vanilla ice cream isn't out of the question (don't judge, it's delicious!). Sometimes I'll add a side of crispy bacon or sausage for that perfect sweet and savory balance. And for drinks? A strong cup of coffee or a tall glass of freshly squeezed orange juice just completes the whole breakfast vibe. This dish and a good book on a quiet morning? Yes please!
The Humble Beginnings of Classic French Toast
You know, it's funny how a dish becomes so ingrained in our culture. While we call it 'French' toast, its origins are actually a bit murky, with similar recipes appearing across Europe for centuries, often as a way to use up stale bread. The Romans even had a version! It was a clever way to prevent food waste, transforming old bread into something delicious and comforting. My personal connection to Classic French Toast started not with history books, but with my mom's kitchen, where it wasn't about fancy origins, but about simple, honest food made with love. It's a testament to how adaptable and universally loved this dish truly is, transcending time and borders to become a breakfast staple in so many homes, including mine.
So there you have it, my take on a truly Classic French Toast. It's more than just eggs and bread, it’s a little bit of comfort, a dash of nostalgia, and a whole lot of love baked into every golden slice. I hope you give this a try and find your own happy memories in its warmth. Don't worry if it's not perfect on the first go mine rarely are! Just enjoy the process, and then, of course, the eating. Share your Classic French Toast moments with me!

Frequently Asked Questions About Classic French Toast
- → Can I make Classic French Toast ahead of time?
You can definitely prep the batter the night before and keep it in the fridge! For cooked Classic French Toast, I usually make it fresh, but leftovers reheat well. I tried making a whole batch ahead once, and it just wasn't as good.
- → What's the best bread for Classic French Toast?
Honestly, brioche or challah are the champions for Classic French Toast. They're rich and sturdy enough to soak up the custard without falling apart. I once used regular sandwich bread, and it was a soggy disaster!
- → Why is my Classic French Toast soggy in the middle?
That usually means your heat was too high, cooking the outside too fast, or you soaked the bread for too long. Keep the pan on medium and don't rush the cooking for perfect Classic French Toast!
- → How do I store leftover Classic French Toast?
Once cooled, store your Classic French Toast in an airtight container in the fridge for 2-3 days. Reheat in a toaster or oven for the best texture. I learned the hard way that microwaving makes it rubbery, so avoid that!
- → Can I make Classic French Toast dairy-free?
Absolutely! I've had success swapping whole milk for oat milk or almond milk in my Classic French Toast batter. Just make sure your bread is also dairy-free if that's a concern!