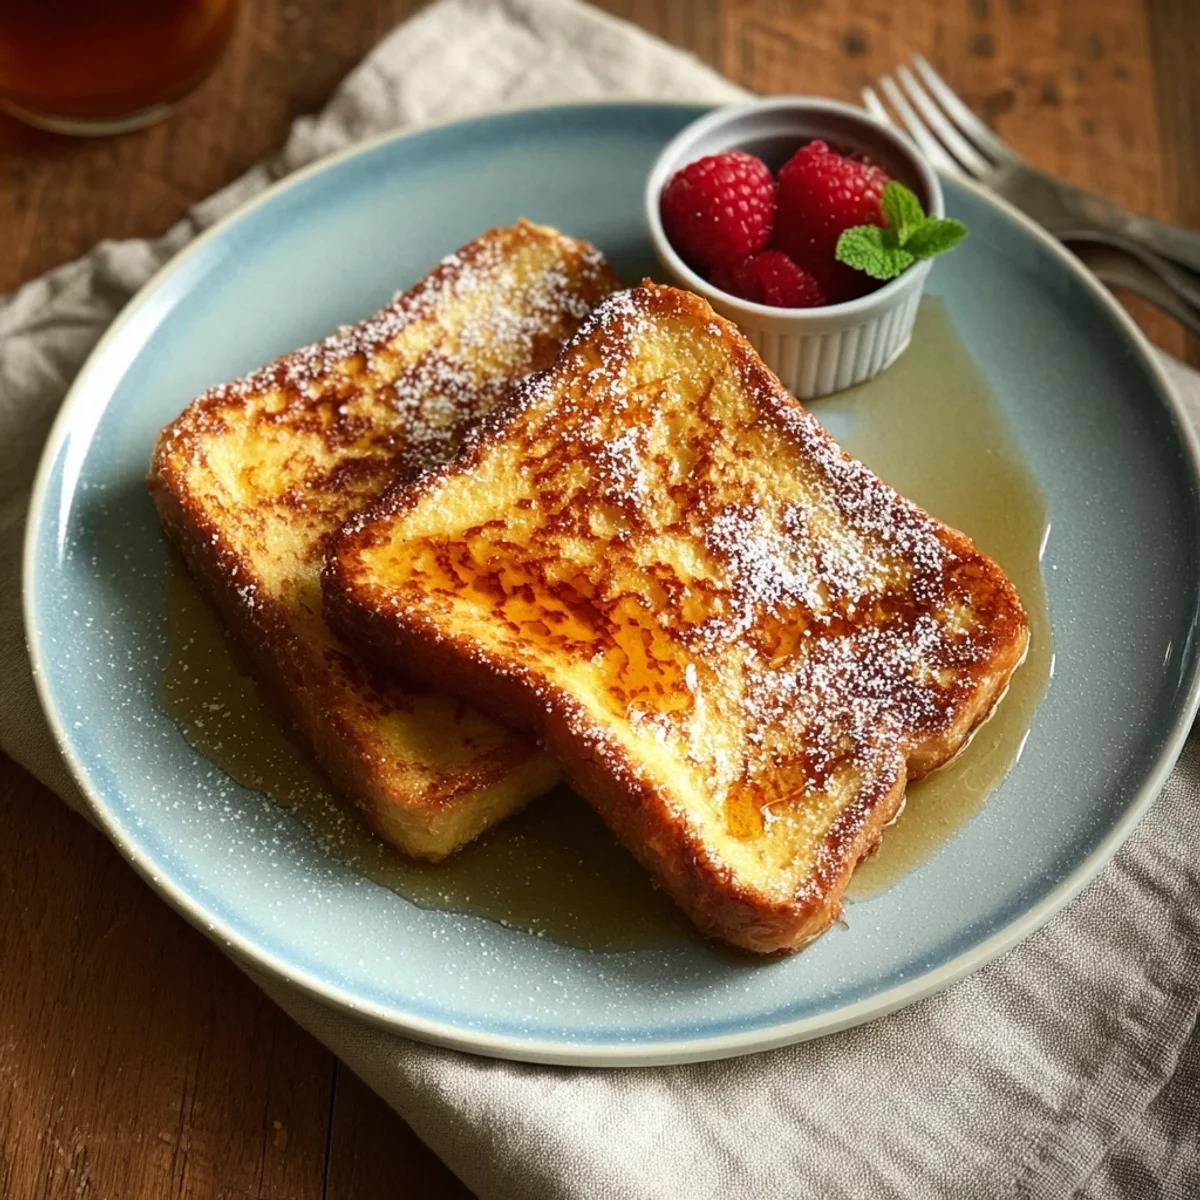


Honestly, French toast used to feel like a fancy restaurant thing to me, something you only got on special occasions. I remember one lazy Saturday morning, probably still in my pajamas, staring at a loaf of slightly stale bread, wondering what to do with it. My fridge was looking pretty sparse, but I had eggs, milk, and a little vanilla. I thought, "What's the worst that can happen?" And just like that, my love affair with this simple, soul-hugging dish began. The smell of cinnamon and vanilla hitting the hot pan? Pure magic, even if my first few attempts were, let's just say, a bit... soggy. But hey, we all start somewhere, right?
I once got so excited making this Easy French Toast that I totally forgot to add the vanilla extract. The result? Edible, sure, but it lacked that certain je ne sais quoi. My husband, bless his heart, politely asked if I was "experimenting with a new savory French toast." Oops! Lesson learned: don't skip the flavor boosters, even when you're half-asleep and craving breakfast.
Easy French Toast: What You'll Need
- Stale Bread (Brioche or Challah): Okay, hear me out slightly stale bread is your secret weapon. It soaks up all that custardy goodness without turning into a mushy mess. Fresh bread just doesn't hit the same, honestly.
- Large Eggs: These are the binding magic! Don't skimp. I usually grab large, free-range ones because they just seem to make everything richer.
- Whole Milk: Please, for the love of all that is delicious, do not use skim milk. Just don't. Whole milk gives you that creamy, dreamy texture. I tried almond milk once, and it worked... kinda, but it wasn't the same.
- Granulated Sugar: Just a touch to sweeten the batter. You'll add more sweetness with syrup later, but this gives it a nice base.
- Vanilla Extract: My favorite part! This is where the magic happens. I'm a bit heavy-handed with vanilla, honestly. Pure vanilla extract makes a huge difference, not the imitation stuff.
- Ground Cinnamon: The warm, cozy spice that makes French toast, well, French toast! I like a generous sprinkle, but you do you.
- Unsalted butter: For cooking! It gives the bread those beautiful golden-brown edges and a rich flavor. Don't use olive oil, it's just not the same vibe.
Crafting Your Easy French Toast
- Whisking the Custard:
- First things first, grab a shallow dish a pie plate or a baking dish works perfectly for this. Crack your eggs into it. Now, pour in that lovely whole milk, add your sugar, a good splash of vanilla extract (don't forget it like I did!), and a generous dusting of cinnamon. Whisk it all together until it's smooth and slightly frothy. You want to see those little flecks of cinnamon swirling around, making it smell absolutely divine already.
- Soaking the Bread:
- This is where the magic really starts for your Easy French Toast. Take your slices of bread, one by one, and gently place them into the egg mixture. Let them soak for about 20-30 seconds per side. The goal is for the bread to absorb the custard, but not get totally waterlogged. I once left a slice in too long while distracted by my phone, and it basically disintegrated when I tried to pick it up. Oops! Don't make my mistake, be present with your bread!
- Heating the Pan:
- Place a large non-stick skillet or griddle over medium heat. Drop in a pat of unsalted butter. Let it melt and swirl around until it coats the bottom of the pan and starts to foam slightly. You'll smell that nutty aroma, which is your cue that it's ready for some French toast action. Don't let the butter burn, though, or your toast will taste bitter a mistake I've made more times than I care to admit!
- Cooking to Golden Perfection:
- Carefully transfer your soaked bread slices to the hot, buttered pan. Don't overcrowd the pan, give each slice some breathing room. Cook for about 2-4 minutes per side, until they're beautifully golden brown and the center looks set, not gooey. You want that satisfying sizzle when they hit the pan. The kitchen will start to smell incredible, like a fancy brunch spot!
- Repeat the Process:
- As each batch of Easy French Toast finishes cooking, transfer it to a plate. If you're making a big batch for a crowd, you can keep the cooked slices warm on a baking sheet in a low oven (around 200°F/95°C) while you finish the rest. Add more butter to the pan as needed between batches. It’s a little messy, but totally worth it for consistently delicious results.
- Serve and Enjoy!:
- Once all your Easy French Toast slices are cooked, it’s time for the fun part! Pile them high on a platter. Dust them with powdered sugar, drizzle with warm maple syrup, and add your favorite toppings. From my experience, a little fresh fruit or a dollop of whipped cream elevates it from a simple breakfast to a special occasion. Take a moment to admire your handiwork before digging in!
There was one morning I was trying to cook French toast for what felt like an army of hungry teenagers. The kitchen was pure chaos, flour on the counter, syrup drips everywhere. But seeing their happy faces, covered in powdered sugar, made every messy moment worth it. That's the real joy of making Easy French Toast at home, isn't it?
Storing Your Easy French Toast
So, you've made a big batch of Easy French Toast and have leftovers? Lucky you! I usually let any cooked slices cool completely before storing them. If you stack them while warm, they'll get soggy, and nobody wants that. I learned that the hard way when I tried to pack warm slices for a picnic a total disaster, lol. Wrap them tightly in plastic wrap or store them in an airtight container in the fridge for up to 2-3 days. For longer storage, flash freeze individual slices on a baking sheet until solid, then transfer them to a freezer-safe bag. They'll keep for about a month. Reheat gently in a toaster, toaster oven, or even a dry skillet to bring back some of that crispy edge. Microwaving works in a pinch, but it can make them a bit chewy, so just be aware!

Easy French Toast Ingredient Swaps
I'm all about using what you have, so I've definitely experimented with substitutions! If you don't have brioche or challah, a good quality white bread, Texas toast, or even sourdough can work for your Easy French Toast, though the texture will be a bit different. Sourdough gives it a nice tang, which I tried once, and it worked... kinda, but it needed extra sweetness. For the milk, you can use half-and-half for an even richer custard, or a plant-based milk like oat milk if you're dairy-free, but be mindful that the flavor and richness will change. If you're out of vanilla, a pinch of nutmeg or cardamom can add a lovely warmth. And if you don't have cinnamon, a pumpkin pie spice blend works wonders! Just be brave and try things, that's what cooking is all about.
Serving Up Your Easy French Toast
This Easy French Toast is fantastic on its own, but it really shines with a few thoughtful additions. My absolute favorite way to serve it is with a generous drizzle of warm maple syrup (the real stuff, please!) and a dusting of powdered sugar. For a fresh touch, add some sliced berries strawberries, blueberries, or raspberries are perfect. A dollop of whipped cream or a scoop of vanilla ice cream turns it into a decadent dessert, which, honestly, sometimes happens for dinner. Pair it with a strong cup of coffee or a mimosa for a truly brunch-worthy experience. This dish and a lazy Sunday morning playlist? Yes please! It’s versatile enough for a quiet solo breakfast or a bustling family gathering.
The Story Behind Easy French Toast
While we call it "French" toast, its origins are actually a bit murky and go way back to Roman times, believe it or not! It was a clever way to use up stale bread, soaking it in milk and eggs before frying. The French themselves call it "pain perdu," which means "lost bread," a nod to rescuing those forgotten loaves. My own connection to it isn't ancient, but it's deeply personal. It reminds me of my grandmother, who would always make a simple version for us when we visited, telling stories as she flipped each golden slice. It was her way of showing love, and now, when I make this Easy French Toast, I feel that same warmth and connection, bringing a little piece of her kitchen into mine. It’s more than just a recipe, it’s a taste of history and family.
So there you have it, my take on Easy French Toast. It's not just food, it's memories, it's comfort, it's a little bit of kitchen chaos, and a whole lot of love. Every time I make it, I think of those early mornings, the mistakes, and the eventual triumph of a perfectly golden slice. I hope it brings as much warmth to your kitchen as it does to mine. Don't be shy, share your French toast adventures with me!

Frequently Asked Questions
- → Can I make Easy French Toast ahead?
You totally can! I often make the batter the night before and store it in the fridge. In the morning, just give it a quick whisk and you're good to go. It saves so much time when you're craving something delicious but still half-asleep!
- → What kind of bread is best for Easy French Toast?
Honestly, brioche or challah are my top picks because they're rich and soak up the custard beautifully. But don't stress if you don't have them! A slightly stale, thick-cut white bread works wonderfully too. I once tried a thin sandwich bread, and it just got too soggy, so go for something substantial!
- → Why does my Easy French Toast turn out soggy?
Ah, the soggy dilemma! I've been there. Usually, it's from soaking the bread too long or not having the pan hot enough. Make sure your pan is at a good medium heat and only soak each side for about 20-30 seconds. You want it moist, not drenched!
- → How do I reheat leftover Easy French Toast?
My favorite way to reheat Easy French Toast is in a toaster or toaster oven for a few minutes until it's warmed through and slightly crispy again. The microwave works but can make it a bit soft. I've even popped it in a dry skillet for a quick refresh!
- → Can I add fruit to the Easy French Toast batter?
You can, but I usually add fruit as a topping! If you want to incorporate it into the batter, finely diced berries or shredded apple could work, but be careful not to make the batter too chunky. I tried blueberries once, and they burst a bit too much in the pan, so I stick to fresh on top now!