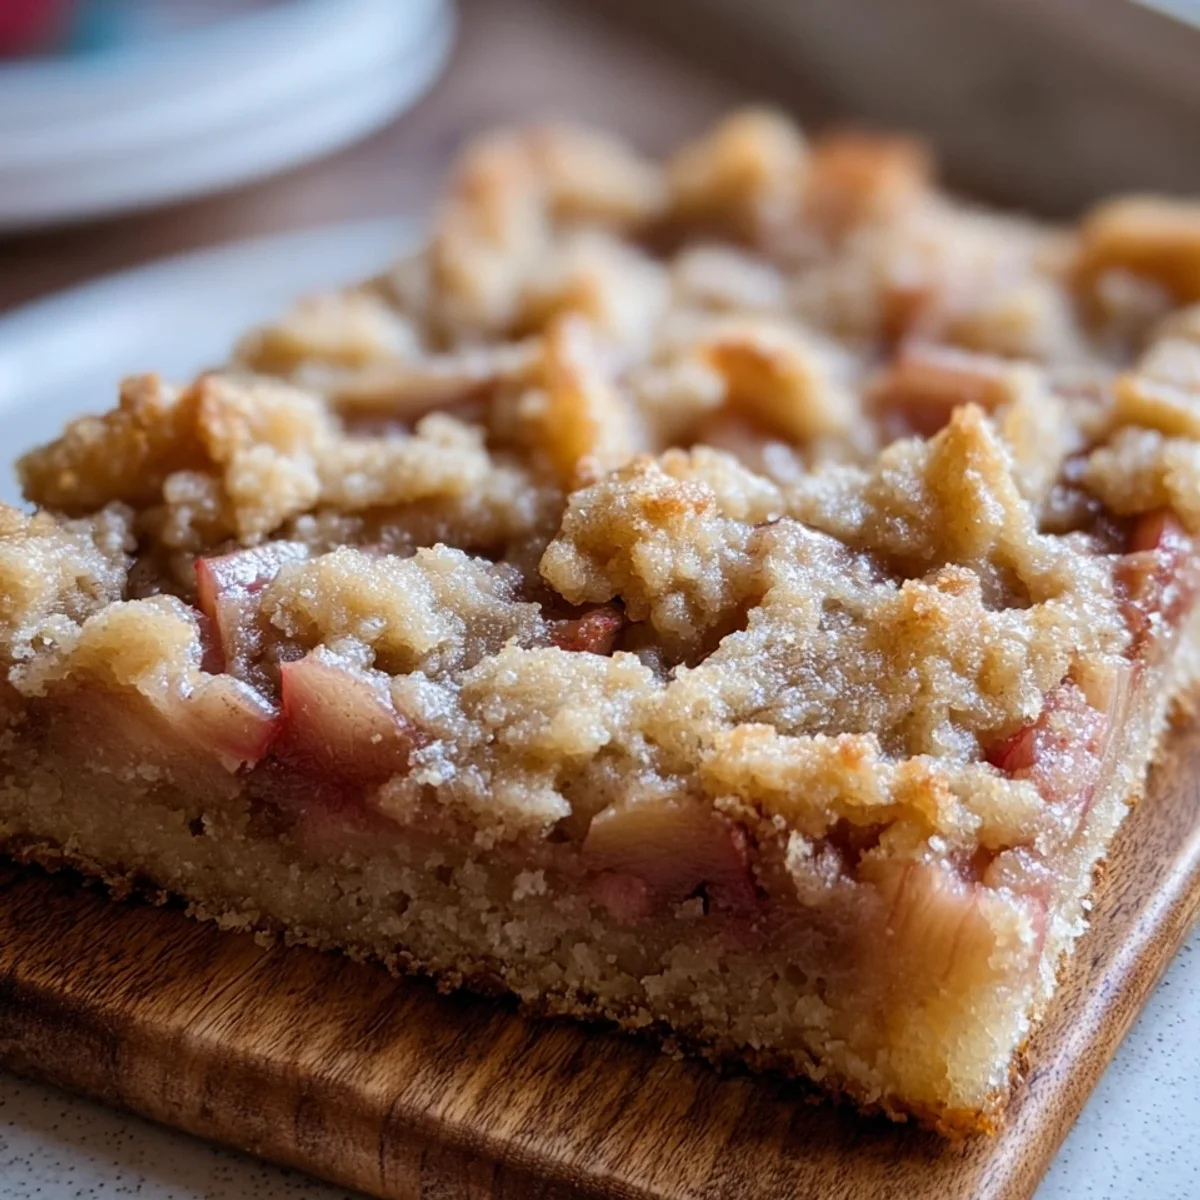


Oh, honey, let me tell you about these Rhubarb Bars! My grandma used to make something similar, but it was always a bit of a mystery. Then one spring, I got a huge haul of rhubarb from a friend's garden like, a mountain of it. I knew I had to do something beyond pie, something snackable. After a few (okay, maybe more than a few) attempts, I landed on this recipe. It's the taste of early summer, sunshine, and pure comfort, all wrapped up in a buttery, tart-sweet package. You're going to adore them.
Okay, so the first time I made these Rhubarb Bars, I was feeling super confident. I pulled them out of the oven, they looked golden and gorgeous. I let them cool for, like, five minutes (impatient, much?). Went to cut them, and oops! The filling was still a bit too jiggly, and they kinda slumped. Lesson learned: patience is a virtue, especially when it comes to cooling your Rhubarb Bars properly. Don't be me!
Ingredients for Amazing Rhubarb Bars
- 2 1/2 cups all-purpose flour: This is the backbone of our buttery crust, the unsung hero! You want all-purpose flour for that perfect tender-crisp texture. I've tried whole wheat once, thinking 'healthier!', and honestly, it just made the crust a bit too dense. Stick with the classic for that melt-in-your-mouth experience. It really makes all the difference in the finished bar.
- 1 cup granulated sugar (for crust): Sugar in the crust isn't just for sweetness, it's also for tenderness and that lovely golden color! This amount gives us a perfectly balanced base for our Rhubarb Bars, not too sweet, letting the fruit shine. Don't skimp, but don't add more either, or you might end up with a crumbly mess. It's all about balance, right?
- 1 cup (2 sticks) unsalted butter, cold and cubed: Ah, butter! The heart and soul of that incredible shortbread crust. Cold butter is key here, hon. It creates those flaky pockets when it melts in the oven, giving us that irresistible texture. I once used softened butter in a pinch, and the crust was dense and sad. Never again! Cold and cubed, that's the secret for the best Rhubarb Bars.
- 6 cups fresh rhubarb, chopped into 1/2-inch pieces: The star of the show! Fresh rhubarb, tart and vibrant, is what makes these bars sing. Chopping it into 1/2-inch pieces ensures it cooks down beautifully and distributes evenly in every bite. I've used frozen once thawed and drained and it worked, but fresh just has that extra zing. Don't be shy with the quantity, rhubarb shrinks a lot!
- 1 1/2 cups granulated sugar (for filling): This sugar is here to tame the rhubarb's tartness, creating that perfect sweet-tart harmony. Rhubarb can be really sour, so don't be alarmed by the amount! It's balanced by the sheer volume of fruit. I once tried to cut back too much and, oh boy, it was a pucker-fest. This ratio is what makes these bars so addictive.
- 1/4 cup cornstarch: Our trusty thickening agent! Cornstarch is crucial for getting that lovely, set filling that holds its shape when you slice the bars. Without it, you'd have a soupy disaster, trust me, I've been there! It helps the filling become jammy and delicious without being gummy. It's the quiet MVP of the filling, really.
Baking Rhubarb Bars: Your Step-by-Step Guide
- Step 1: Preheat Oven, Prep Pan:
- First things first, get that oven nice and toasty to 375°F (190°C). While it's heating up, grab a 9x13-inch baking pan. Line it with parchment paper, leaving an overhang on the sides. This is a game-changer, honestly! It makes lifting your glorious Rhubarb Bars out of the pan a breeze later on. A little spray of non-stick under the parchment helps too. Trust me, future you will thank you when it's time to slice those beautiful Rhubarb Bars.
- Step 2: Mix Crust Ingredients:
- Now for the buttery magic! In a large bowl, whisk together your flour, 1 cup sugar, and salt. Then, scatter in those cold, cubed butter pieces. Grab a pastry blender or, my preferred method, your clean fingertips, and cut the butter into the flour mixture. You're looking for coarse crumbs, like wet sand, with some pea-sized pieces of butter still visible. Don't overmix, we want a tender crust for our Rhubarb Bars!
- Step 3: Press Crust into Pan:
- Take about two-thirds of that crumbly crust mixture and press it evenly into the bottom of your prepared 9x13-inch pan. Use the bottom of a flat glass or your knuckles to get it really compact and even. This forms the sturdy, buttery foundation for our amazing Rhubarb Bars. Make sure it's snug into the corners! The remaining one-third? That's for the glorious crumb topping, so set it aside.
- Step 4: Combine Rhubarb Filling:
- Time for the star of the show! In another large bowl, gently toss together your chopped rhubarb, 1 1/2 cups sugar, cornstarch, fresh lemon juice, vanilla extract, and a pinch of salt. The sugar will start to draw out the rhubarb's juices, and the cornstarch will work its magic to thicken it during baking. That lemon juice really brightens everything up. This filling is what makes these Rhubarb Bars sing!
- Step 5: Assemble Bars, Add Topping:
- Carefully spoon that vibrant rhubarb mixture evenly over the pressed crust in your pan. Try to get it as level as possible. Then, take the reserved one-third of the crust mixture and crumble it artfully over the rhubarb filling. Don't press it down this time, we want a loose, crumbly topping that gets beautifully golden and crispy. This lovely crumb layer is the crown jewel of our Rhubarb Bars.
- Step 6: Bake Rhubarb Bars:
- Pop that pan into your preheated oven! Bake for about 50-60 minutes. You'll know your Rhubarb Bars are ready when the topping is golden brown and the filling is bubbly and looks set. If it starts to brown too quickly, you can loosely tent it with foil. My oven runs a little hot, so I usually check at 45 minutes. That warm, sweet-tart smell filling your kitchen? Oh, it's the best!
Honestly, baking these bars is one of my favorite kitchen rituals. There's something so satisfying about seeing that vibrant rhubarb transform into a bubbling, jammy filling, all nestled under a golden crumb. The smell that fills my home? Pure comfort. It’s a simple joy, really, and it reminds me why I fell in love with home baking in the first place.
Keep Your Rhubarb Bars Fresh: Storage Secrets
So, you've made a batch of these glorious Rhubarb Bars! Now, how to keep them fresh? Once they're completely cooled (seriously, don't put warm bars in a container, that's a mistake I've made resulting in soggy tops!), store them in an airtight container at room temperature for up to 2-3 days. If you want them to last longer, pop them in the fridge, where they'll be good for about a week. I've also frozen individual bars wrapped tightly in plastic wrap and then foil, they thaw beautifully! Just pull one out when a craving hits. Don't just leave them on a plate, they'll dry out so fast, and nobody wants a sad, stale bar!

Swapping Ingredients in Your Rhubarb Bars
Feeling adventurous or missing an ingredient? I've played around with a few swaps for these Rhubarb Bars. If you don't have fresh rhubarb, thawed frozen rhubarb works, just make sure to drain it really well to avoid a watery filling. For the crust, I've tried half whole wheat flour, but it makes it a bit denser, stick to all-purpose if you can. As for the lemon juice, a splash of orange juice could work for a slightly different citrus note, but lemon really highlights the rhubarb's tartness best. I even experimented with adding a pinch of ginger to the filling once yum! Not quite the classic, but a fun twist if you like that spice.
How to Serve Up Your Perfect Rhubarb Bars
Oh, the ways to enjoy these bars! Honestly, they're perfect just as they are, straight from the pan (once cooled, of course!). But if you want to elevate them, a dollop of vanilla bean ice cream melting over a slightly warm bar is pure bliss. Or, for a lighter touch, a spoonful of freshly whipped cream. They're also fantastic with a strong cup of coffee in the morning yes, I've had them for breakfast, don't judge! For a picnic or potluck, they travel so well and are always a huge hit. Everyone asks for the recipe for these incredible Rhubarb Bars, trust me!
The Sweet History Behind Rhubarb Bars
While these exact bars might be a modern invention, the idea of fruit bars and crumbles has roots stretching back centuries, especially in European and American baking. Rhubarb itself, often called the 'pie plant,' became popular in North America in the 19th century, especially in spring when other fruits weren't available. For me, they connect to a simpler time, to my grandma's kitchen filled with the smell of baking. It's that feeling of using what's in season, making something comforting and delicious from humble ingredients. It's a reminder of how food traditions evolve, and how a classic ingredient like rhubarb keeps finding new, delicious forms like these bars.
There you have it, my friends! These Easy Rhubarb Bars are more than just a recipe, they're a little slice of spring, a testament to simple, delicious baking. I hope you love making and sharing them as much as I do. What are your favorite rhubarb memories or recipes? Drop a comment below, I'd love to hear from you!

Burning Questions About Rhubarb Bars? I Got You!
- Can I use frozen rhubarb for these Rhubarb Bars?
Absolutely! Just make sure to thaw it completely and drain any excess liquid really well before you chop it and mix it into the filling. Too much moisture can make your Rhubarb Bars a bit soggy, and we don't want that! It's a great way to enjoy rhubarb all year.
- How do I know when my Rhubarb Bars are baked enough?
You're looking for a gorgeous golden-brown crumb topping and a filling that's visibly bubbling around the edges and looks set. If you gently jiggle the pan, the center shouldn't be too watery. Trust your nose too, your kitchen will smell heavenly when they're ready!
- My crust is too crumbly, what went wrong?
This usually happens if your butter wasn't cold enough or if you didn't press it firmly enough into the pan. Cold butter helps it bind. Next time, try pressing it down really well with the bottom of a glass or your knuckles. It needs to be compact for these bars!
- Can I make these Rhubarb Bars gluten-free?
I haven't personally experimented with a gluten-free version yet, but I imagine a good 1:1 gluten-free baking flour blend could work for the crust. You might need a tiny bit more liquid or fat to get the right consistency, but it's worth a try if you're GF!
- Why is my rhubarb filling runny?
A runny filling usually means it either didn't bake long enough, or you might have skipped or reduced the cornstarch. The cornstarch is super important for thickening! Also, if you used frozen rhubarb, make sure it was well-drained. Patience with baking and cooling helps set up these bars.