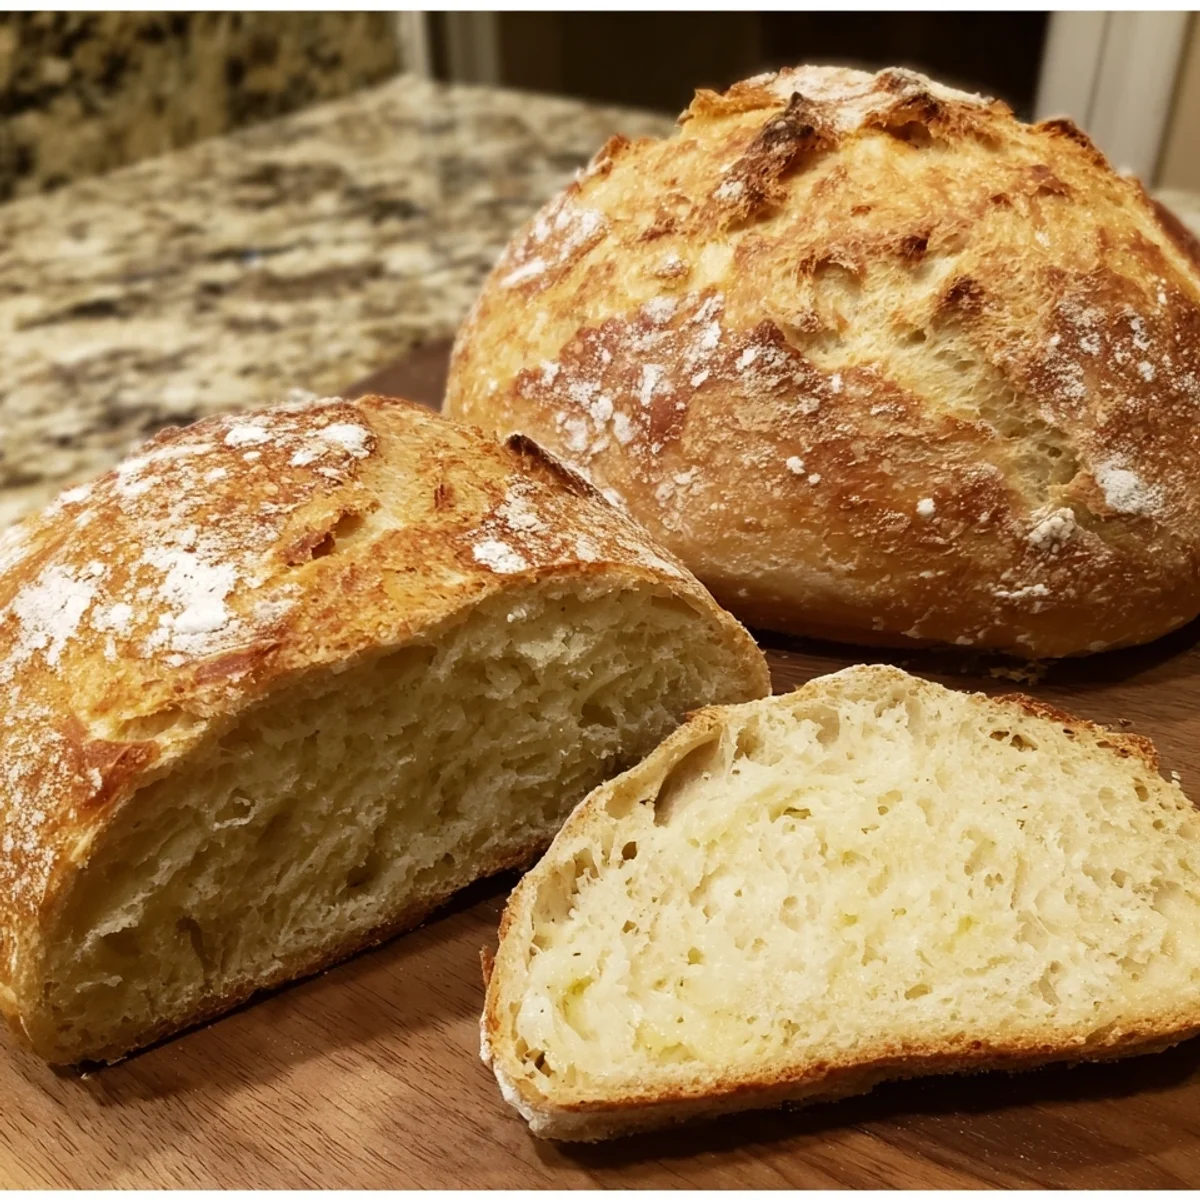


Oh, honey, let me tell you about my journey to this recipe. For years, I chased that elusive bakery-quality loaf, the one with the crackly crust and airy inside. I had my share of dense bricks and flat frisbees, honestly! But then, after countless experiments and a few kitchen explosions, I cracked the code. This isn't just a recipe, it's the culmination of my quest for the perfect Crusty Italian Bread, and I'm so excited to share it with you!
One time, I was so excited about my dough rising, I totally forgot to preheat the oven with the baking sheet inside! Oops. I popped the dough in, realized my mistake, and ended up with a gorgeous, golden top but a surprisingly pale, soft bottom. It was still tasty, but definitely not the Crusty Italian Bread I was aiming for. Lesson learned: always, always double-check the oven!
The Building Blocks for Your Perfect Crusty Italian Bread
- 4 cups bread flour: This isn't just any flour, my friend. Bread flour has a higher protein content, which is our secret weapon for that incredible chew and structure in our Crusty Italian Bread. It helps develop the gluten network, giving us those beautiful air pockets and that satisfying pull. Don't skimp here, it makes a huge difference in the final texture of your loaf, trust me. I tried all-purpose once, and while okay, it just wasn't the same glorious thing.
- 1/2 cup whole wheat flour: A little bit of whole wheat flour adds so much character and a lovely, subtle nutty depth to our bread. It's not enough to make it dense, but just enough to give it a rustic flavor that pairs so well with the Italian herbs. Plus, it adds a touch more fiber, which is always a bonus, right? I love how it complements the bread flour, making the flavor profile a bit more complex than just white flour alone. It's a small addition with a big impact.
- 1 3/4 cups warm water (105-115°F): This is crucial, hon! The water temperature is like the perfect spa day for your yeast. Too cold, and they'll be sluggish, too hot, and you'll kill them, which I've done more times than I'd like to admit. Aim for that sweet spot, around 105-115°F. It's warm to the touch, but not scalding. This perfectly activates the yeast, giving your Crusty Italian Bread that beautiful rise we're after.
- 2 1/4 teaspoons active dry yeast: Ah, the tiny miracle workers! This is what makes our bread light and airy. Active dry yeast needs a little wake-up call with warm water and a touch of sugar. Don't rush this step, you want to see it get all foamy and bubbly. If it doesn't, your yeast might be old or dead, and your bread won't rise. I've wasted a whole batch of dough because of sleepy yeast, so learn from my mistakes!
- 2 teaspoons fine sea salt: Salt isn't just for flavor, it's a vital player in bread making. It controls the yeast's activity, preventing it from going wild, and strengthens the gluten structure. Without it, your bread would be bland and probably over-proofed. Fine sea salt dissolves beautifully and distributes evenly, ensuring every bite of your Crusty Italian Bread is perfectly seasoned. Trust me, skipping salt is a rookie error you only make once!
- 2 tablespoons extra virgin olive oil, 1 teaspoon white vinegar, 1/2 teaspoon dried oregano, 1/2 teaspoon dried basil: These are the flavor enhancers and secret weapons! The olive oil adds richness and helps keep the crumb tender. The white vinegar? It's a little trick that helps tenderize the dough and gives it a subtle tang, honestly, it's a game-changer! And the herbs, oregano and basil, they just scream 'Italian bakery' and infuse that classic aroma and taste into every slice of our Crusty Italian Bread. Don't skip these little touches!
Baking Your Own Crusty Italian Bread: Step-by-Step Guide
- Step 1: Activate Yeast:
- Okay, first things first! Grab a small bowl and pour in that warm water remember, 105-115°F, like a cozy bath. Stir in the sugar and then sprinkle your active dry yeast on top. Give it a gentle swirl, then just let it sit for about 5-10 minutes. You're looking for a beautiful, foamy layer on top. That foam means your yeast is alive and kicking, ready to give us the lift we need for a magnificent Crusty Italian Bread. If it doesn't foam, your yeast might be past its prime, and honestly, it's better to start fresh than waste the rest of your ingredients on a flat loaf!
- Step 2: Mix Dry Ingredients:
- While your yeast is doing its thing, grab a large mixing bowl. Whisk together your bread flour, whole wheat flour, and fine sea salt. Make sure it's all nicely combined. This step seems simple, but getting an even distribution of salt is important for flavor and yeast control. You don't want pockets of super salty or bland dough! Once everything's mixed, make a little well in the center, ready for the wet ingredients. We're laying the foundation for our perfect Crusty Italian Bread here!
- Step 3: Form and Knead Dough:
- Now for the fun part! Pour your activated yeast mixture, olive oil, and white vinegar into the well of your dry ingredients. Mix everything with a wooden spoon or your hands until a shaggy dough forms. Then, turn it out onto a lightly floured surface. Knead for about 8-10 minutes. It'll be sticky at first, but keep going! You'll feel it transform, becoming smooth and elastic. This kneading is key to developing the gluten for that wonderful chew in our Crusty Italian Bread.
- Step 4: First Rise:
- Time for a nap! Lightly oil a clean bowl, place your kneaded dough inside, and turn it once to coat. Cover the bowl with plastic wrap or a clean kitchen towel. Find a warm, draft-free spot my oven (turned off, of course!) is usually perfect. Let it rise for 1 to 1.5 hours, or until it's doubled in size. This slow fermentation develops so much flavor! Don't rush this step, patience is a virtue when making truly amazing Crusty Italian Bread.
- Step 5: Shape Loaves:
- Gently punch down the risen dough to release the air. Turn it out onto a lightly floured surface and divide it in half. For classic Italian loaves, gently shape each piece into an oval or oblong shape. You want to create some surface tension, so the bread holds its shape. Don't overwork it, just a gentle persuasion. This shaping step is where your beautiful Crusty Italian Bread starts to take its final form, ready for its second rise.
- Step 7: Bake Bread:
- Carefully transfer your risen loaves to the preheated baking sheet or Dutch oven. If using a baking sheet, you might want to score the top with a sharp knife or razor blade just a few slashes help the bread expand beautifully. Pop them into the hot oven. The initial burst of heat, especially with steam, is what creates that incredible, golden-brown, shattering crust we crave in a perfect Crusty Italian Bread. Watching it puff up and turn golden is just so satisfying!
Oh, baking this bread is such a sensory journey! The feel of the dough transforming from shaggy to silky under your hands, the earthy scent of yeast and flour, and then that incredible aroma as it bakes it fills the whole house with pure comfort. It's a little bit of magic, honestly, watching simple ingredients become something so satisfying and delicious. It's a true labor of love, but the reward? So worth it.
Keeping That Crusty Italian Bread Fresh: Storage Secrets
So, you've baked this gorgeous Crusty Italian Bread, now what? The best way to keep it fresh is at room temperature. Once cooled, store it in a paper bag or a breathable bread bag. Avoid plastic wrap or airtight containers right away, as they'll trap moisture and make that beautiful crust soft and soggy a mistake I've made too many times! If you have leftovers (what even are those?), you can freeze slices or half loaves for up to a month. Just wrap them tightly in plastic wrap, then foil. Thaw at room temp or pop directly into a toaster for a quick refresh. Never put fresh bread in the fridge, it goes stale super fast!

Swapping Ingredients for Your Best Crusty Italian Bread
I've played around with a few things while perfecting this Crusty Italian Bread recipe! If you don't have bread flour, you can use all-purpose, but be aware the texture will be a bit softer and less chewy. For the whole wheat flour, feel free to swap it for rye flour for a different earthy note, or just use all bread flour if you prefer a lighter crumb. As for the herbs, Italian seasoning works great if you don't have individual oregano and basil. I've even added a pinch of garlic powder sometimes I didn't expect that to work, but it was delicious! Just remember, each swap might change the final texture or flavor slightly, but it's all part of the fun of baking!
What to Serve with Your Amazing Crusty Italian Bread
Okay, let's talk about how to show off this beautiful Crusty Italian Bread! My absolute favorite way is just sliced thick, drizzled with good quality extra virgin olive oil, and maybe a sprinkle of flaky sea salt. It's also incredible alongside a hearty minestrone or a rich pasta dish. Think about making bruschetta with fresh tomatoes and basil, or using it for the most epic grilled cheese sandwich ever. Leftovers (if there are any!) make amazing croutons for salads or perfect dipping sticks for a cheesy spinach dip. Honestly, this bread is so versatile, it's hard to go wrong!
The Heart and Soul of Crusty Italian Bread
Italian bread, or 'pane,' has been a staple in Italy for centuries, deeply woven into the country's culinary fabric. It's more than just food, it's tradition, community, and the heart of the table. Regional variations are endless, from the chewy Pugliese to the salt-free Tuscan. This specific Crusty Italian Bread recipe aims to capture that rustic, homemade essence, reminiscent of the loaves baked in family kitchens across Italy. It's about bringing that warmth and tradition right into your home, sharing a piece of history with every slice. It reminds me of the simple, honest food I adore.
And there you have it, my friend! The recipe for the Crusty Italian Bread that changed my baking game. There's nothing quite like pulling a warm, fragrant loaf from your own oven. It's more than just bread, it's a little piece of comfort, a hug from your kitchen. I really hope you try this out! When you do, please, please come back and tell me all about it in the comments. I love hearing about your kitchen adventures!

Your Burning Questions About Crusty Italian Bread, Answered!
- Why didn't my bread rise?
Oh, that's a common one! Usually, it's either your yeast wasn't active (check for foam in step 1!), or your water was too hot or too cold. Also, ensure your rising spot is warm and draft-free. Sometimes old flour can be a culprit too, honestly. Don't worry, it happens to the best of us when making Crusty Italian Bread!
- How do I get a really crispy crust?
The secret to that amazing Crusty Italian Bread crust is steam in the oven! Place a metal pan on the bottom rack while preheating, then carefully pour hot water into it right before baking. The steam helps the crust develop beautifully. A high initial baking temperature also plays a big role.
- Can I make this dough ahead of time?
Absolutely! After the first rise, you can punch down the dough, shape it into loaves, and then place them in the fridge overnight for a slow, cold proof. Just let them come to room temperature for about 30-60 minutes before baking. This actually develops even more flavor in your Crusty Italian Bread!
- My bread is dense, what went wrong?
A dense loaf can happen for a few reasons. It might be under-proofed (didn't rise long enough), or perhaps you added too much flour during kneading. Over-kneading can also sometimes make it dense. Ensure your yeast is active and you're not adding extra flour unless the dough is truly unmanageable for this Crusty Italian Bread.
- Can I use a stand mixer for this recipe?
Yes, you totally can! Use the dough hook attachment and knead on medium-low speed for about 6-8 minutes after combining the ingredients. Keep an eye on the dough, it should clear the sides of the bowl and become smooth and elastic. It's a real arm-saver when making this Crusty Italian Bread!