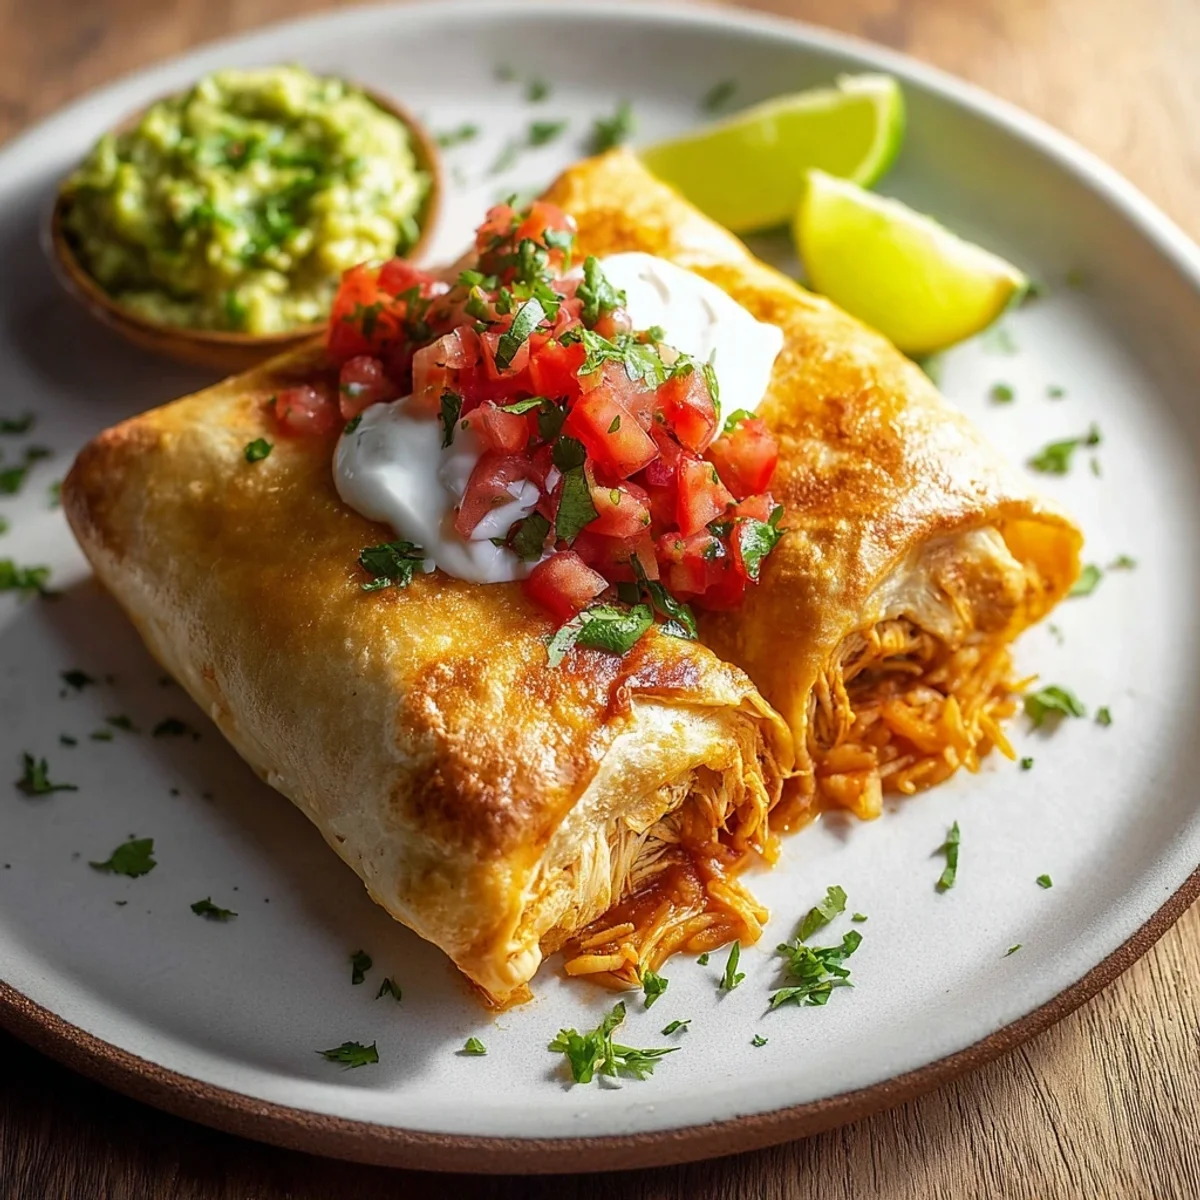


There's this vivid memory I have, standing in my tiny first apartment kitchen, trying to recreate a dish I’d fallen head over heels for at a little Tex-Mex joint down the street. It was chicken chimichangas. Honestly, I had no idea what I was doing. Flour flew, oil splattered, and I nearly set off the smoke detector. But when that first golden, crispy parcel emerged from the pan, smelling like pure joy, I knew I was onto something. It wasn't pretty, but it was mine. This recipe is a journey back to that feeling, messy kitchen and all, but with a lot more confidence and a lot less smoke!
I remember one time, I was so excited to make these chicken chimichangas for a friend, I completely forgot to drain the chicken mixture properly. The tortillas got super soggy, and instead of frying, they just... steamed. What a mess! My friend still ate them, bless her heart, but we laugh about my "steamed disappointment pockets" to this day. Lesson learned: always, always drain your filling!
Ingredients for Crispy Chicken Chimichangas
- Cooked chicken (shredded): I usually use rotisserie chicken, honestly. It’s a lifesaver, and who has time to boil chicken when hunger strikes? But leftover roasted chicken works beautifully too!
- Cream cheese (softened): This is the secret to that creamy, dreamy filling. Don't even think about using low-fat, we're going for flavor here, people! I tried it once, and it just wasn't the same... kinda bland, actually.
- Salsa verde: My absolute favorite for a tangy kick! I prefer a medium heat one, but if you're feeling adventurous, go spicy. Or if you're a mild fan, that's fine too. I accidentally bought the super spicy stuff once, and my tongue was on fire for an hour. Oops!
- Shredded Monterey Jack cheese: Melts like a dream and gives that perfect gooey pull. Cheddar works too, but Monterey Jack just has a smoother melt.
- Diced green chiles (canned): Adds a subtle, earthy flavor without too much heat. Just remember to drain them well, or you'll have soggy chimis, and we don't want that again!
- Cumin: Earthy, warm, and essential for that Tex-Mex vibe. I'm heavy-handed with cumin, it just smells so good when it hits the pan!
- Chili powder: Adds a smoky depth. Not just for heat, but for a rich, complex flavor.
- Garlic powder: Because, honestly, what isn't better with a little garlic? I add a bit more than most recipes call for, it just feels right.
- Onion powder: Complements the garlic, giving that savory base.
- Salt and black pepper: To taste, of course! Don't be shy, but don't overdo it either. I always taste as I go, sometimes adding a little extra at the end.
- Large flour tortillas (burrito size, 10-12 inch): You need these big ones to hold all that glorious filling. Smaller ones just explode, trust me. I learned that the hard way during a particularly ambitious dinner party.
- Vegetable oil (for frying): Canola or corn oil works too. You need enough to get that beautiful golden crisp. I always measure, but then inevitably add "a little extra" because I love a deep golden hue.
How to Make Chicken Chimichangas: The Journey
- Prepare the Chicken Filling:
- Alright, first things first, let's get that glorious filling ready. In a big bowl, combine your shredded cooked chicken, softened cream cheese, salsa verde, Monterey Jack cheese, and those diced green chiles. Now, sprinkle in your cumin, chili powder, garlic powder, onion powder, salt, and pepper. Give it a good mix until everything is combined and looks wonderfully creamy and chunky. This is where the magic starts to happen, you can already smell those delicious Tex-Mex flavors mingling! I sometimes forget to soften the cream cheese, which makes mixing a real workout, so learn from my mistakes and plan ahead!
- Warm the Tortillas:
- This step is crucial, hon! Gently warm your flour tortillas. You can do this quickly in the microwave for about 15-20 seconds for a stack of 3-4, or one at a time in a dry skillet over medium heat for 10-15 seconds per side. Don't skip this! Warm tortillas are pliable and won't crack when you fold them, preventing those messy, exploding chimichangas. I once tried to fold cold tortillas, and it was a tear-fest, both for the tortillas and for me. Not fun!
- Assemble Your Chimichangas:
- Now for the fun part! Lay a warm tortilla flat. Spoon about 1/2 to 3/4 cup of the chicken mixture just below the center. Don't overfill, or they'll be hard to close, and things will inevitably ooze out during frying trust me, I've seen it! Fold the bottom edge up over the filling, then fold in the sides like an envelope. Roll it up tightly from the bottom. It should look like a neat little package. If it's a bit messy, that's okay! Mine rarely look perfect, but they taste amazing.
- Get Ready to Fry:
- In a large, heavy-bottomed skillet or Dutch oven, pour about 1-2 inches of vegetable oil. Heat it over medium-high heat until it reaches about 350-375°F (175-190°C). If you don't have a thermometer, a good trick is to drop a tiny piece of tortilla in, if it sizzles vigorously and turns golden in about a minute, you're good to go! Don't let it get too hot, or your chimichangas will burn on the outside before heating through. I've had a few too-dark incidents, and they just aren't as pleasant.
- Fry the Chimichangas:
- Carefully place 2-3 chimichangas into the hot oil, seam-side down first, so they seal as they fry. Don't overcrowd the pan, or the oil temperature will drop, and you'll end up with greasy rather than crispy chimichangas. Fry for 2-4 minutes per side, or until they're beautifully golden brown and crispy all over. The smell filling your kitchen right now? That's pure joy, I tell ya!
- Drain and Serve:
- Once golden and crispy, carefully remove the chimichangas from the oil using tongs and place them on a plate lined with paper towels to drain any excess oil. This step is important for that perfect, non-greasy crunch. Let them sit for a minute or two, then serve immediately with your favorite toppings. Honestly, they're best right out of the fryer. The outside is so shatteringly crisp, and the inside is warm and gooey. Pure bliss!
Making chicken chimichangas always brings a smile to my face, even when I make a little mess. There's something so satisfying about pulling those golden parcels out of the hot oil, hearing that slight sizzle, and knowing you created something so comforting. My cat, Mittens, usually sits patiently by the stove, hoping a tiny piece of chicken will "accidentally" fall. It’s a whole production, but a happy one.
Storing Your Chicken Chimichangas
So, you've got leftover chicken chimichangas? Lucky you! To store them, let them cool completely first. I usually place them in an airtight container in the fridge for up to 3 days. Reheating is where it gets tricky for that crispiness. I tried microwaving them once, and the tortilla turned soft and chewy, and the sauce kinda separated so don't do that, lol. My go-to method is popping them in an air fryer at 350°F (175°C) for about 8-10 minutes, or in a preheated oven at 375°F (190°C) for 15-20 minutes, flipping halfway. This brings back a lot of that glorious crunch. You can also freeze un-fried chimichangas! Just assemble, wrap them individually in plastic wrap, then foil, and freeze for up to a month. Thaw slightly before frying as usual.

Ingredient Substitutions for Chicken Chimichangas
Life happens, and sometimes you don't have exactly what the recipe calls for. I get it! For the chicken, ground beef or shredded pork works wonderfully if you're not feeling chicken chimichangas. Just season it similarly. If you don't have salsa verde, a good red salsa or even a bit of enchilada sauce will do in a pinch I tried it once, and it worked... kinda, just a different flavor profile. As for the cheese, use what you love! A mix of cheddar and Colby Jack is fantastic, or even just a simple Mexican blend. I've even thrown in a bit of smoked gouda for a twist, and honestly, it was surprisingly delicious. Don't be afraid to experiment with your favorite spices too, a little smoked paprika or a pinch of cayenne can really change things up!
Serving Your Chicken Chimichangas
These chicken chimichangas are practically a party on a plate! For me, they're best served piping hot, straight out of the fryer, with a generous dollop of cool sour cream or a scoop of fresh guacamole. A side of my simple cilantro-lime rice is a must, and a quick black bean salad adds a lovely freshness. Sometimes, if I'm feeling fancy, I'll whip up a batch of queso for dipping. Drink-wise, a frosty margarita or even a crisp Mexican lager makes for a perfect pairing. Honestly, this dish and a good rom-com on a Friday night? Yes, please! It’s comfort food that feels celebratory, whether you're alone or with friends.
The Cultural Backstory of Chicken Chimichangas
The chicken chimichangas, in all their golden-fried glory, have a bit of a fun, disputed origin story! Most food historians point to Arizona as their birthplace, likely in the 1940s or 50s. The legend often involves a happy accident a chef accidentally dropping a burrito into a deep fryer. The name "chimichanga" itself is thought to be a playful alteration of a Spanish swear word, "chingada," softened to "chimichanga" to avoid offending sensibilities. For me, discovering chimichangas was a revelation. It was my introduction to a whole new world of Tex-Mex flavors beyond tacos. It reminds me of those early culinary adventures, trying new things, and finding dishes that just stick with you. It's a testament to how accidental innovations can become beloved classics!
So there you have it, my journey to making these crispy chicken chimichangas. They're more than just a meal, they're a little piece of my kitchen history, full of learning, laughter, and a whole lot of deliciousness. I hope you give them a try and make your own happy kitchen memories. Don't forget to share your chimichanga adventures with me, I love hearing about your kitchen chaos!

Frequently Asked Questions About Chicken Chimichangas
- → Can I bake these chimichangas instead of frying?
You totally can! While frying gives that classic crisp, I've baked them at 400°F (200°C) for 20-25 minutes, flipping halfway, after lightly brushing with oil. They won't be as deeply golden or shatteringly crisp, but still delicious and a little lighter!
- → What if I don't have Monterey Jack cheese for the chimichangas?
No problem! I've used cheddar, Colby Jack, or even a Mexican blend in these for the melting. They all work great. Just use whatever melty cheese you have on hand, the goal is gooey goodness!
- → My tortillas keep tearing when I fold the chimichangas, what am I doing wrong?
Ah, the classic tortilla tear! You're probably not warming them enough. I always give them a quick zap in the microwave or a few seconds in a dry skillet. Warm tortillas are super pliable, cold ones are just asking for trouble, trust me!
- → How long do these chimichangas last in the fridge?
If you have any leftovers (a rare occurrence in my house!), they'll last about 3 days in an airtight container in the fridge. Reheat them in an oven or air fryer for the best texture, skip the microwave for sure!
- → Can I make the filling for these chicken chimichangas ahead of time?
Absolutely! The filling is a great make-ahead component. I often mix it up a day in advance and keep it in the fridge. It actually gives the flavors more time to meld, making your chimichangas even tastier!